Add a load carrier step to an operation
Add a load carrier step
Within the steps of an operation, there is a special step type named Load Carrier Step that creates a data collection activity type of Load Carrier automatically. In the settings for this activity, you can select the carrier type, import an image that represents the carrier, and define carrier positions graphically.
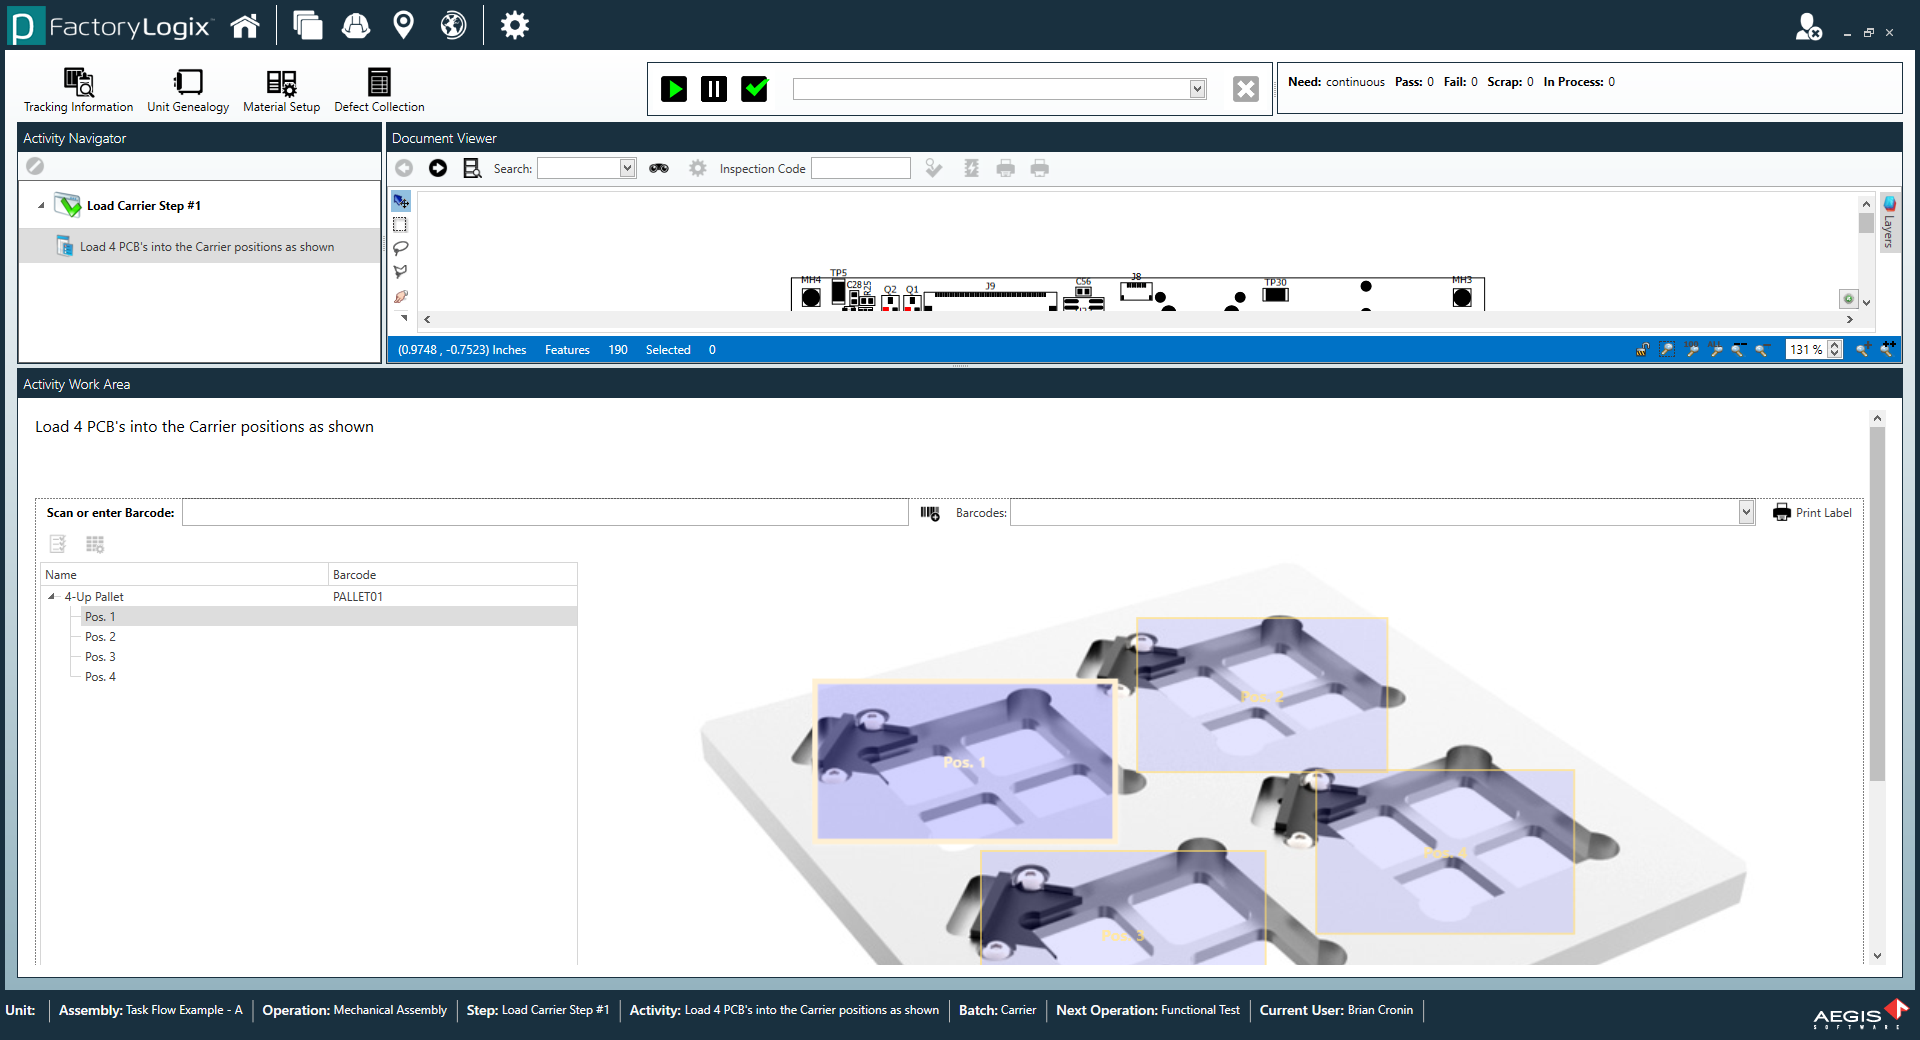
Once the image file is loaded, a dialog is displayed allowing you to create positions where assemblies will be loaded into the carrier in question. In the following example, a 15-position cart was created. Once the process is released to production, the Load Carrier Activity is displayed in the activity work area. The carrier UID is scanned or entered and the system guides the operator to load assemblies into specific positions (if defined). The expected position graphically indicates where to load each assembly.
When assemblies are loaded into a carrier, they can be moved through operations as a group with a single scan. In order to unload a carrier, there is an exit action named Unload Carrier to accommodate this much in the same way that a panelized assembly is de-panelized.
Log into the NPI client application.
Select Process Engineering
 , then select an assembly.
In the Process Definition window, double-click the Process Flow in the tree to open it for editing.
Double-click the operation where you want to add the Load Carrier step to open it for editing.
Select Add
 > Load Carrier.
Carrier Collection Activity #1 is added to the step automatically.Double-click Carrier Collection Activity #1, then select the Activity Details tab.
Select the Is Activity Required? check box to make this a required activity that can't be skipped.
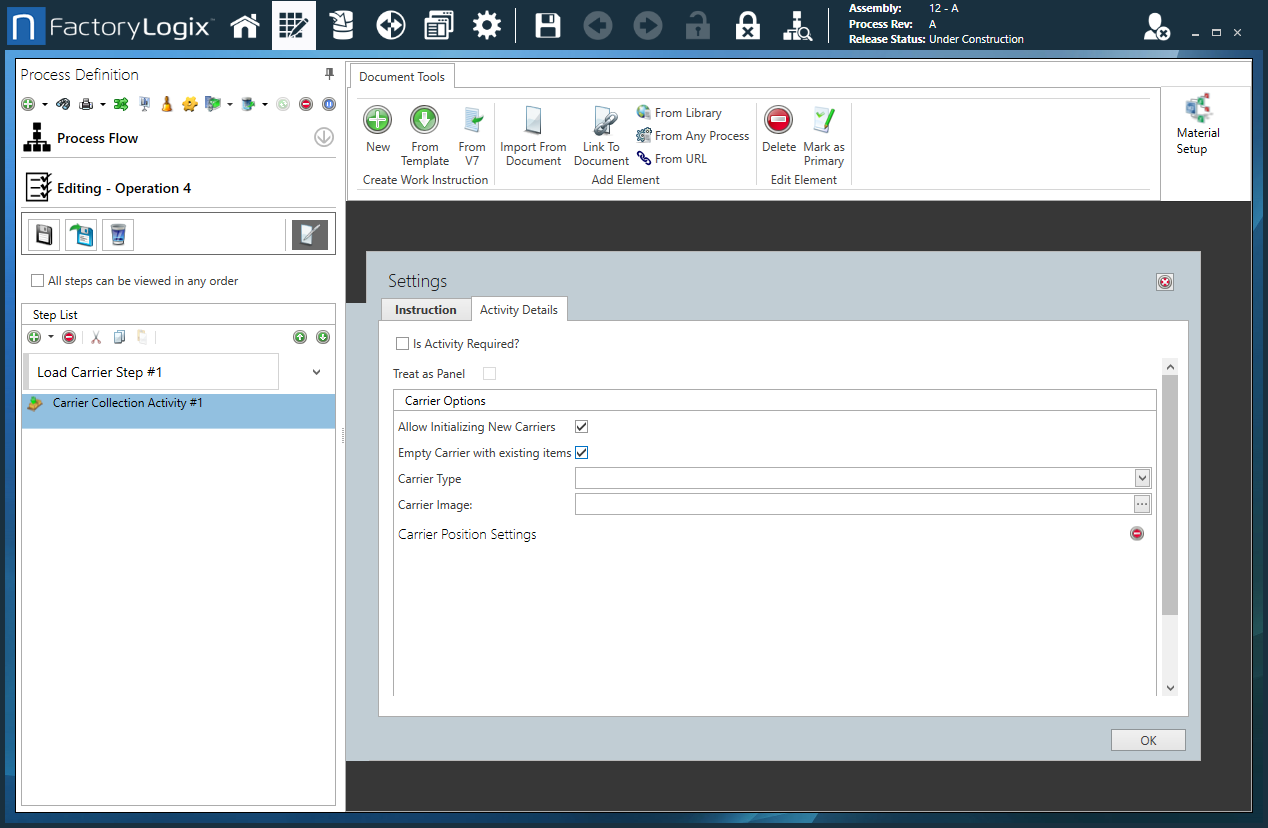
Make additional selections as required for this assembly (the following table describes the options), then select OK.
Option | Description |
|---|---|
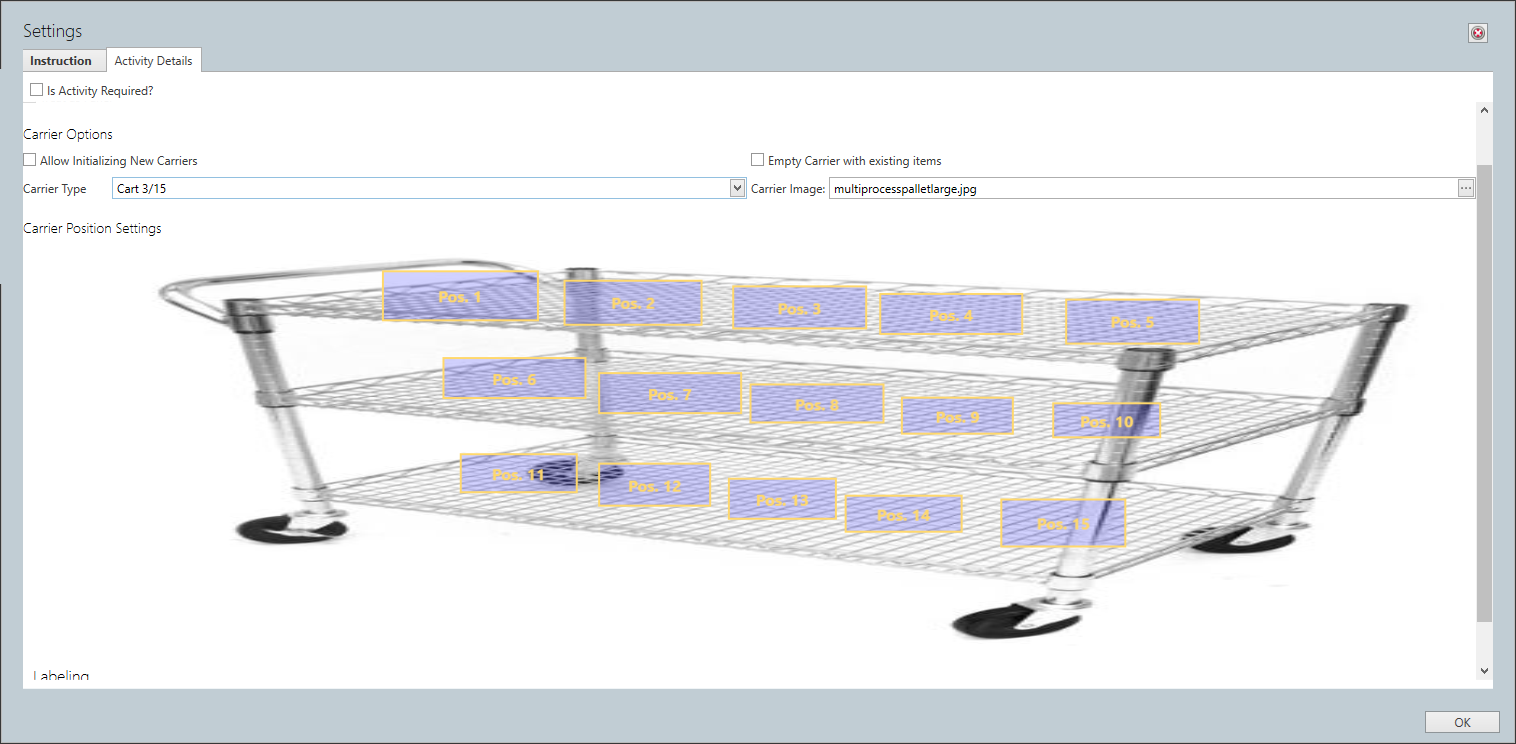
Treat as Panel | Legacy (V7) carrier option. |
Allow Initializing New Carriers | Allows you to scan a new carrier UID and the carrier is added to inventory. |
Empty Carrier with existing items | Indicates that when you reach this step in production and the carrier UID is scanned, the carrier is unloaded if there are units currently loaded (otherwise, units can be added to the carrier). |
Carrier Type | Specifies the type of carrier to be used for this assembly, for example 4-Up Pallet, 6-Cavity Mold, 8 PCB Carrier, and so on). |
Carrier Image | Allows you to upload an image of a carrier. Once uploaded, you can create positions on the image and generate a matrix of positions on the carrier. |
Create carrier positions
When you select options for the Carrier Collection activity, you can upload an image of the carrier and create positions on the image to help guide operators.
On the Activity Details tab, select the ellipsis (...) to the right of the Carrier Image option, locate and select the carrier image, then select Open to upload it and display a new window.
Select Create Position, then drag the position onto the carrier image.
Continue creating positions. (Use the Delete Position button to delete a selected position.)
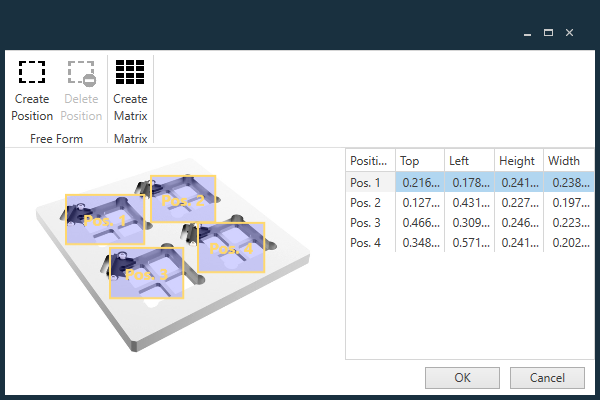
For large panels, select the Create Matrix button, then specify the Number of Positions High and the Number of Positions Wide and the X and Y spacing between the positions.
Select OK to return to the Activity Details tab and view the carrier positions you created, then select OK.
Select the Save and Close Operation
 button on the left side of the window to save your changes and return to the Process Definition window.
Double-click the process in the Process tree on the left side of the window, then select the Release to Production
 button (the Green check mark) in the upper-right corner of the window to observe the results.
Log into the Production client application.
Create a new batch with this process and initialize a barcode into the batch.
The Load Carrier Activity is displayed in the activity work area. When the carrier UID is scanned or entered, the system guides the operator to load assemblies into specific positions (if defined). The expected position graphically indicates where to load each assembly.