Bypass remaining activities when an activity fails
When using the Production client application, there may be situations where there is no reason to complete remaining activities (for example, when a problem is found at an earlier activity that fails). If this type of situation occurs, an operator can set up reroute activities in NPI so that when one activity fails, all remaining activities are bypassed automatically.
Note
The scenario described in this topic applies only to assemblies with fully tracked operations (Full Tracking must be selected for each reroute operation that contains reroute activities.)
Open a process definition in the NPI client application.
Create an out of route operation (Re-work or Repair, for example) and make sure you select Full Tracking for the operation before selecting OK.
Note
For details about creating out of route operations and reroutes, see Out of route operations and reroutes.
In the process tree under Out-of-Route Operations, double-click the out of route operation you created.
Under Step List on the left side of the window, select Add
 > Standard Step.
Select the Entry/Exit
button in the upper-right corner of the window.
Select the Add
 button next to Re-Route Points on the right side of the window to create a new re-route point.
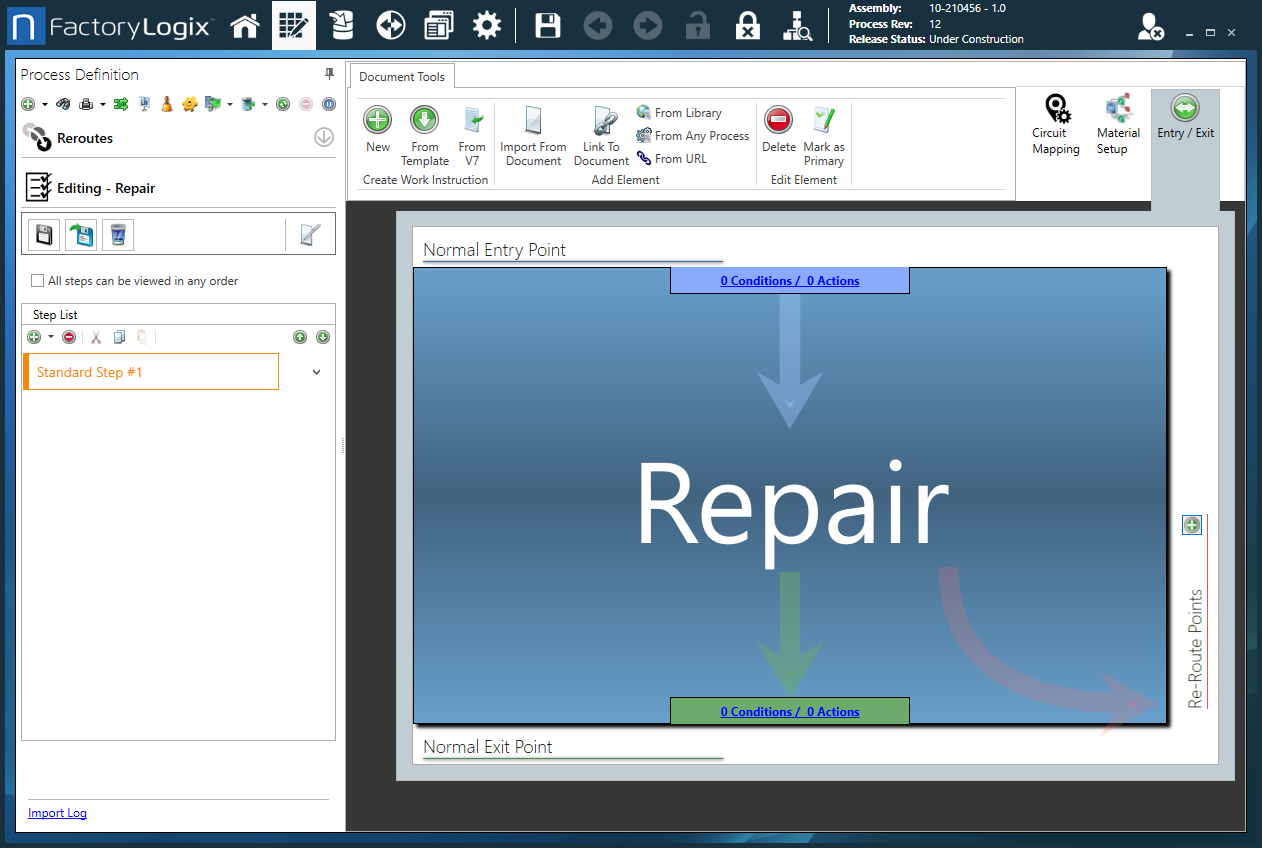
In the dialog, enter a name for the re-route point in the Name field (Re-route Point 1, for example).
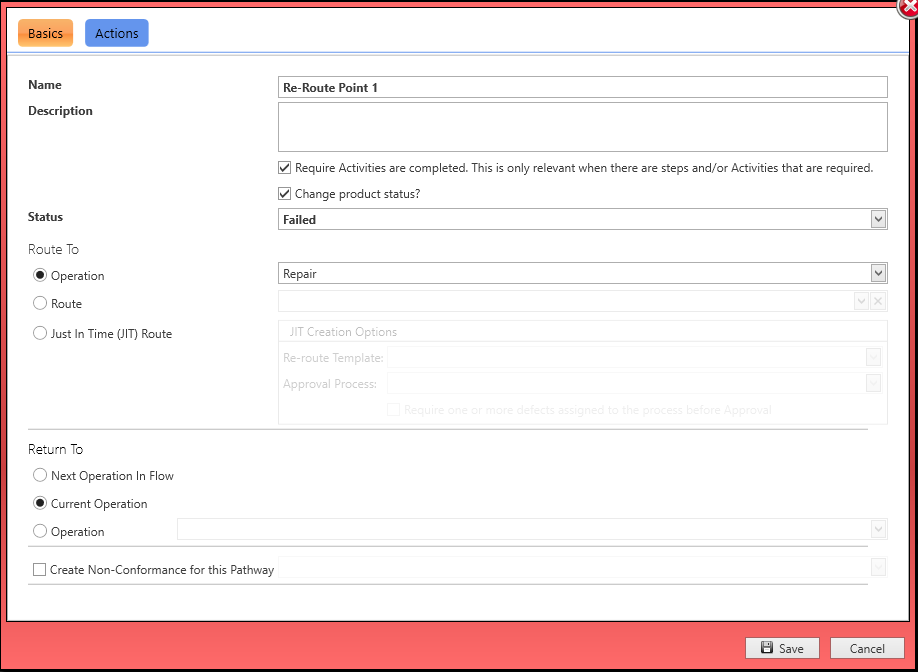
Select the Operation button, then select the re-route operation from the drop-down (Re-work or Repair, for example).
Under Return To, select Current Operation, then select Save to add the new re-route point.
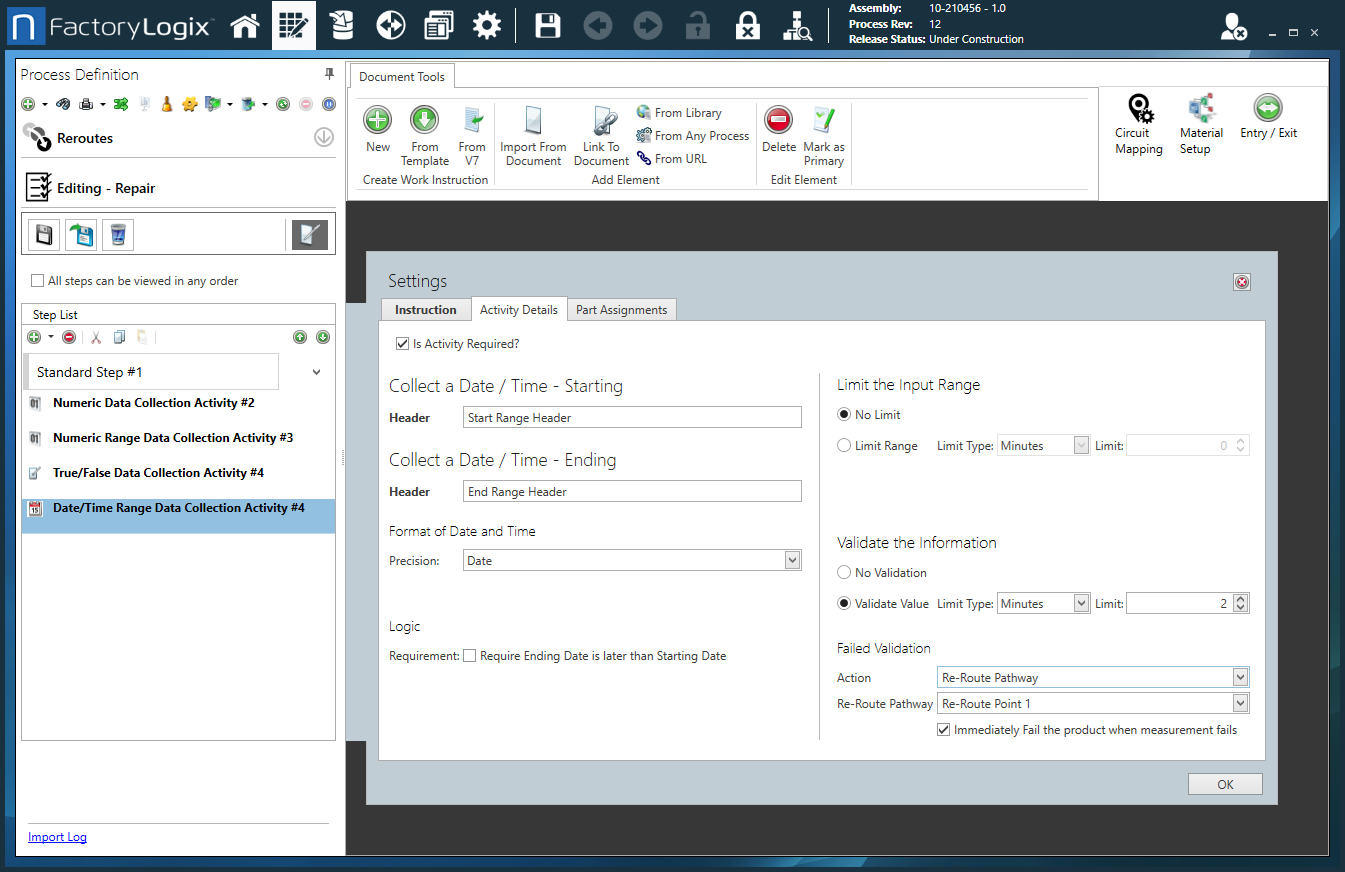
Select the Standard step you created.
Select the Add
 button, then select the desired data collection activity for this re-route point from the Activity list (Collect a Number Activity, Collect a Date/Time Activity, and so on).
Double-click the activity, then select the Activity Details tab.
If you want to limit what the operator can do for this activity, select the Limit Range button under Limit the Input Range, then specify the desired Limit Type and Limit value.
The operator's input will be limited to the limit type and value you select.Under Validate the Information, select the Validate Value button.
Specify the desired Limit Type and Limit value for the activity validation.
Under Failed Validation, select Re-Route Pathway from the Action drop-down.
The reroute point you created is selected automatically in the Re-Route Pathway drop-down.Select the Immediately Fail the product when measurement fails check box, then select OK.
Repeat Steps 11-17 for each additional data collection activity you add.
In the Process Definition window, select the Save and Close Operation
 button to save your changes.
When you're ready, select the process in the Process Definition tree under Product, select the Release to Production
 button (the Green check mark), then select Yes.
In Production, when you initialize a UID for the assembly, if any data collection limits you specified aren't met, you will see the message: The value has failed validation, the product "barcode" will be failed, are you sure you want to continue?Select No to fail the activity and all remaining activities for the assembly.
When you finish the UID, the assembly is sent to the Repair or Re-work operation you specified previously in NPI. You can now complete the repair or re-work for the assembly.