Create a task flow template
Task flow templates are used to drive projects in FactoryLogix. Project administrators typically set up tasks and sub-tasks to create a consistent task hierarchy for factory projects. Tasks and sub-tasks can take many forms depending on your project requirements and goals. The system is flexible; when you modify a task flow template, the changes are added automatically to any projects using the template.
Log into the NPI client application.
Select Templates and Standards
 > Task Flow Templates to display the Task Flow List window.
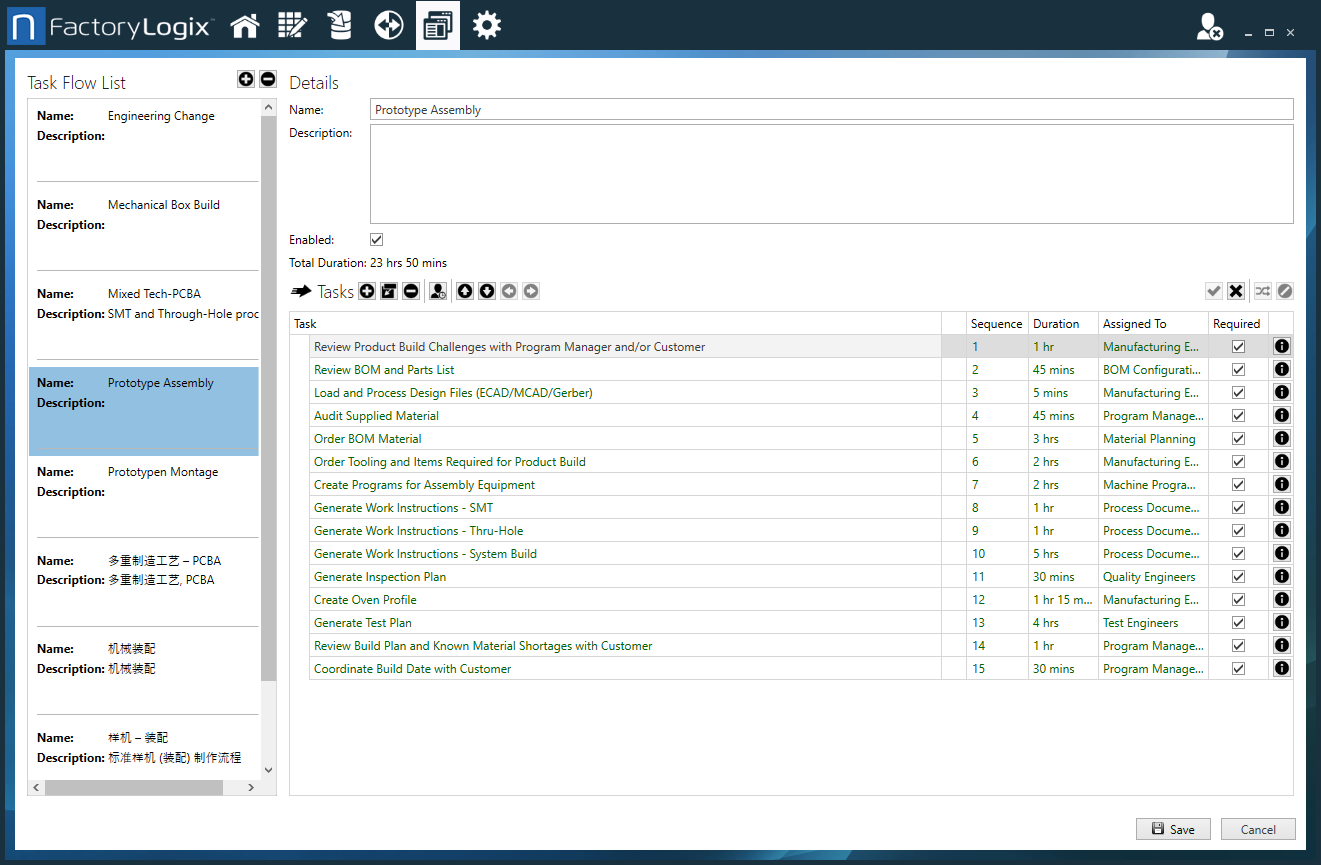
The left side of the window shows existing task flow templates; when you select a template, tasks, sub-tasks, and other details of the task flow are displayed. The main area of the window displays task flow information in columns. The following table describes the column information.
Column | Description |
|---|---|
Task | The name of the task. |
Sequence | The order in which tasks must be completed by the assigned users or groups in the flow. |
Duration | The anticipated amount of time required to complete the task. |
Assigned to | The users or groups assigned to the task. |
Required | Specifies whether a task is required in the flow. |
Show Details |
|
To create a task, select the Add Task
 button.
 Click next to the task name, then enter a new name for the task.
To add a sub-task to a main task, select the Add Sub Task
 button, then enter a name for the sub-task.
To change the sequence of tasks in the flow, select a task, then use the Move Up, Move Down, Decrease Indent, and Increase Indent
 buttons to move the tasks up or down, make a task a sub-task, or promote a sub-task to a task.
To allow multiple tasks to be completed in any order (that is, non-sequentially), Shift+click or Ctrl+click to select the tasks, then select the Group Tasks in Any Mode
 button. (In the Sequence column, the grouped tasks now have the same sequence number and can be completed in any order.)
To remove Any Mode from grouped tasks, select the tasks, then select the Remove Any Mode From Tasks
 button.
To delete one or more selected tasks or sub-tasks, select the Delete Item
 button.
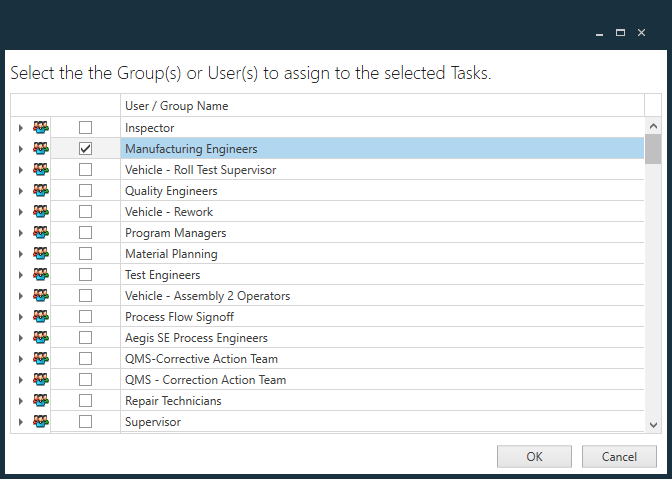
To assign a task or sub-task to a user or group, select the task, select the Assign Group(s) or User(s) to the Selected Tasks
 button.
Use the check boxes to select and assign specific users or user groups to the task, then select OK.
Related topics |
|---|