Create an Operator Interface template
You can customize Operator Interface templates to suit your manufacturing operations and your operators' needs. In this example, you will start with a blank template, then add some essential functionality to the template using gadgets.
Log into the NPI client application.
Select Templates and Standards
 > Operator Interface Templates.
Select the New
 button in the upper-left corner of the window.
Enter a name for the template in the dialog that displays, then select OK.
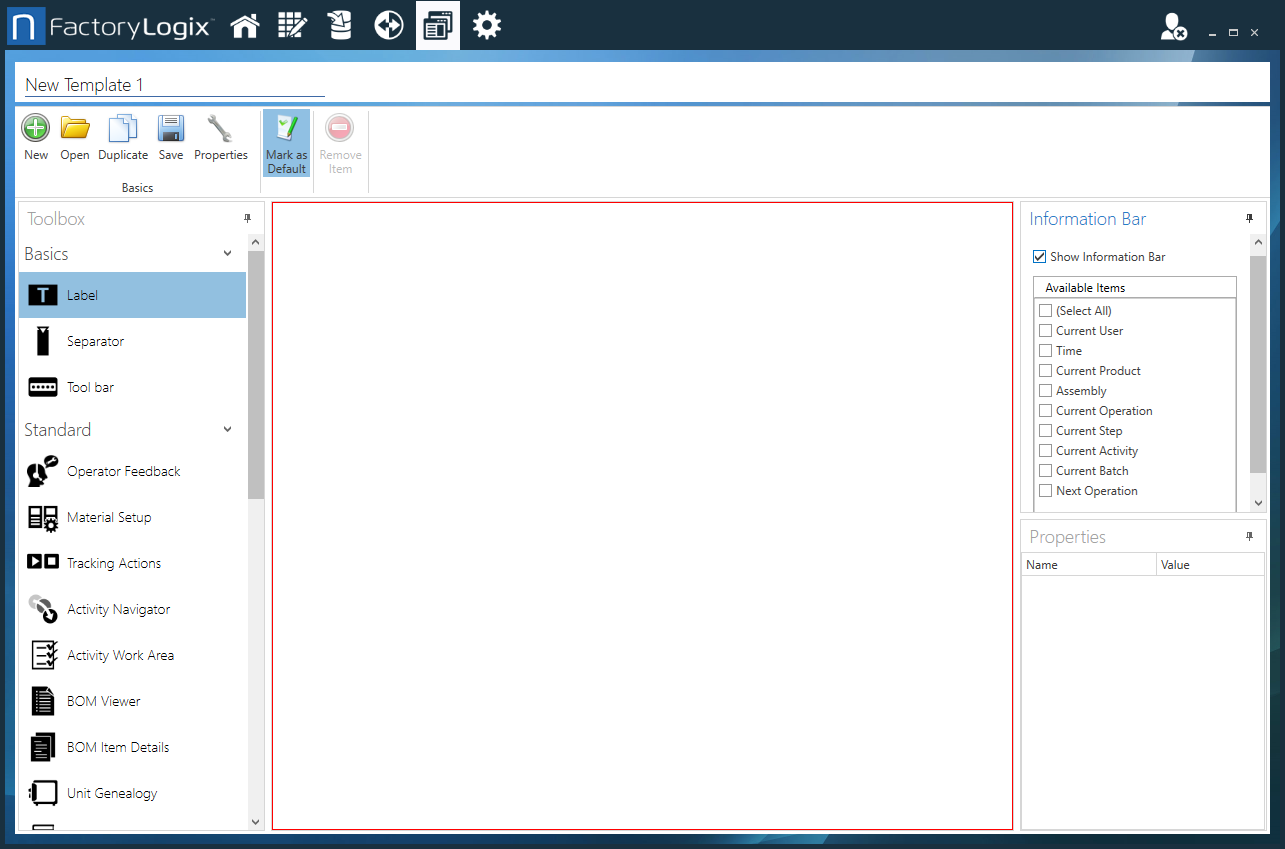
Shop floor interface gadgets are displayed on the left side of the window in the toolbox. You drag these gadgets onto the blank area of the window (the canvas) to create the various aspects of a step or operation you want to model in the template.
Important
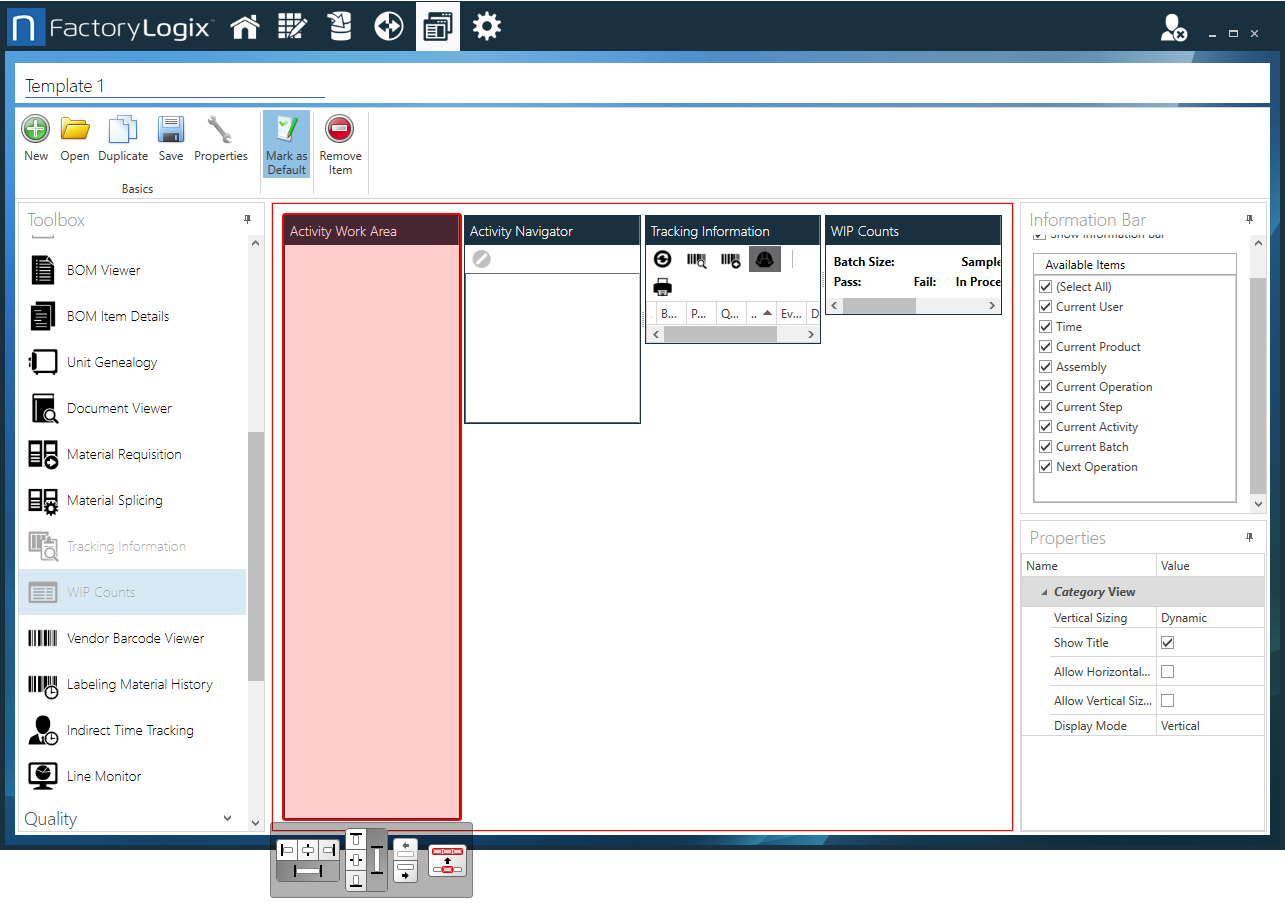
As a general rule, an Operator Interface template should (at minimum) contain these gadgets for an operation:
Activity Work Area to display all activities for an operation
Activity Navigator to navigate the workflow for the activities in an operation
Tracking Information for starting and stopping work on an assembly
WIP Counts to display WIP counts
Drag the Activity Work Area gadget onto the canvas.
Drag the Activity Navigator gadget onto the canvas.
Drag the Tracking Information gadget onto the canvas.
Drag the WIP Counts gadget onto the canvas.
Note
By default, each new gadget is added to the right of the previously-added gadget.
Select the new gadget to display the alignment toolbar.
The alignment toolbar has options to move and align gadgets horizontally and vertically on the canvas.Select a control to move a gadget or align it with another selected gadget.
Use the alignment toolbar to position the selected gadget where you want it on the template.
Continue to add gadgets for this operation.
To remove a gadget, select it, then select Remove Item
 or press the Delete key.
When you finish creating the template, select the Save
 button.
To make this template the default template for all operations, select the Mark as Default
 button.