Define custom fields
A custom field consists of a label and a value you use to further customize, identify, or differentiate part numbers (Manufacturer, Customer, or Internal), BOM line items, processes, or defects. In NPI you can define and manage custom fields that allow process engineers to enter a specific value for each field. Custom fields display in the following areas of FactoryLogix:
Manufacturer Part Number - Custom fields display on the IPN Info tab of the BOM, the Internal Part Numbers tab (General tab) in the Part Library, and in the Map Column Headers dialog with the field name followed by (MPN).
Customer Part Number - Custom fields display on the Customer Part Numbers tab (General tab) in the Part Library and in the Map Column Headers dialog with the field name followed by (CPN).
Internal Part Number - Custom fields display on the Manufacturer Parts tab of the BOM, the Manufacturer Part Numbers tab (General tab) in the Part Library, and in the Map Column Headers dialog with the field name followed by (IPN).
BOM Line Item - Custom fields display in the Map Column Headers dialog with the field name followed by (BOM).
Process - Custom fields display in the Update Process Properties dialog (Additional Information tab).
Note
You can select whether a process custom field is required for release when you define it.
Defect Collection - Custom fields display in the Add Defect dialog in the Production client application.
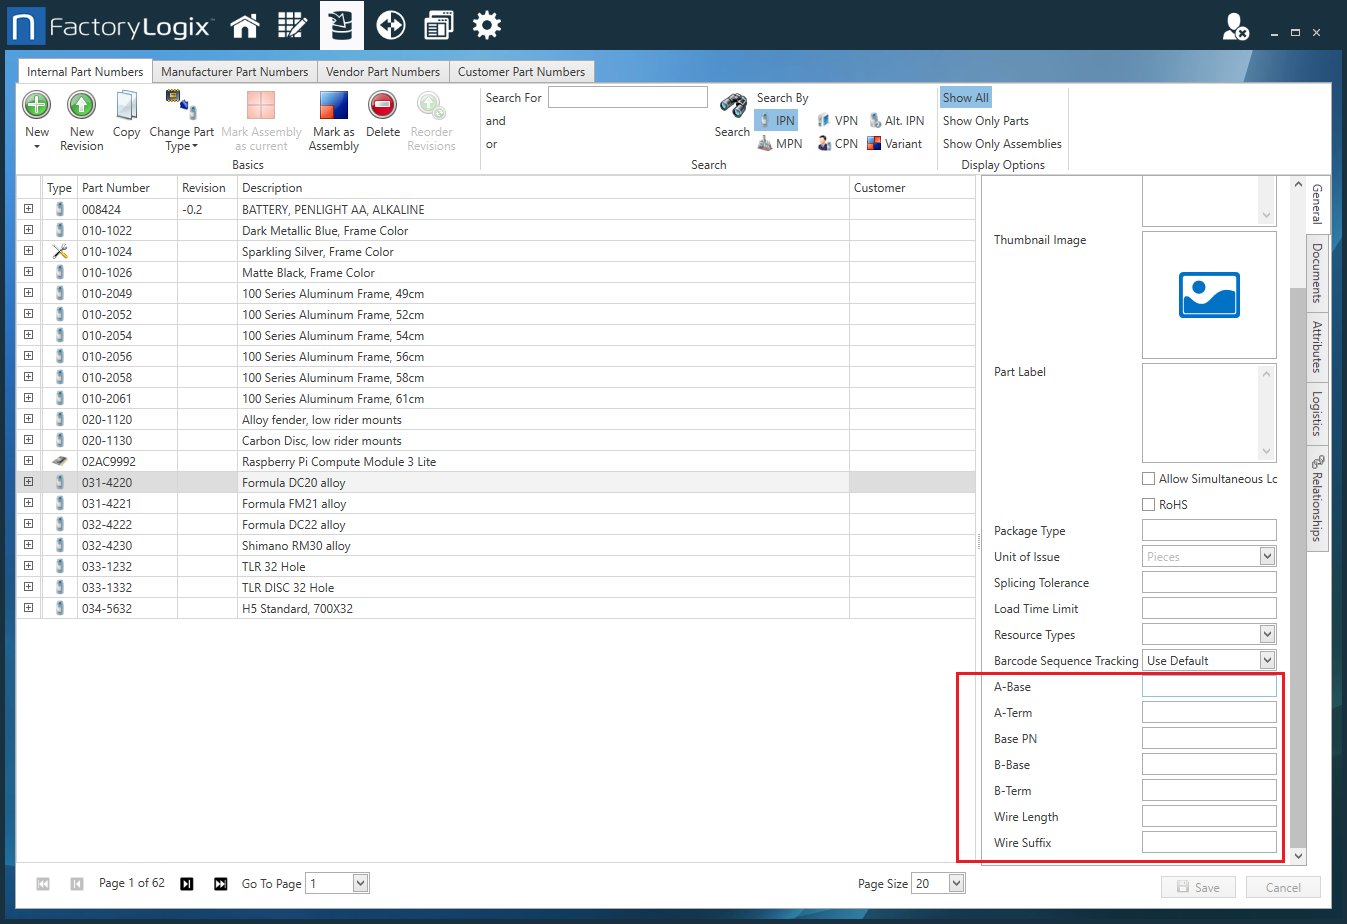
In FactoryLogix, the name you specify for a custom field displays next to the text box where the custom field value will be entered. For example, in the following illustration, for these internal part numbers, the following custom fields were defined: A-Base, A-Term, Base PN, B-Base, B-Term, Wire Length, and Wire Suffix.
Note
Custom fields you define for part numbers are also displayed in the Map Column Headers dialog with the assigned field name followed by the part number type in parentheses (MPN), (CPN), and (IPN). When you import a BOM, the custom fields are available to map to column headers in the BOM.
Log into the NPI client application.
Select System Configuration > Define Custom Fields.
Select the blank area under one of the custom field categories (Manufacturer Part Number, Customer Part Number, Internal Part Number, BOM Line Item, Process, or Defect Collection).
Select the Add New Custom Field to Selected Category
 button.
In the dialog, enter the name for the custom field under Custom Field Name. (If you selected the Process category in Step 3, select the Required for Release check box if the custom field will be required to release the process to Production).
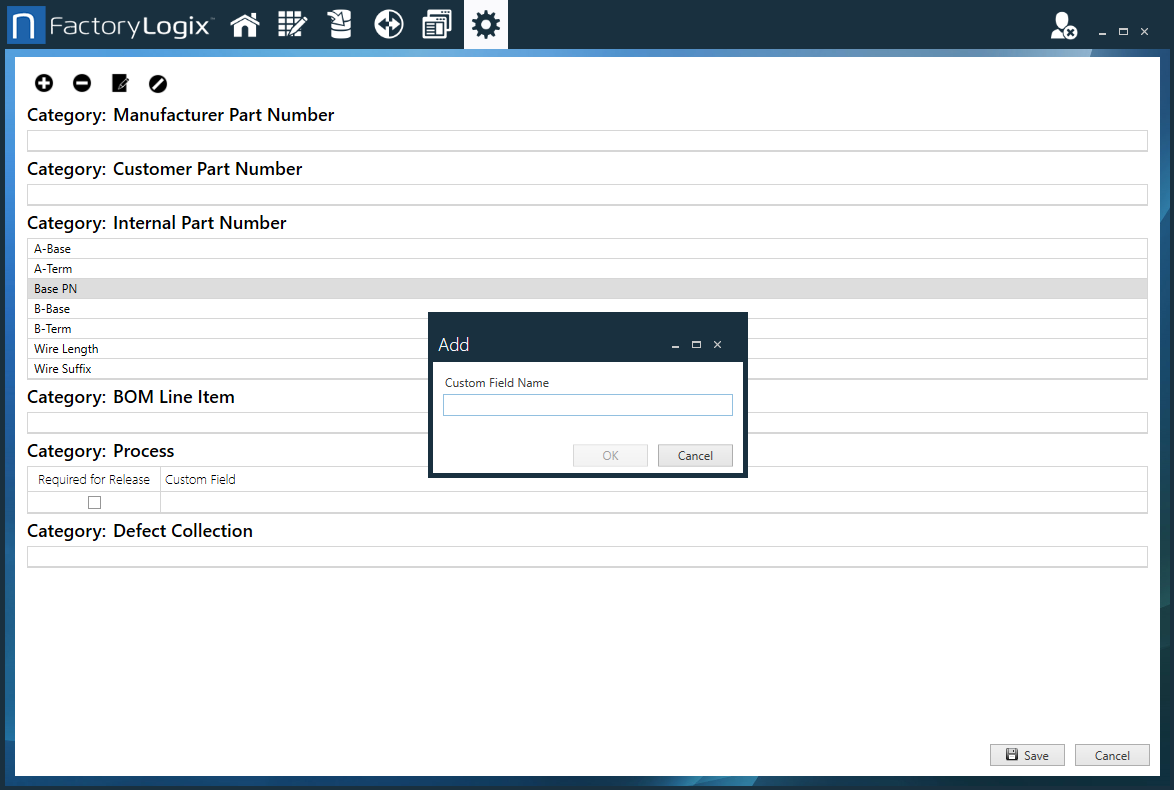
Select OK to create the custom field.
To delete a custom field, select the field, select the Delete Selected Custom Field
 button, then select Yes in the confirmation dialog.
To change the name of a custom field, select it, select the Edit Selected Custom Field
 button, modify the field name, then select OK.
To temporarily disable the use of any custom field in FactoryLogix, select the field, then select the Disable Selected Custom Field
 button. (The field will remain disabled (dimmed) and unavailable to use until you select it and then select the Disable Selected Custom Field button again.)