Format (clean) a BOM and resolve errors
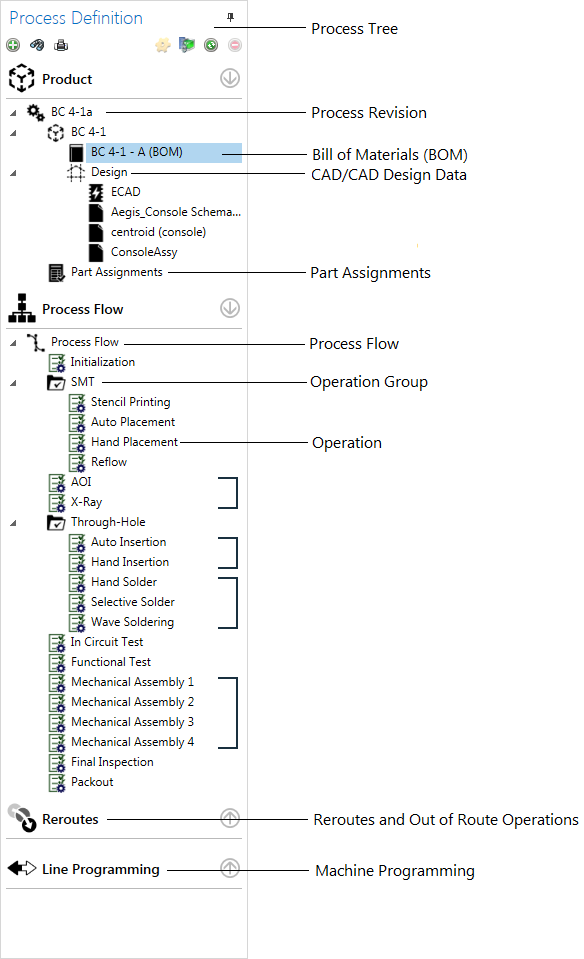
Process tree
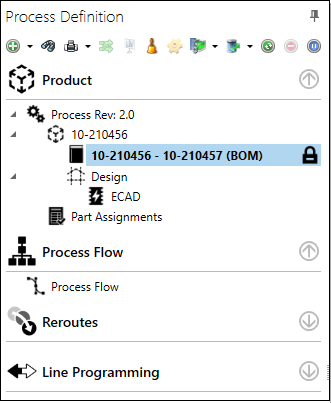
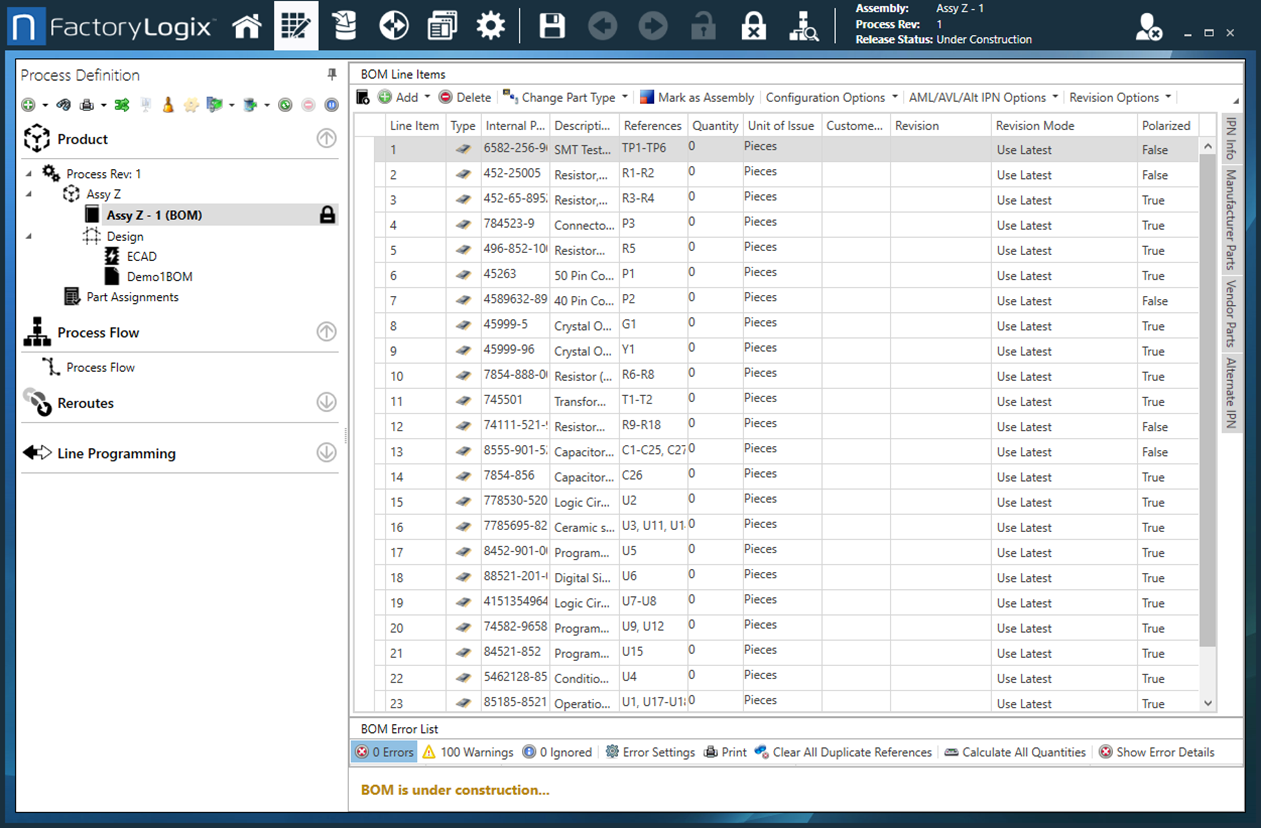
After you import the files for a new assembly using the New Assembly wizard, the Process tree in the Process Definition window displays all the components that make up a process definition—including the BOM—as shown in the following illustration.
Note
If you aren't viewing a BOM directly after importing the files for an assembly using the New Assembly wizard, you can open the BOM for editing by logging into NPI, double-clicking the assembly to open it in the Process Definition window, then double-clicking the BOM in the Process tree.
Resolve BOM errors
After you import a BOM, there may be errors you need to address such as missing part numbers or documents or other changes. You can make all these changes in the Process Definition window or fix errors from within the imported BOM itself. For example, if there is an incorrect quantity, instead of using the Process Definition window, you can just change it in the BOM listing.
In the Process Definition window, double-click a BOM error to see a dialog with details about the error.
In this example, Internal Part Numbers are missing from the BOM.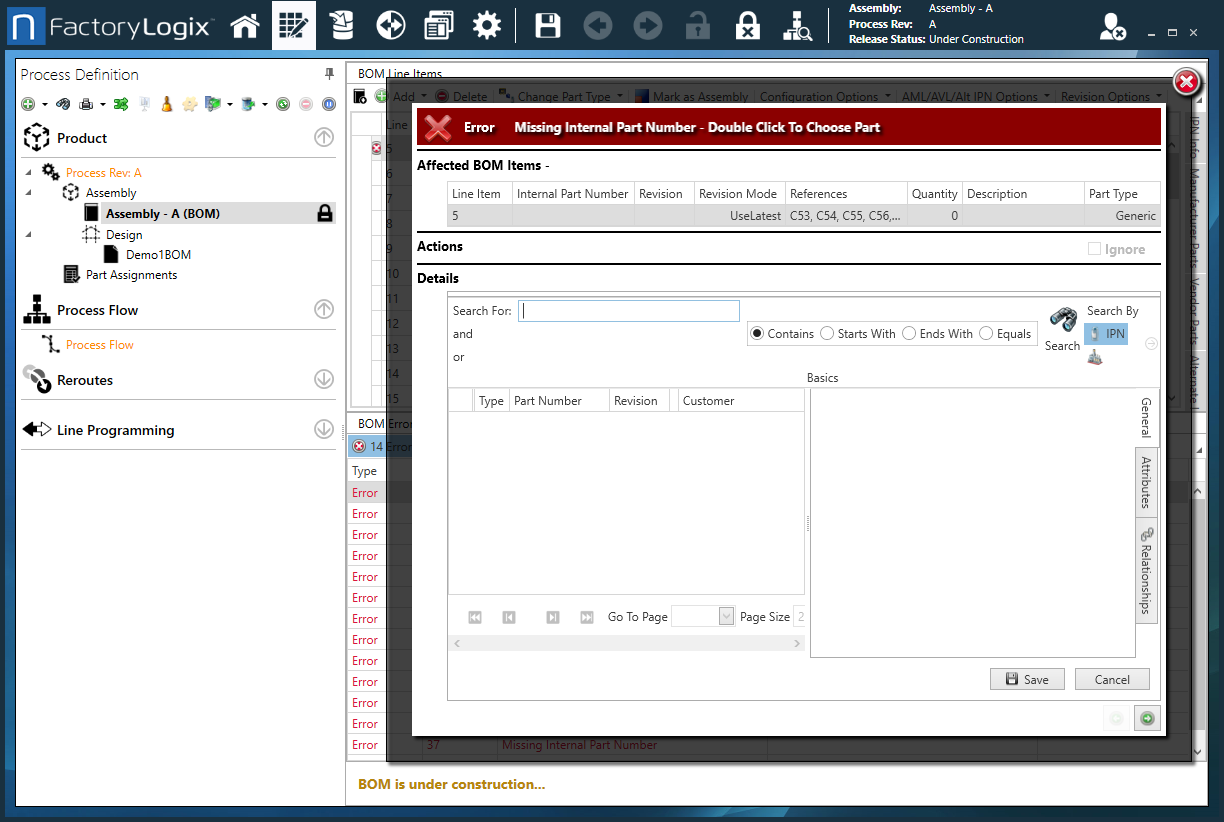
Use the dialog options to correct the error (in this example, locate the appropriate IPN), then select Save to update the BOM with the correct IPN.
Note
For some errors, you have the option to select Ignore next to Actions, then the error entry will remain in Ignore status.
BOM Error List toolbar
The BOM Error List toolbar has useful tools to help you resolve BOM errors after importing.
Command | Description |
|---|---|
Errors | Displays BOM errors. |
Warnings | Displays BOM warnings. |
Ignore | Allows you to ignore an error message. |
Error Settings | Displays a dialog where you can select the BOM error checking options you want to view to help you troubleshoot BOM errors.  |
Displays a dialog where you can select printing options for the BOM error list, search for specific text, and/or export BOM errors to a file. | |
Clear All Duplicate References | Clears all duplicate references in the BOM error list. |
Calculate All Quantities | Resolves errors where the BOM quantity doesn't match the calculated quantity. |
BOM Line Items toolbar
Along the top of the BOM under BOM Line Items, there is a toolbar with options for adding and removing line items, changing the part type of a selected item, setting specific revisions, and AML/AVL options.

Option | Description |
|---|---|
Launch Wizard |
|
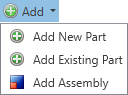
Add | Adds a new part, existing part, or assembly to the BOM for a process definition.
 |
Delete |
|
Change Part Type | Changes the selected part to a different type: Generic, Electronic, Consumable, or Tooling.  |
Mark As Assembly |
|
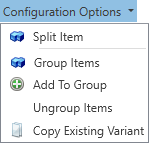
Configuration Options |
|
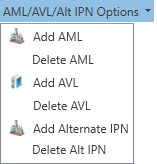
AML/AVL/Alt IPN Options | Specifies approved manufacturer or vendor lists for parts and Alternate IPNs for selected parts.
|
Revision Options | Assigns the selected option to the Revision Mode column for all BOM items.
|
Auto-Validation | When selected, error checks you previously set up in NPI Global Options are validated automatically. |
Validate | When selected, validates error checks you previously set up in NPI Global Options. |
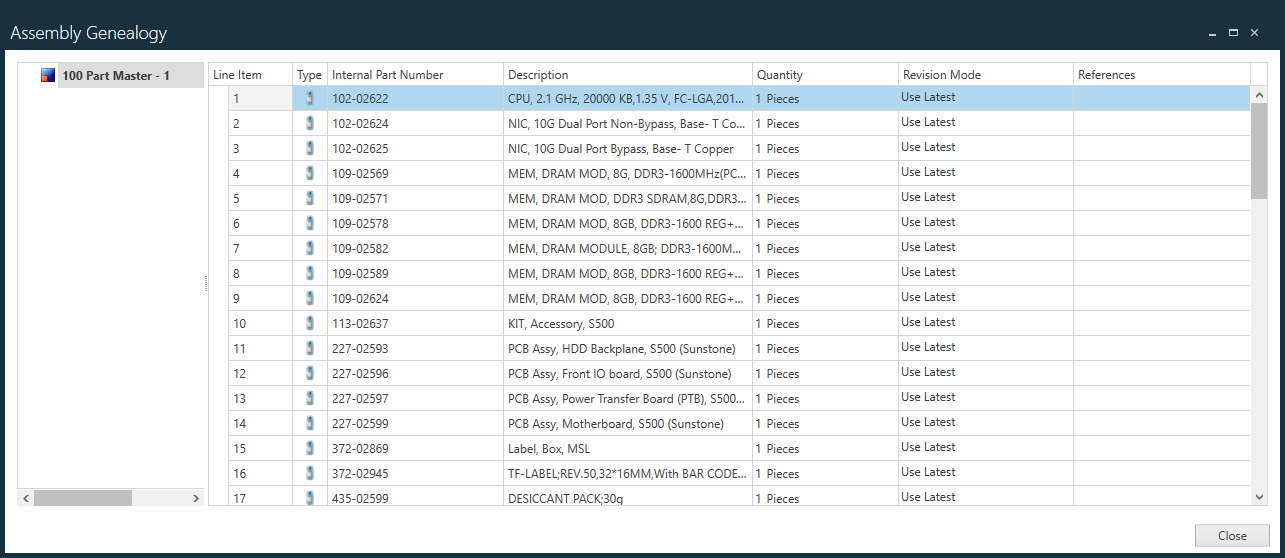
Genealogy |
 |
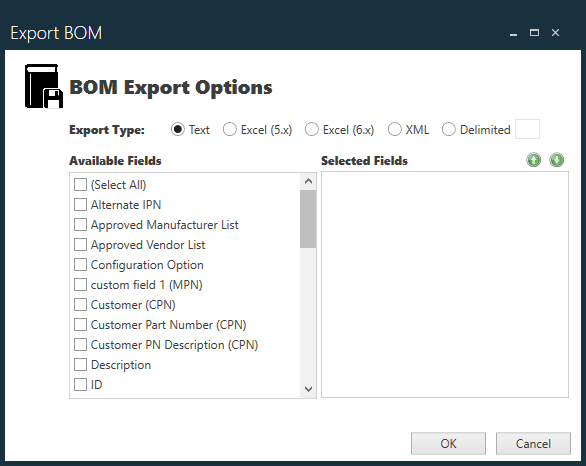
Export BOM |
 |

Save and publish a BOM
After you format a BOM, select the Save and Check In ![]() button (the padlock) next to the BOM node of the Process tree on the left side of the window to save and publish the BOM.
button (the padlock) next to the BOM node of the Process tree on the left side of the window to save and publish the BOM.
Publishing commits any part linkage (internal to customer and internal to manufacturer) and adds new parts to the global part library. FactoryLogix will then switch to the ECAD node of the tree and present the PCB to you. You can compare the CAD to the BOM for further error-checking by clicking the CAD to BOM Comparison button on the toolbar. The tool will display a list of discrepancies between the CAD and BOM such as reference designators present in the CAD with no matching part numbers in the BOM and vice versa.
If you're satisfied with the BOM, select the Save button next to the BOM in the Process tree to save and publish the BOM.
Related topics |
|---|