Manage an existing non-conformance
Search for and view a non-conformance
After a non-conformance is created, you can open, manage, and edit it in the Production or Logistics client application. In the Non-Conformances window, you can search, filter, and sort non-conformances, print reports, and organize the list of non-conformances. You can also cancel or reactivate a non-conformance, create a new non-conformance, or open a selected non-conformance for further review and editing.
Log into the Production client application.
Select Advanced Features
 > Non-Conformances.
Note
To access the Non-Conformances window from the Logistics client application, log into Logistics, then select Non-Conformance.
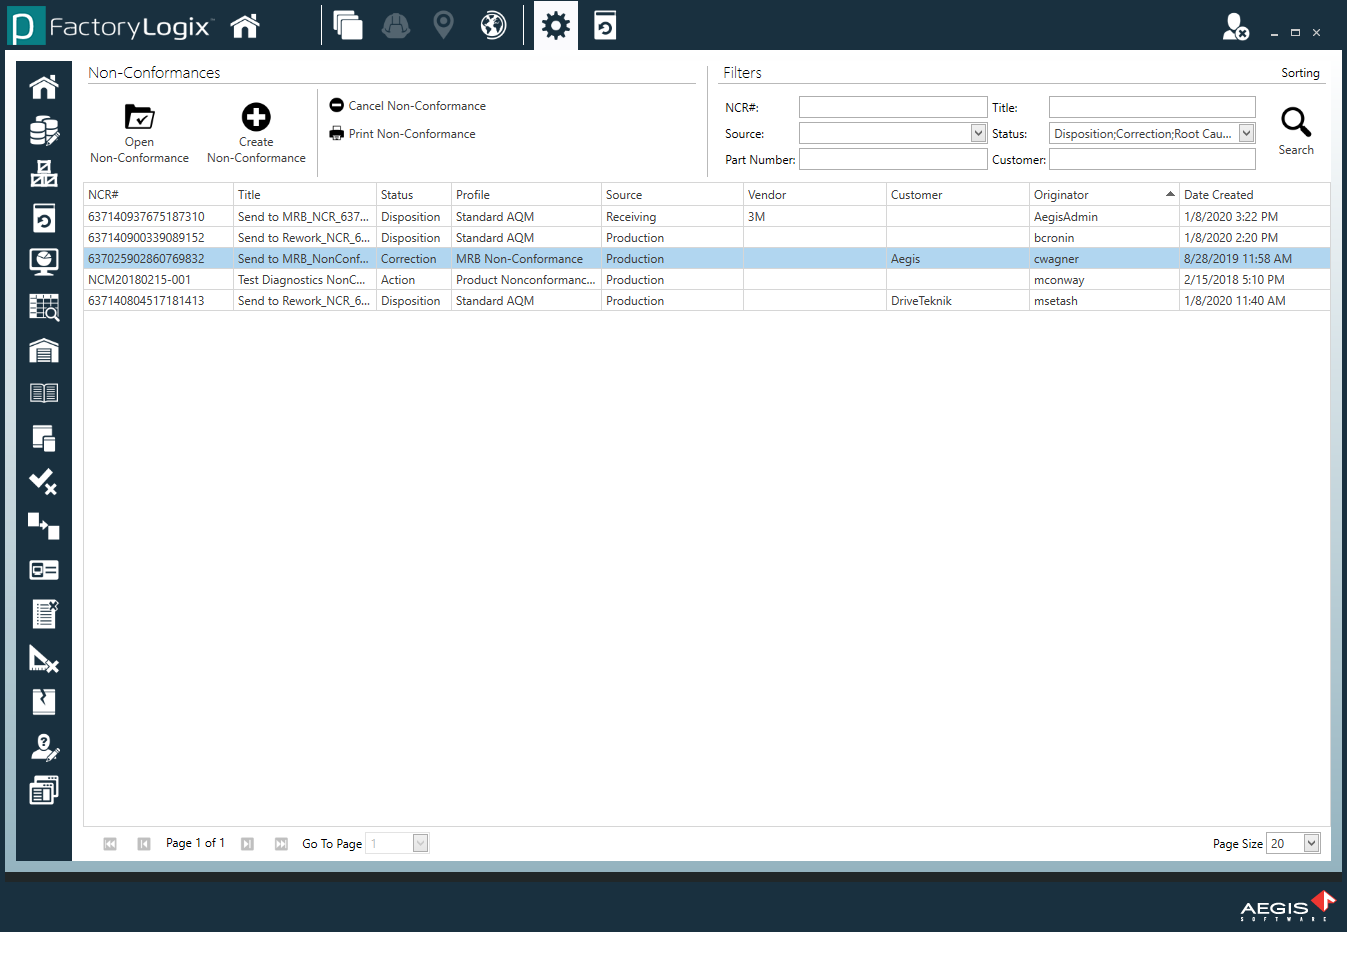
To search for a non-conformance, use the filters in the upper-right corner of the window, then select the Search
 button (the magnifying glass). You can use one or multiple search criteria: NCR#, Source, Part Number, Title, Status, and Customer.
Tip
When managing multiple non-conformances, you can select Sorting in the upper-right corner of the Non-Conformances window to display sorting criteria to arrange the non-conformance list. Use the ASC (Ascending) and DSC (Descending) options to arrange the information in ascending or descending order (A-Z or Z-A, for example).
Do one of the following to open a non-conformance and view its details:
Double-click a non-conformance in the list.
Select a non-conformance from the list and select the Open Non-Conformance
 button in the upper-left corner of the window.
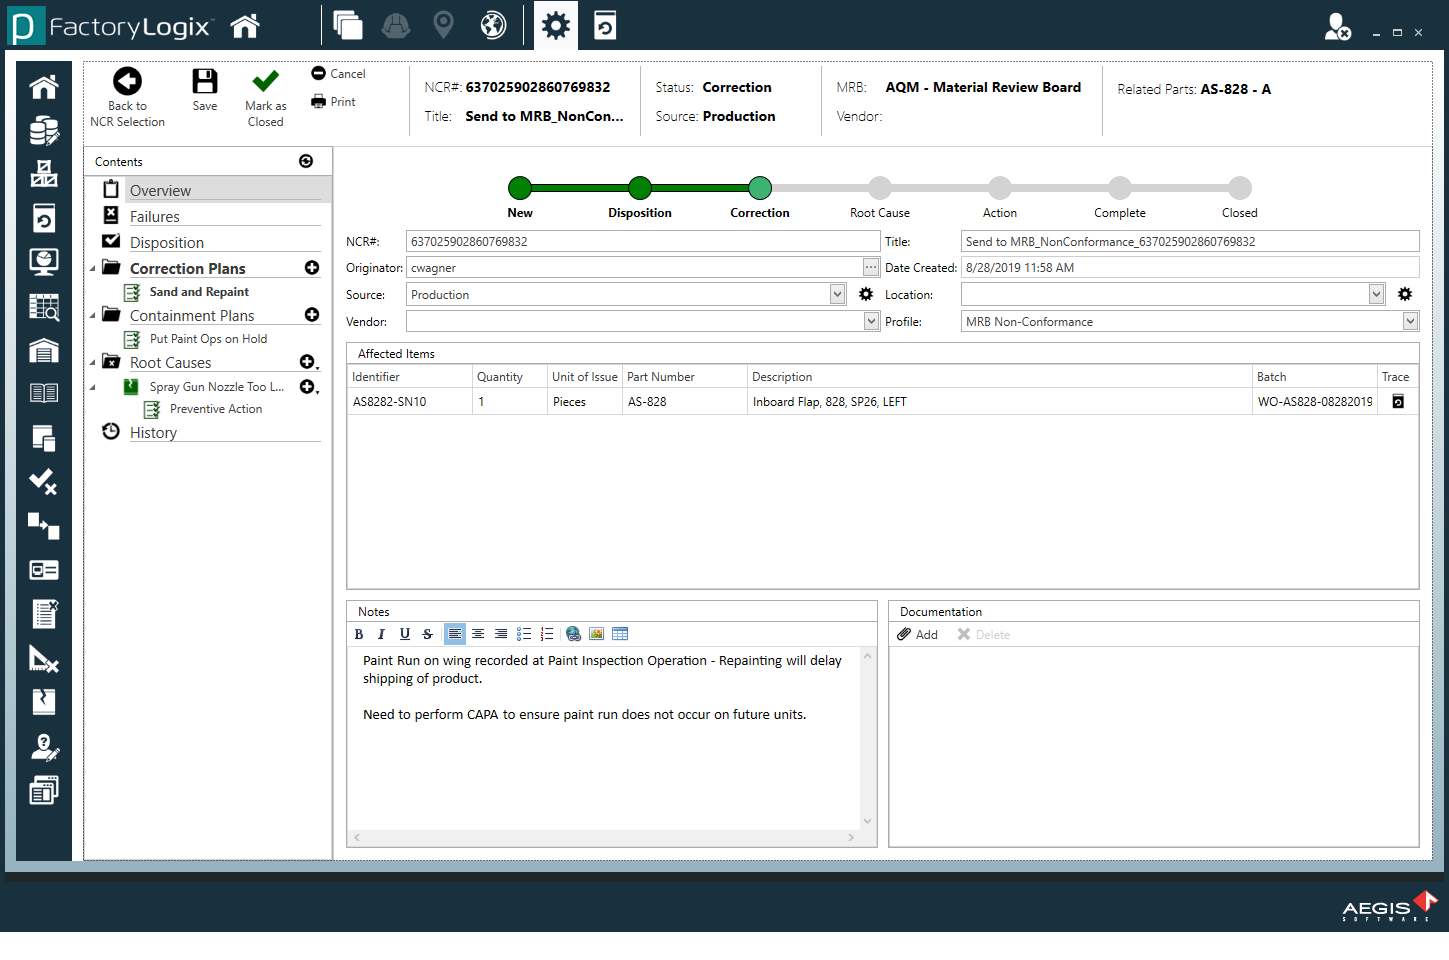
Select the Print Non-Conformance button to print the list of non-conformances.
Select the Generate Report button to create a PDF report for the selected non-conformance.
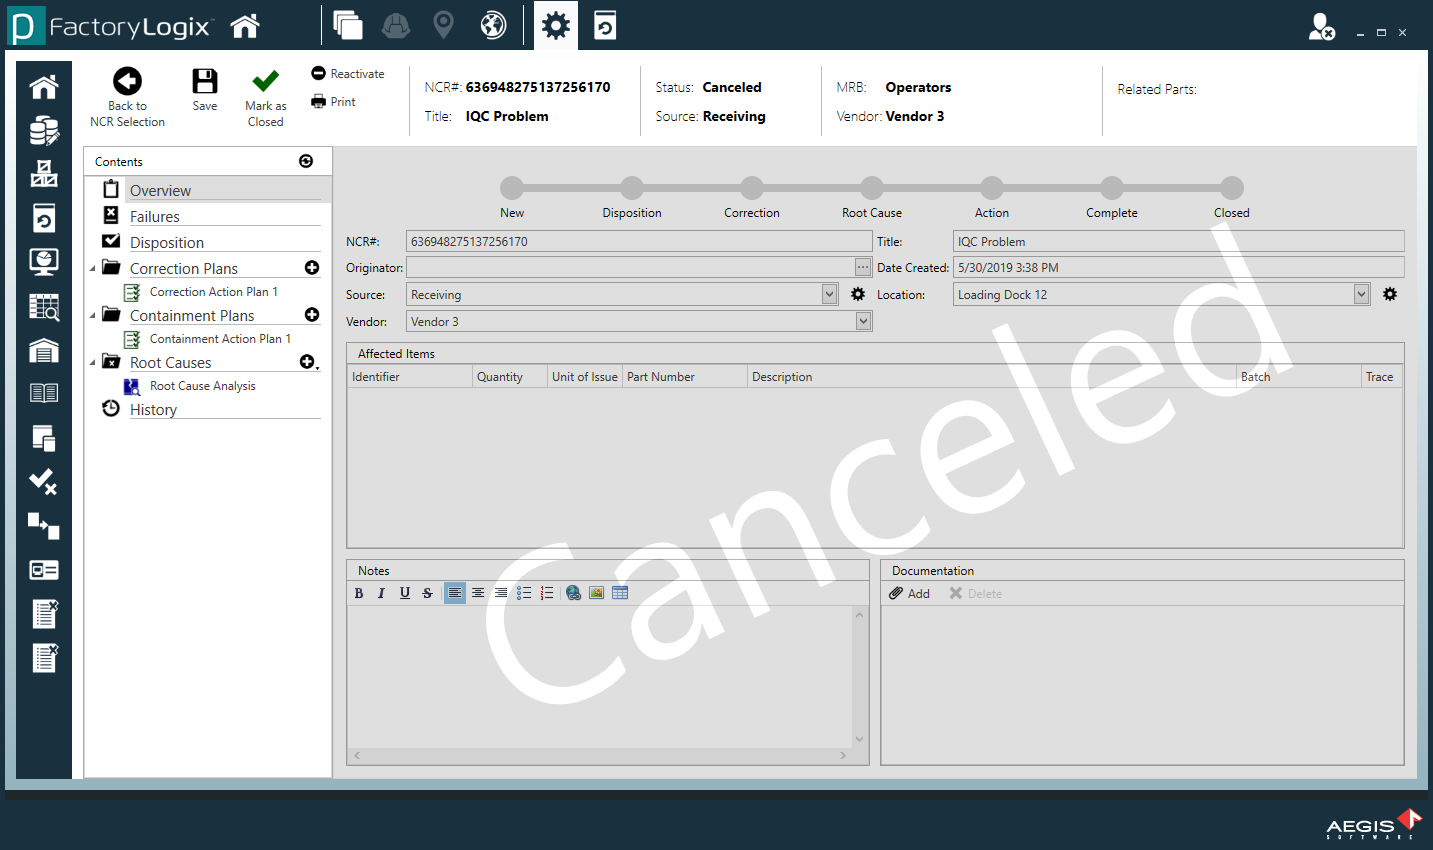
Select the Cancel Non-Conformance button to cancel the selected non-conformance, then select Yes to confirm your selection.
Note
If you change your mind after canceling a non-conformance, select the Reactivate ![]() button, then select Yes when prompted to make the non-conformance active again.
button, then select Yes when prompted to make the non-conformance active again.
Review or edit a non-conformance
After locating and opening an existing non-conformance, you can edit non-conformance details, update its status, view its history, and make other changes.
Log into the Production client application.
Select Advanced Features
> Non-Conformances to display the Non-Conformances window.
Note
To access the Non-Conformances window from the Logistics client application, log into Logistics, then select Non-Conformance.
Locate and select the non-conformance you want to review or edit, then select the Open Non-Conformance
button.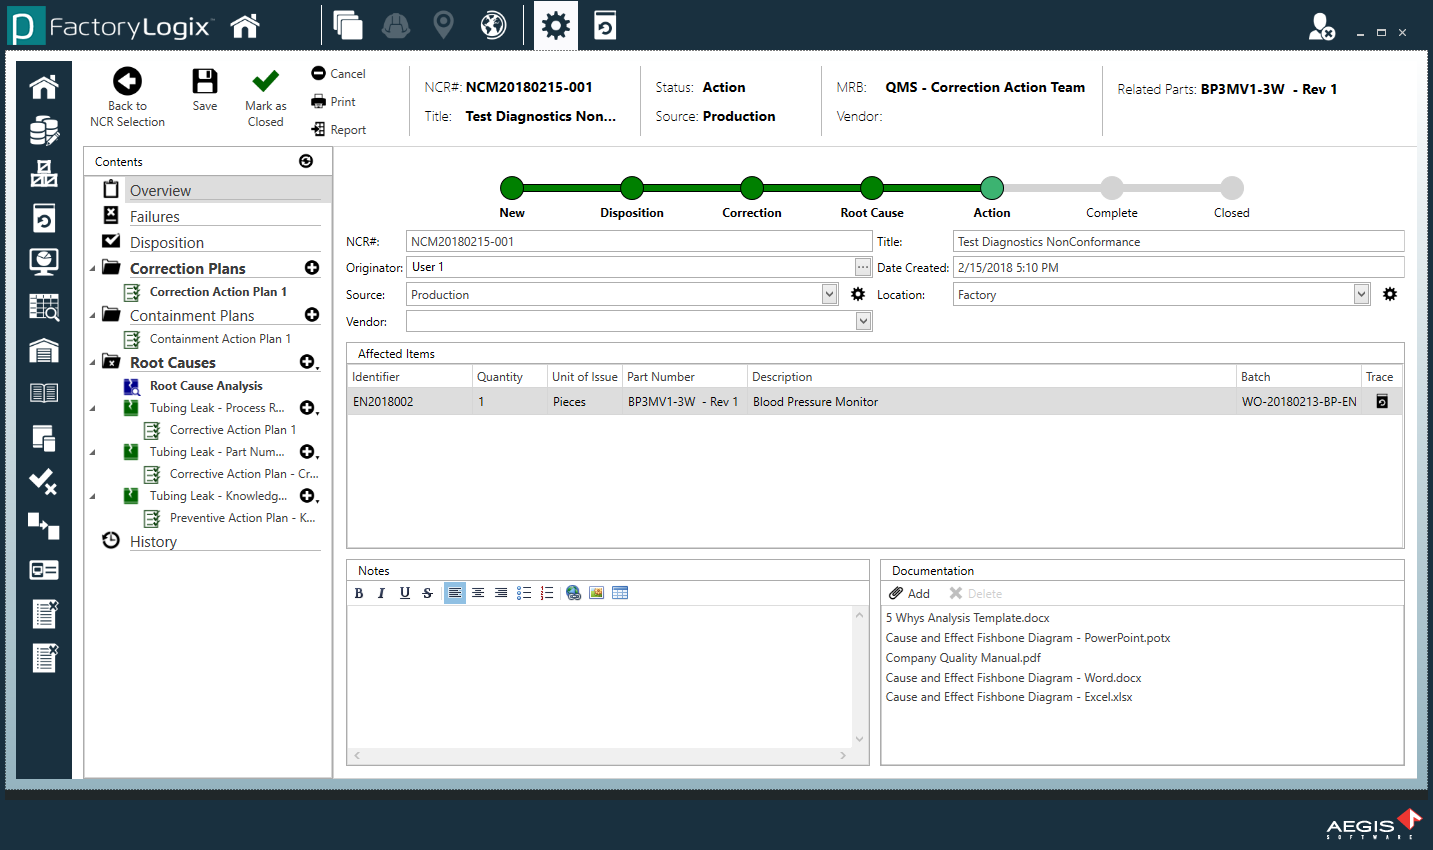
Use the tree on the left side of the window to step through the details of the non-conformance: Overview, Failures, Disposition, Correction Plans, Containment Plans, Root Causes, and History. The following table describes these details and the changes you can make to a non-conformance.
Tree item | Description |
|---|---|
Overview | Displays the overall status of the non-conformance visually (the Green progress bar). You can modify details including:

|
Failures | Displays information related to a non-conformance failure. For all three tabs, select Add to display the Select Inventory dialog where you can search for and select parts related to the failure by UID or part number. 
|
Disposition | Specifies the disposition decision for the non-conformance. Typical disposition decisions might include: Return Unused Material to Stock, Return to Vendor, Rework, Repair, and Scrap. You can also add supporting documentation to the decision and pertinent notes in the Notes area. |
Correction Plans | Displays correction action plans for the non-conformance. To edit a plan, select it in the tree on the left side of the window, then select the Set to Under Construction You can also add supporting documentation to the decision and pertinent notes in the Notes area.  |
Containment Plans | Displays containment plans for the non-conformance. To edit a plan, select it in the tree on the left side of the window, then select the Set to Under Construction You can also add documentation to the decision and pertinent notes in the Notes area. |
Root Causes | Displays root cause analysis information for the non-conformance. To edit a root cause, select it in the tree on the left side of the window, then select the Set to Under Construction You can also add supporting documentation to a root cause and pertinent notes in the Notes area. |
History | Displays a complete history of the non-conformance including status changes by date, type, user, and description. |