Use the Report Scheduler in Production

In the Production Advanced Features window, you can access the Report Scheduler directly instead of needing to launch the Analytics client application. Access to the Report Scheduler right on the factory floor is beneficial since it potentially eliminates the need to have the Analytics client application installed and consuming a license at a factory floor workstation.
After you create one or more report templates in DataMiner, you can schedule customized reports to run automatically at pre-determined intervals. For example, a quality manager may want to see a report emailed each morning detailing the state of production that occurred overnight.
The Report Scheduler allows you to:
Generate customized reports on a timed interval
Schedule and email reports automatically
Generate customized reports automatically in response to certain thresholds or conditions being reached or exceeded using alarms set up with triggers and reactions. For example, when Yield falls below 94%, you might generate a quality report and email the Production Manager and Quality Team.
The Report Scheduler window
Report Schedule tab - Use the settings on this tab to create, edit, or delete a report schedule. The window displays all existing reports, including information about who has access, when a report was created or last modified, and the recurrence type. If a report is queued, you can select it and temporarily suspend queuing if you want to make changes to the report.
Report Schedule Queue tab - Use the settings on this tab to view and modify the reporting queue. You can temporarily hold a report by selecting the Place On Hold button, then use the Set To Ready button to resume the report. There's also a Stop button to stop a report from running—even if it already started running.
Alarm Report Schedule Queue - This tab displays alarm reports by name, status, scheduled start date, started date, and completed date.
Note
On any of the Report Scheduler tabs, use the Show only your report schedule queues check box to toggle between your report queue and everyone's.
Create and schedule a report
Note
If you purchased the xStream option for the Analytics client application, you can export data grid and pivot table data to a specified location automatically using the Report Scheduler. When xStream is installed, a new Export Location tab displays in the Report Scheduler, allowing you to specify a default location for exporting scheduled data grid and pivot table data in addition to charts and reports.
Log into the Production client application, then select Advanced Features > Report Scheduler.
Tip
You can also access the Report Scheduler from the Analytics client application by logging into Analytics, then selecting Report Scheduler.
Select Add New.
Enter a Name for the scheduled report in the Add New Report Schedule dialog.
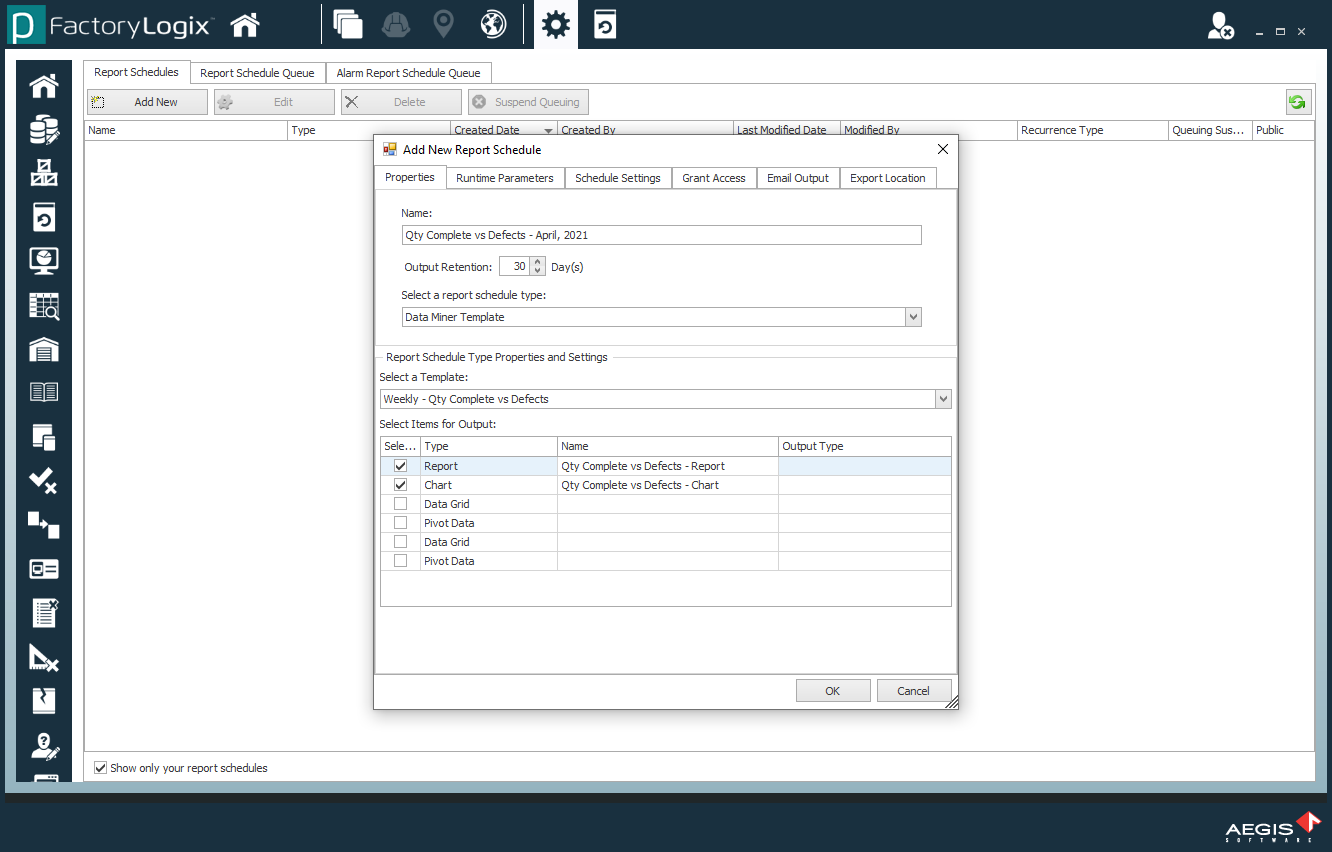
Select the Output Retention check box, then specify how long the report will be retained before it is deleted. (You can specify a maximum of 180 days.)
Note
Output retention is the length of time the file is stored in the report queue. Overwriting the output file overwrites the file in the selected folder.
Use the Select a Template drop-down to select a report template.
Under Select Items for Output, select the check boxes for the data items you want to include in the report (Report or Chart).
Note
If you purchased the xStream Analytics option, your Type selections in the Add New Report Schedule dialog will also include Data Grid and Pivot Data.
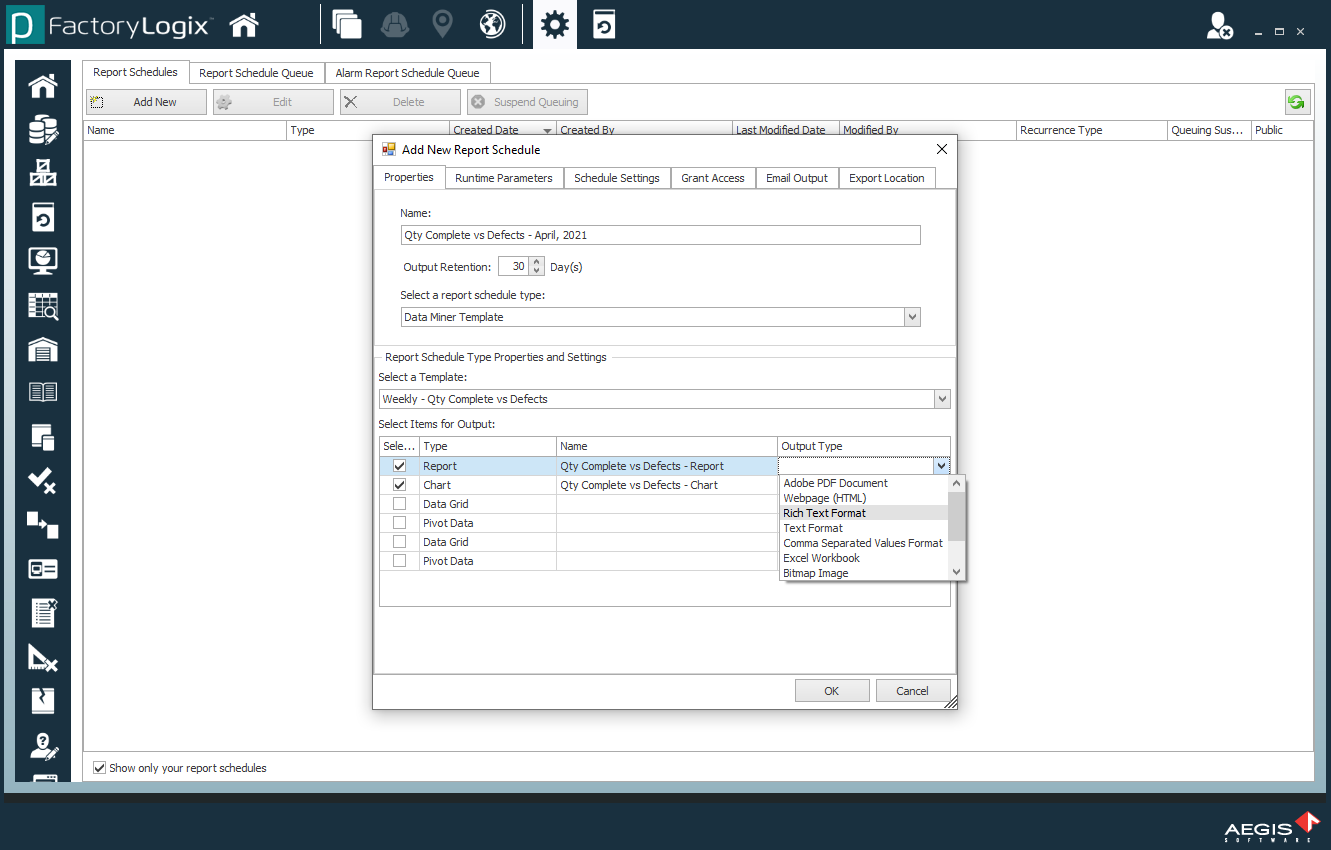
For each output type you selected in Step 5, use the Output Type drop-down to select an output type for the report (Bitmap, PDF, HTML, and so on).
Note
If you purchased the xStream Analytics option, your Output Type selections in the Add New Report Schedule dialog will also include these output formats: *.htm, *.txt, *.xml, and *.xls.
If the report template you selected has predefined runtime parameters, select the Runtime Parameters tab.
Note
The availability of runtime parameters in the Report Scheduler can significantly reduce the number of report templates you need. In DataMiner, you can set up a "master" template that can be used for multiple reports. For example, if you previously created six report templates for six different customers, you can instead create a "master" template to use for multiple report schedules using Customer as a runtime parameter.
Select the highlighted runtime parameters on the appropriate tabs, then select OK.

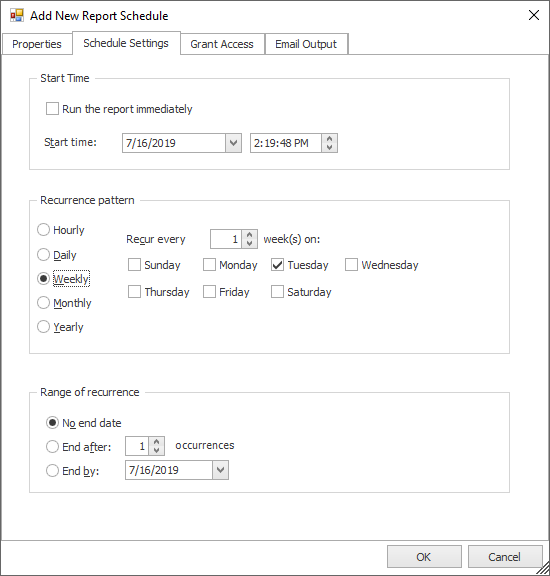
Select the Schedule Settings tab along the top and clear the Run the report immediately check box.
Specify the Start time and date for the scheduled report to run.
Under Recurrence Pattern, select a frequency to run the report and when to repeat the report.
Note
You can also specify how many reports to generate before stopping or set an end-date for the scheduled report. The default No end date setting keeps the report scheduled indefinitely.
Select the Grant Access tab, then use the Groups and Users tabs to select the check boxes that correspond to the groups and users who will have access to the report.

Select the Email Output tab, then use the Groups and Users tabs to select the check boxes that correspond to the Groups and Users who will receive the emailed report when the report for viewing at the specified frequency.
(Only for users who purchased the xStream option) Select the Export Location tab, then select the Browse button and select the location where reports will be exported automatically.

(Only for users who purchased the xStream option) Select the Overwrite output file with each generation check box if you only want to save the latest report each time a scheduled report is generated.
Warning
Do not select the Overwrite output file with each generation check box if you need historical reports. When you select the check box, the latest report will be saved, but that report will be overwritten when the next scheduled report is generated.
Select OK to save the scheduled report.
The scheduled report is now displayed in the list.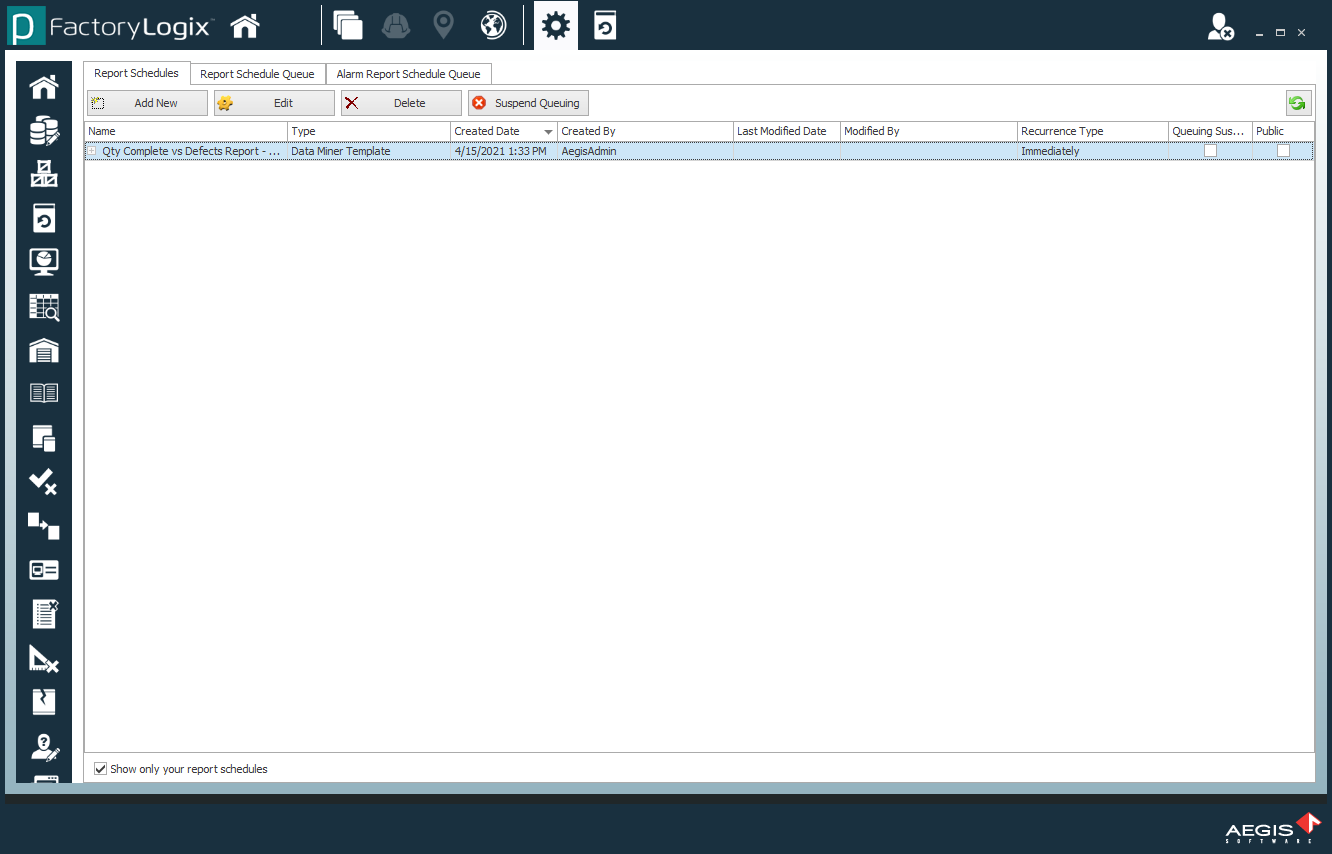
Related topics |
|---|