Create a Goods Receipt Note (GRN)

A Goods Receipt Note (GRN) is a note or receipt used by a customer to check or validate delivered goods; a verification note filled in by the customer. A GRN is a subset of a Purchase Order (PO). For example, you may place an order for a quantity of 10,000 of a particular part from a vendor, but the vendor may ship smaller quantities as they become available in their factory. These smaller shipments are received as a GRN. Similar to a production batch, a GRN essentially describes the part and the quantity being received. You can enter this information manually in the Logistics client application or you can import the data through an xTend integration from an Enterprise Resource Planning (ERP) system.
Important
By default, GRN Creation in FactoryLogix is set to xTend: Purchase Orders (POs) are imported into FactoryLogix through an xTend integration from an Enterprise Resource Planning (ERP) system. In this state, the Material Purchase Order button is hidden in the Logistics area of NPI. In order to create POs manually, you need to first change the GRN Creation setting to Manual in NPI > System Configuration > Settings > Logistics > Option Type: Receiving Materials. Once this is done, you can access the Material Purchase Order area in the Logistics area of NPI.
Creating a GRN in Logistics is very similar to creating a production batch.
Log into the Logistics client application.
Select the Process Incoming Material button.
Select the GRN Selector
 button in the menu at the top of the window.
Select the Add GRN
 button next to Current GRN List in the window.
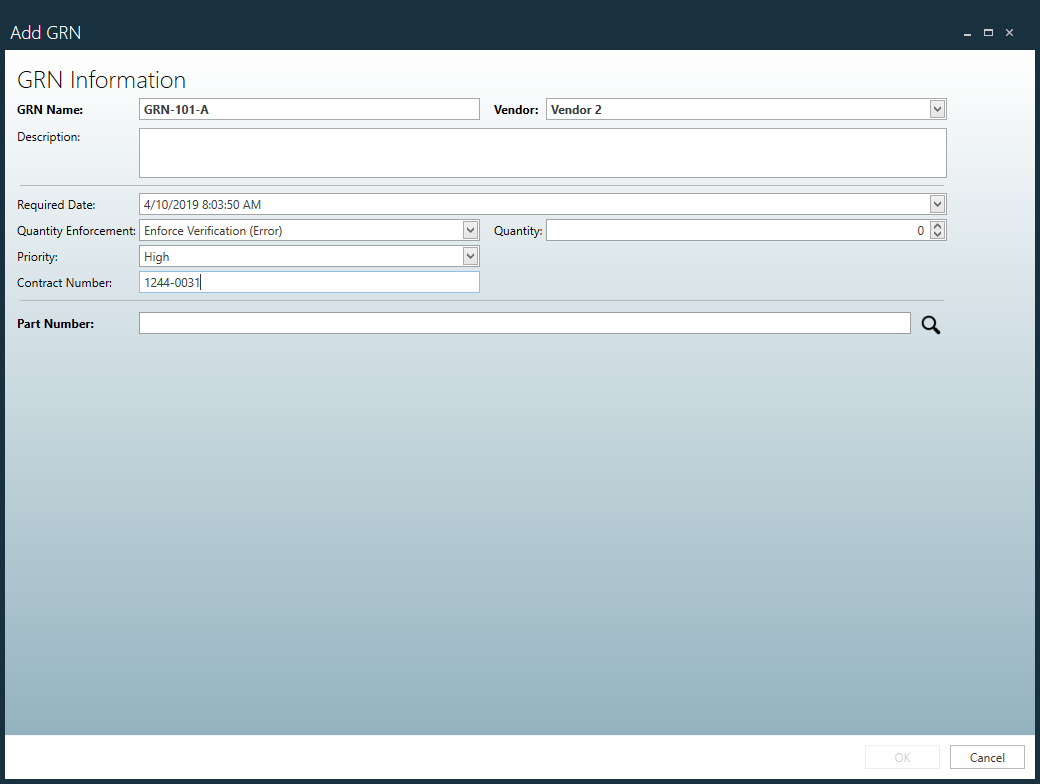
Enter a unique GRN Name and (optionally) a Description for this GRN.
Enter a Vendor (the company from which the parts are being received).
If the parts you are ordering are required by a specific date, select a date in the Required Date field.
If you must have all required parts by the specified date (that is, not a partial order), select Enforce Verification (Error) from the Quantity Enforcement drop-down or select Enforce Verification (Warning) if it is acceptable for the vendor to ship a partial quantity by the specified date.
Specify a Quantity (the total number of parts being received in this GRN).
Select a Priority (High, Medium, Low) for receiving this order from the Priority drop-down.
If you have contract number with this vendor, enter it in the Contract Number field.
Note
The Vendor Name is important; it determines which Vendor Label template will be used to scan materials during the receiving and labeling portion of the receiving process.
Select the magnifying glass next to Part Number, then search for the part number you want to order. (The Part Number is the actual material being received.)
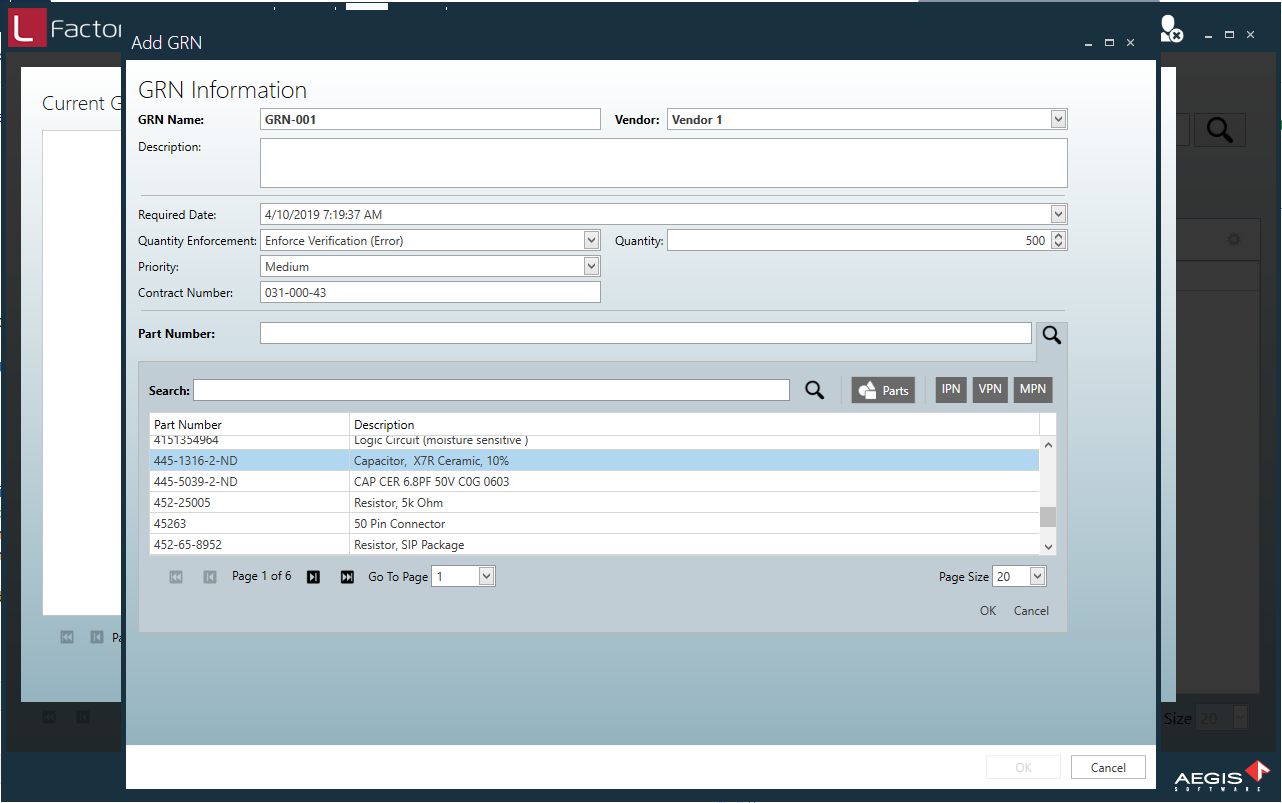
Select the part number, then select OK.
Related topics |
|---|