Skip table of contents

Composer step

Note

See Support for SOLIDWORKS Composer files for more information about FactoryLogix support for Composer files.

Create a Composer step

  1. Log into the NPI client application.

  2. Select Process Engineering Process Engineering button , then select an assembly.

  3. In the Process Definition window, double-click the Process Flow in the tree to open it for editing.

  4. Double-click the operation where you want to add the Composer Step to open it for editing.

  5. Select the Add Add button button under Step List in the Process tree, then select Composer Step.

  6. Double-click the Composer Step to open the Settings dialog.

  7. Use the following tables to make your selections for the step.

  8. When you're finished making selections for the step, select OK to confirm your choices.

Settings dialog - Basics tab

Option

Description

Name

Specifies the name of the step.

  • To apply a step template to the step, select the Apply a Template Apply a Template button button, select a step template, then select OK.

  • To save the step as a step template, select the Save as Template Save as Template button button, enter a name for the template, then select OK.

For details about creating and saving step templates, see Create a process, step, or operation template.

Operator Interface Template

Specifies the Operator Interface template to apply to the step. 

See Operator Interface templates for more information.

Assigned Workstation

Specifies the assigned workstation where the step and activities will be performed by a shop floor operator.

See Create a factory and set up factory resources for more information.

Any Order Mode (Activities can be viewed in any order)

Specifies that all the activities associated with the step may be viewed in any order.

Is Step Required?

Specifies that the step cannot be skipped by a shop floor operator.

Activities may be executed without starting a unit

Specifies that any activities associated with the step may be executed by a shop floor operator without first scanning or entering the UID to start the unit in production.

Frequency

  • Frequency - The frequency with which activities associated with the step are displayed and performed. 

    • Every Item - Activities must be performed for every item. 

    • By Item Count - Displays activities for the step every n number of scans. For example, when you select 3, activities will display for every third item, (item 1, item 4, item 7, item 10, and so on).

    • Batch Based - Displays activities using the specified condition:

      • (Select All) - Displays activities for the first and last items in the batch.

      • Start of Batch - Displays activities for the first item in the batch.

      • End of Batch - Displays activities for the last item in the batch.

    • Time Interval - Activities for the step must be performed using the specified conditions. For example, 1 product every 2 minutes for the current batch. 

    • At Certain Times of Day - Displays activities for the step at specific times during the day, for example when periodic maintenance is needed to keep a workstation or machine running smoothly.

    • By % of Total - Displays activities (even distribution) for the step each time the specified percentage of the total batch is reached. For example, a value of 10 percent in a 50-piece batch will display the specified step and activities every tenth assembly (10 percent of 50 is 5 over the course of 50 assemblies). This condition might be useful for periodic inspection of items in a batch.

    • Operation Session Based - Displays activities for the step each time an operator logs in to begin a new session.

Activity Completion Acknowledgement

Add Acknowledgement to:  The shop floor operator must acknowledge completion of All Activities, the First Activity, or the Last Activity associated with the step.

Do you want to require credentials?

  • Yes - The shop floor operator is prompted to supply appropriate credentials before completing the step.

  • No - The shop floor operator isn't required to provide credentials before completing the step. 

Approval Process

  • Yes - An approval will be required for the specified activities before the step can be completed.

    • Select an approval process from the Approval Process drop-down.

    • Select the activities that the approval will be required for: First ActivityLast Activity, or All Activities.

  • No - The shop floor operator won't be required to obtain an approval before completing the step and its activities. 

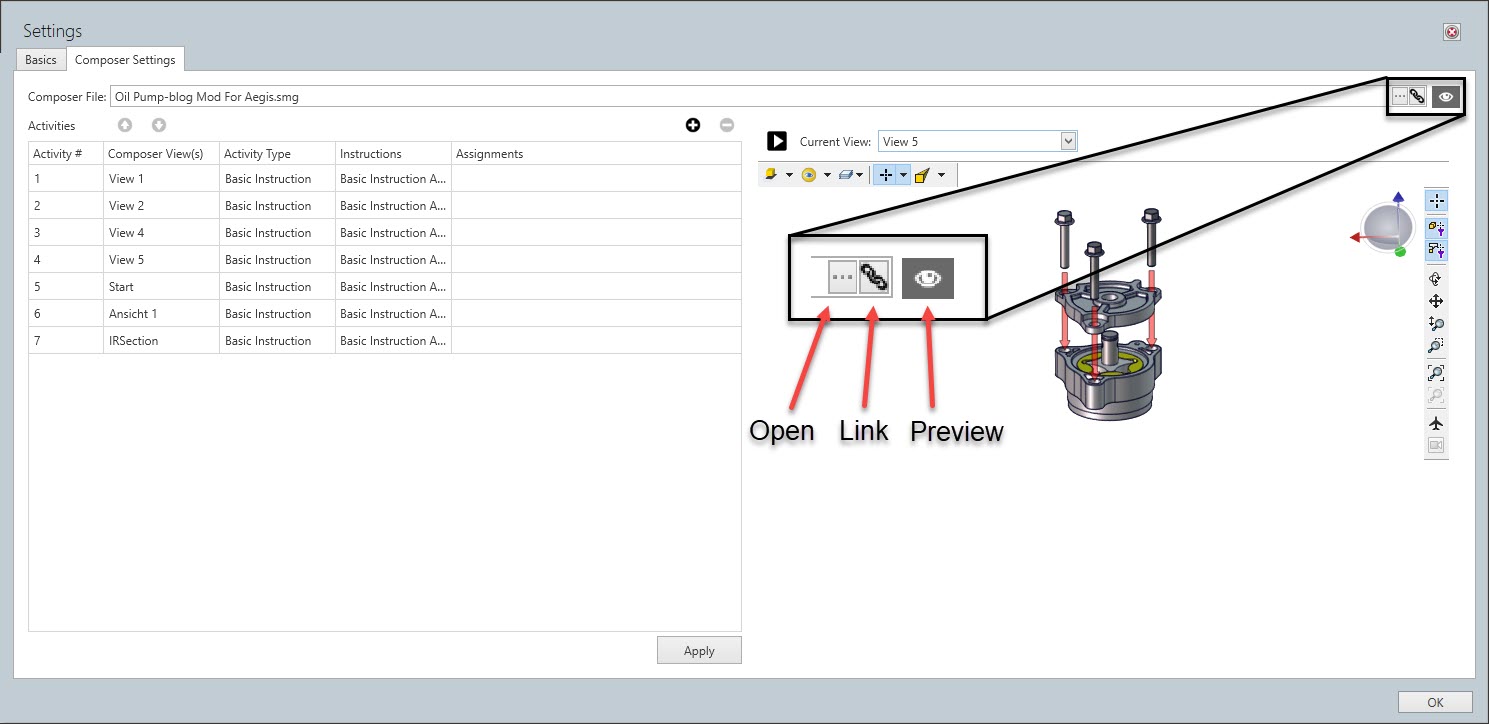
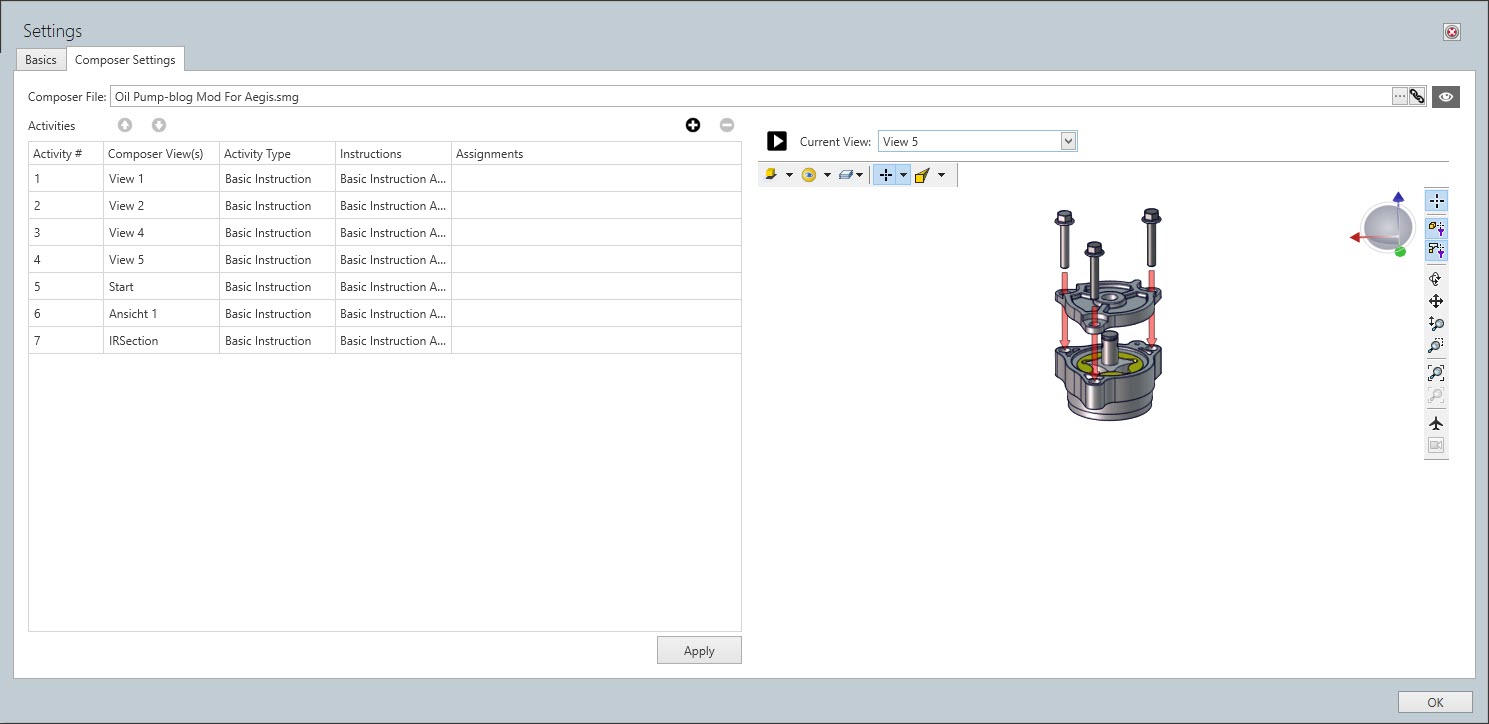
Settings dialog - Composer Settings tab

Option

Description

Composer File

Specifies the Solidworks Composer file for the Composer step.

  • Select the Link To Document button to link to your Composer file (useful for projects still evolving).

  • Select the Browse button (...), then browse to and select the desired Composer file to embed it into the FactoryLogix database. 

    Composer Step Settings


    Once the file is opened, FactoryLogix analyzes the Composer file and automatically creates a Basic Instruction Activity for each distinct Composer view contained in the file. For example, a Composer file created with seven distinct views correlates to seven activities in the Settings dialog for the Composer step.

    Composer Step Settings


  • Use the Preview tool (the eye) in the upper-right corner of the Settings dialog to check the Composer Player file and see which Composer views contain the different portions of the assembly.

    After opening the Composer file, you can group multiple Composer views within a single activity.

  • Use the drop-down in the Composer View(s) column to select each view to be displayed within this activity. After you select/group the desired Composer views for this activity, select OK.

  • Use the Add 

    Add button
     and Remove 
    Remove button
    buttons in the upper-right corner of the Activities table to add a new view to the list in the table or remove a selected view respectively.

Settings dialog - Option Codes tab

Option

Description

Option Codes

Displays a list of available option codes.

Note

Option codes are only used with configurable (CTO) assemblies.

  • Use the Apply Option Codes Apply Option Codes button button to move selected option code(s) to the Assigned Option Codes column.

  • Use the Remove Option Codes Remove Option Codes button button on the right side of the window to move selected assigned option code(s) back to the Option Codes list.

    Option Code Logical Expressions

Note

For details about option codes, see Option codes for configurable assemblies.

Assigned Option Codes

Displays the option codes assigned to this step.

Use Logical Expression

Select the Use Logical Expression Use Logical Expression button button on the right side of the dialog to define option codes for a step in the form of a logical expression (comprised of available option codes plus the logical operators: AND, OR, and NOT, and brackets to identify precedence).

Logical expressions for option codes

JavaScript errors detected

Please note, these errors can depend on your browser setup.

If this problem persists, please contact our support.