When you add a new operation to a process flow, there are multiple ways to configure the operation's parameters, settings, and overall behavior in the process flow.
Log into the NPI client application.
Select Process Engineering > Define Processes, then create a new assembly or assembly revision.
In the Process Definition window, double-click ProcessFlow in the Process tree.
A padlock icon indicates that the process is checked out for editing.
Do one of the following:
Under Current Flow on the right side of the window, select Add> Operation.
Right-click an existing operation in the process flow, then select Add Operation from the menu.
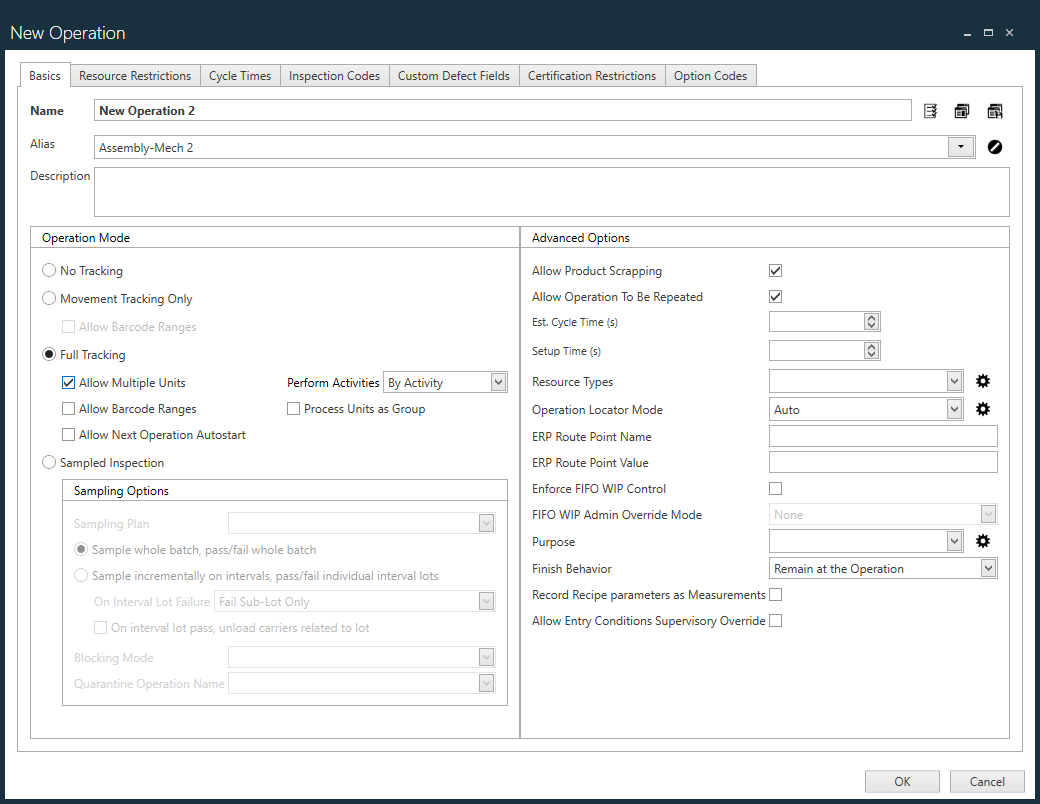
In the New Operation dialog, enter a Name for the operation.
There are multiple tabs with options to help you define an operation: Basics, Resource Restrictions, Cycle Times, Inspection Codes, Custom Defect Fields, Certification Restrictions, and Option Codes. Review the tables following this procedure to understand the options for an operation before making your selections.
Note
Option codes are only used with Configure To Order (CTO) assemblies, so if your assembly in not a CTO assembly, the Option Codes tab won't display. See Option codes for configurable assemblies for more information.
On the Basics tab, enter a Name for the operation. (This is the only required field for an operation.)
Make the desired selections for the operation on each of the five tabs (Basics, Resource Restrictions, Cycle Times, Inspection Codes, and Certification Restrictions).
When you finish making selections in the New Operation dialog, select OK to return to the Process Definition window.
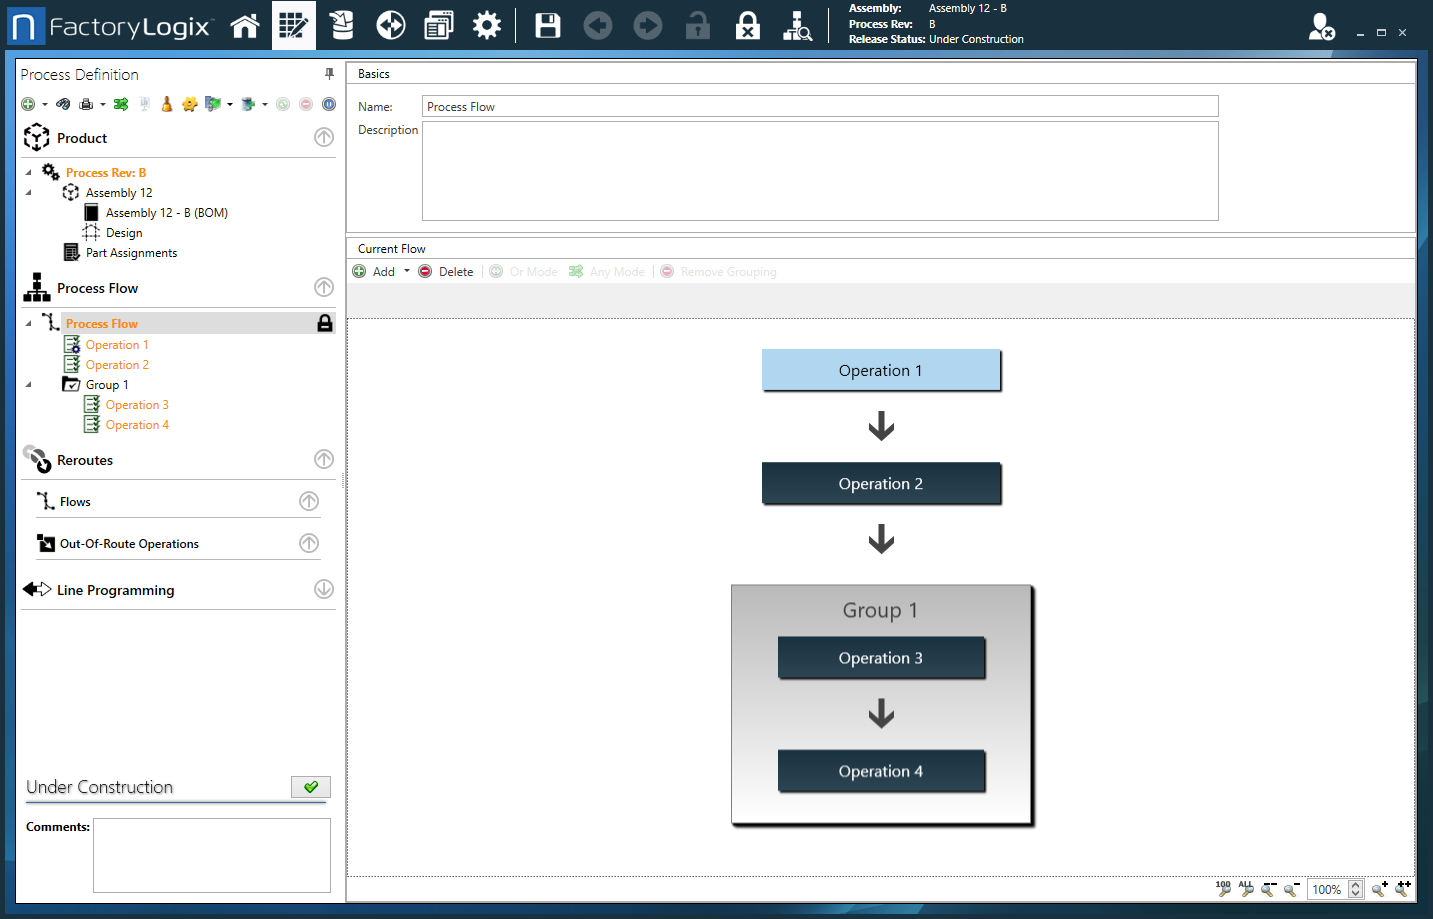
The Current Flow area of the window displays a graphical representation of the process flow with the new operation you added.
(Optional) To rearrange the flow, drag an operation to a new location in the process flow.
Note
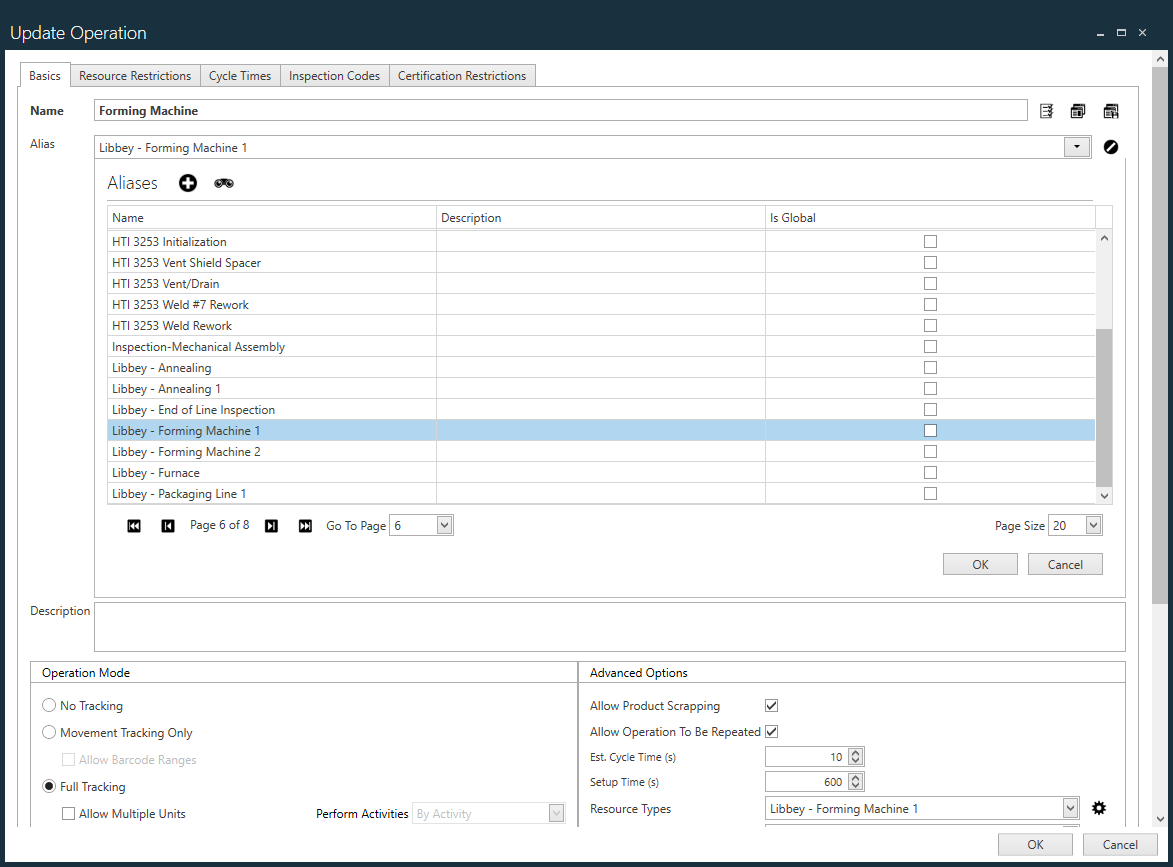
If you exit a new operation and want to edit it later, just double-click Process Flow in the tree to check it out for editing, right-click the operation you want to edit, then select Properties. You'll notice that the title of the New Operation dialog has now changed to Update Operation.
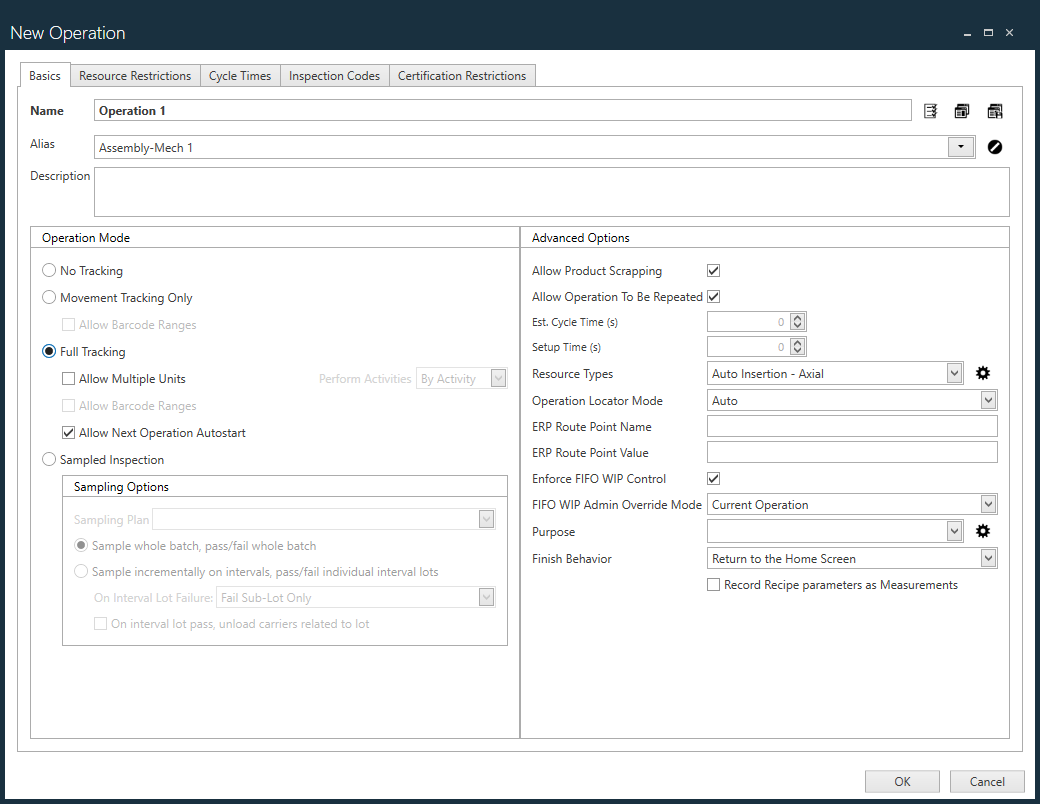
Basics tab
On the Basics tab of the New Operation dialog, you specify essential information about an operation such as its name, tracking mode, and advanced options such as whether the operation can be repeated, FIFO WIP control, and what happens when the operation finishes.
The following table describes the options on the Basics tab of the New Operation dialog.
Option
Description
Name
Specifies the name of the operation. (This is the only required field for an operation.)
Alias
Operation aliasing allows process engineers to group similar operations from one or more process flows for reporting purposes.
For example, several inspection operations such as AOI, manual inspection, and final inspection could all be assigned an Alias of Inspect. Once assigned, reports can be generated against the Inspect alias that takes all three operations into account instead of having to specify each operation manually in the report.
Use the Alias drop-down to select a previously-defined alias, or select the Add Operation Alias button to create a new alias.
Note
Global operation aliases are used to define global operations accessible from Production. If you don't use global operations, you do not need to define any operation aliases as global. If you do use global operations, you need to define these aliases as global and also associate an appropriate Operator Interface template to make the global options available.
Use the Is Global column/option to specify an operation alias as global.
Description
Provides a description of the operation.
Operation Mode
No Tracking - Presents paperless work instructions only (no WIP tracking).
Movement Tracking Only - Presents work instructions and tracking to indicate a product or assembly has passed through the operation. Start/Finish is immediate, so no actual processing time is recorded when you use this mode.
Allow Barcode Ranges lets operators enter a range of serial numbers to allow processing multiple units at once.
Full Tracking - Forces operators on the shop floor to both start and finish a product or assembly as it moves through this operation, providing total touch time at this operation.
Note
Touch time is the total time that a unit is started at an operation and not in a paused state.
Allow Multiple Units - Permits operators to scan more than one assembly into this operation at any one time for simultaneous processing.
Perform Activities by - Specifies whether activities for this operation will be performed By Activity or By Unit.
Perform Activities By Unit allows you to start a WIP transaction for multiple units at the same time while forcing you to pass activities for each unit one at a time. For example, if you enable this option at an operation and start three barcodes there, instead of seeing all three barcodes in the WIP gadget, only a single barcode displays. You only pass activities for this barcode rather than for all three barcodes currently started. After passing all activities for the first barcode, you select the next unit from the WIP gadget and complete the same activities. You would complete activities for the final barcode, then the WIP transaction could be completed.
Allow Barcode Ranges - Permits operators to enter a range of serial numbers allowing processing multiple units simultaneously.
Allow Next Operation Autostart - (This option is for operations with Full Tracking enabled in NPI.) Specifies that the operation following this operation will start automatically. When selected, an operator is able to press a button to complete all units in Production with a Passed status and those same units will be started at the next operation automatically. You configure the behavior of the Finish button in Production.
Sampled Inspection - Sampled inspection is a technique to determine whether a lot should be accepted or rejected on the basis of the number of defective parts found in a random sample taken from the lot. The methodology used to sample depends on the type of analysis being done but may include simple random sampling or systematic sampling.
Sampling Plan - Specifies the sampled inspection plan to use for this operation.
MIL-STD-105E - ANSI/ASQ Z1.4 Sampling Plan - Refers to a United States defense standard that provides procedures and tables for sampling by attributes.
MIL-STD-1916 - Accept-on-Zero (c=0) - MIL-STD-1916 is a United States defense standard that contains Accept On Zero (AOZ) plans for attributes, variables, and continuous sampling.
Squeglia Zero-Based Plan - Refers to a zero-defect sampling plan that is based on an acceptance threshold of c=0. A lot or batch will only be accepted if no non-conforming items are found in the sampled inspection.
Sample whole batch, pass/fail whole batch - When a whole batch is sampled, if any units fail, the entire batch will fail.
Sample incrementally on intervals, pass/fail incrementally on individual interval lots -
On Interval Lot Failure: If an interval lot fails, allows you to select what happens: Fail Sub-Lot Only or Fail Sub-Lot and All Subsequent Units.
On interval lot pass, unload carriers related to lot - When an interval lot passes sampled inspection, specifies that the carriers for that lot will be unloaded.
Allow Product Scrapping - Specifies whether shop floor operators can change a product or assembly status to Scrapped.
Allow Operation To Be Repeated - Affects WIP tracking operations and route enforcement.
By default, a product or assembly may only pass through an operation one time—the next operation defined in the process flow is the only valid operation from a route validity perspective for the product or assembly to be scanned into. This option allows an assembly to be scanned into the specified operation more than once.
Estimated Cycle Time - Specifies the expected/estimated time (in seconds) required to complete this operation.
Reports and real-time dashboards can make use of this information to calculate and display information to operators indicating if they are performing as expected.
Note
Cycle time is the complete time a unit has been at an operation. It begins when the unit is first scanned into an operation and stops when the unit is finished. Pausing the unit does not stop the cycle time count.
Setup Time - Allows process engineers to specify the expected amount of time (in seconds) necessary to set up this operation for a new build.
Resource Types - Allows process engineers to specify the type of resource this operation belongs to for resource planning purposes.
You can add more resources by selecting the Edit Resource Typesbutton to the right of the Resource Types drop-down:
Operation Locator Mode - Defines the side of the board to which an operation should be attributed: Top, Bottom, Auto. The side is determined based on the next logical side for which events aren't yet recorded. These options are used mostly for xLink machine data.
ERP Route Point Name - Used with the xTend Integration FLX-XTD-WIP-01 (WIP Data Export) to tie FactoryLogix operation names to the corresponding ERP route point in your ERP system. Some ERP systems use a simple text name, some use a numeric or alphanumeric value, some use a combination of the two.
ERP Route Point Value - Used with the xTend Integration FLX-XTD-WIP-01 (WIP Data Export) to tie FactoryLogix operation names to the corresponding ERP route point your ERP system. Some ERP systems use a simple text name, some use a numeric or alphanumeric value, some use a combination of the two.
Enforce FIFO WIP Control - When selected, enforces First-In-First-Out WIP control of the operation.
FIFO WIP Admin Override Mode - Controls override permissions for First-In-First-Out WIP control of an operation.
None - Prevents any overrides from occurring. Single Transaction - Allows an override of a single transaction. Current Operation - Allows an override of the current operation only.
Purpose - Allows you to create a new reason code or select an existing reason code for this operation. (See Add, delete, and manage reason codes for more information.)
Finish Behavior - Specifies what happens when this operation is finished.
Record Recipe parameters as Measurements - Saves recipe parameters in the FactoryLogix database. You can view these measurements in the Trace window in the Production client application or in the Test and Measurement data source in DataMiner.
Resource Restrictions tab
The Resource Restrictions tab shows the factory resources that are restricted for this operation. For example, an operation may require one or more specific factory areas or specific workstations or computers in order to be completed. (See also Create a factory and set up factory resources.)
To restrict a factory resource for this operation, select the resource on the left side of the window, select the Send to Operation button to move the resource to the Restricted column, then select OK.
Use the Remove From Operation button to remove a restricted resource from the list.
After you make your selections, select OK to return to the Process Definition window.
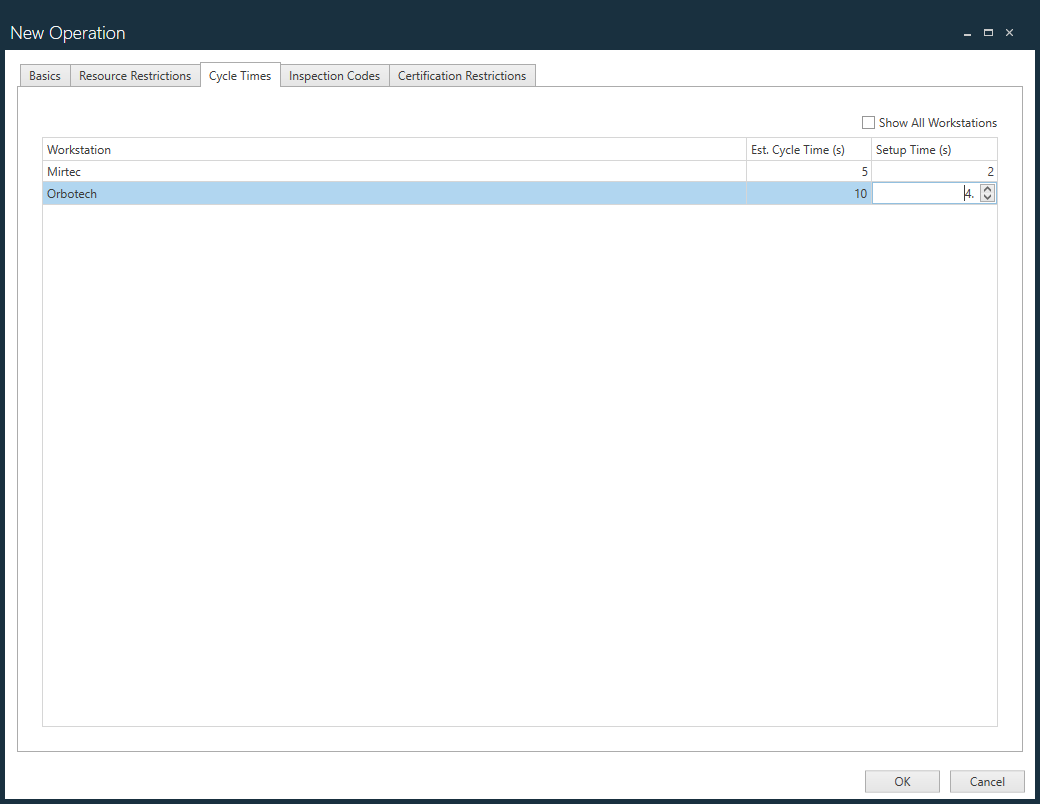
Cycle Times tab
The Cycle Times tab displays the estimated cycle time for an operation to be completed and the estimated setup time for the operation (in seconds). These estimates help in planning the duration of each operation and the overall process duration.
Use the Est Cycle Time (s) column to specify the estimated cycle time for a workstation.
Note
Cycle time is the complete time a unit has been at an operation. It begins when the unit is first scanned into an operation and stops when the unit is finished. Pausing the unit does not stop the cycle time count.
Use the Setup Time (s) column to enter the setup time for a workstation.
(Optional) To view cycle times for all workstations, select the Show All Workstations check box.
Select OK to save your changes and return to the Process Definition window.
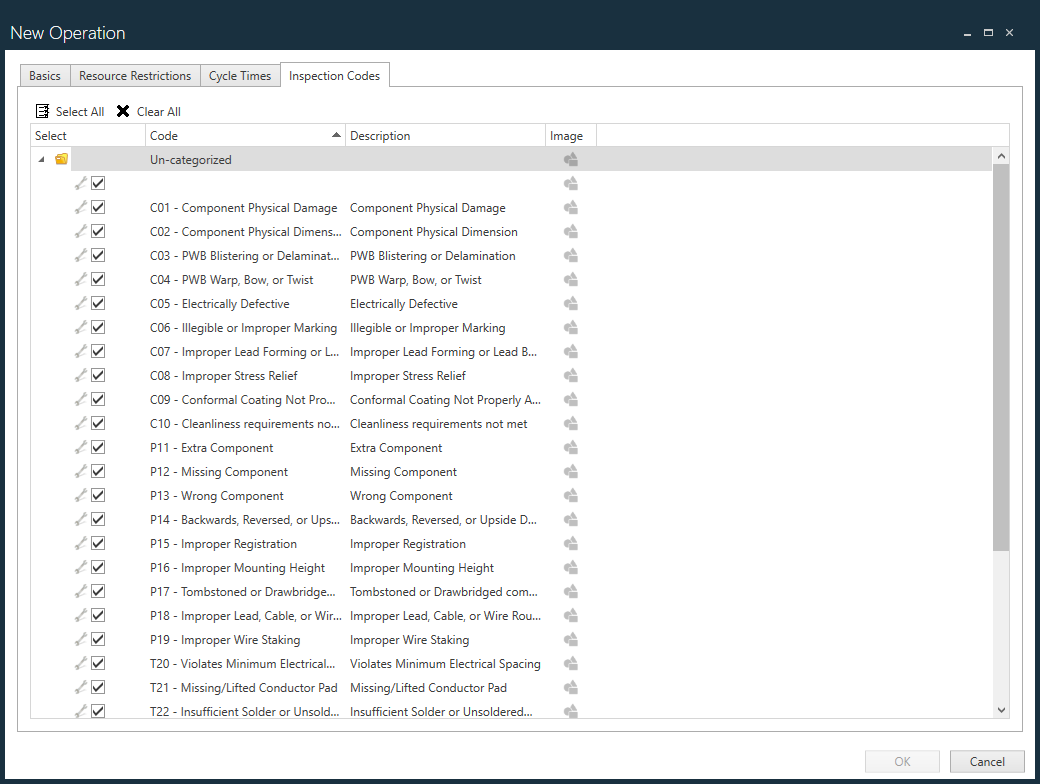
Inspection Codes tab
The Inspection Codes tab allows you to select the inspection codes to be used for the current operation. (See Create and manage inspection codes for details about how to create and manage inspection codes.)
Use the check boxes on the left side of the window to select the inspection codes you want to apply to the current process.
(Optional) Select the Select All icon to select all available inspection codes.
(Optional) Select the Clear Allicon to deselect all selected inspection codes.
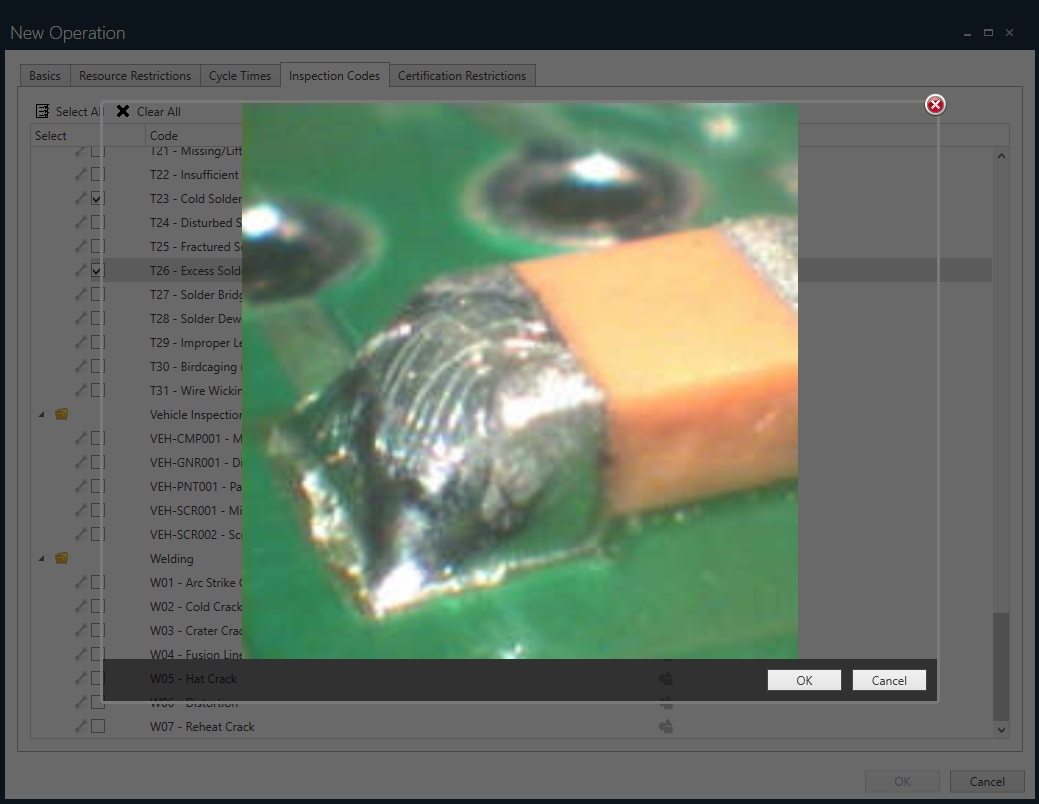
If an inspection code has an accompanying image to aid the inspection process, select the icon in the Image column next to the inspection code to view the image.
After you select all applicable inspection codes for the current operation, select OK.
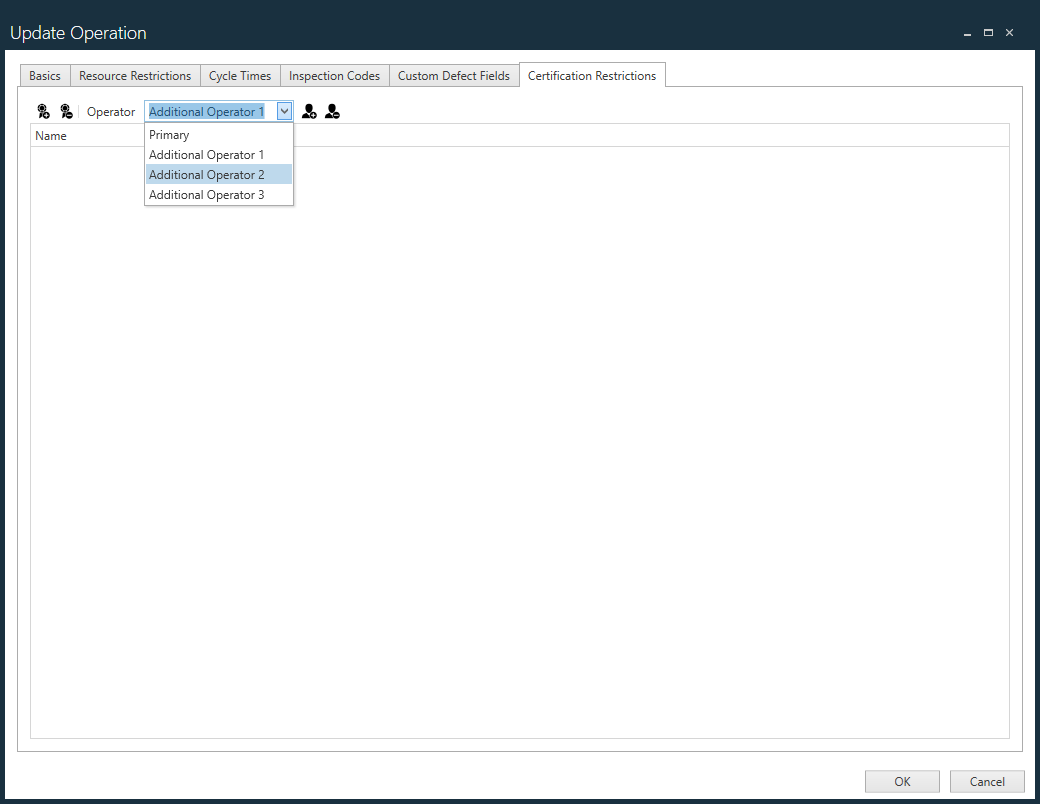
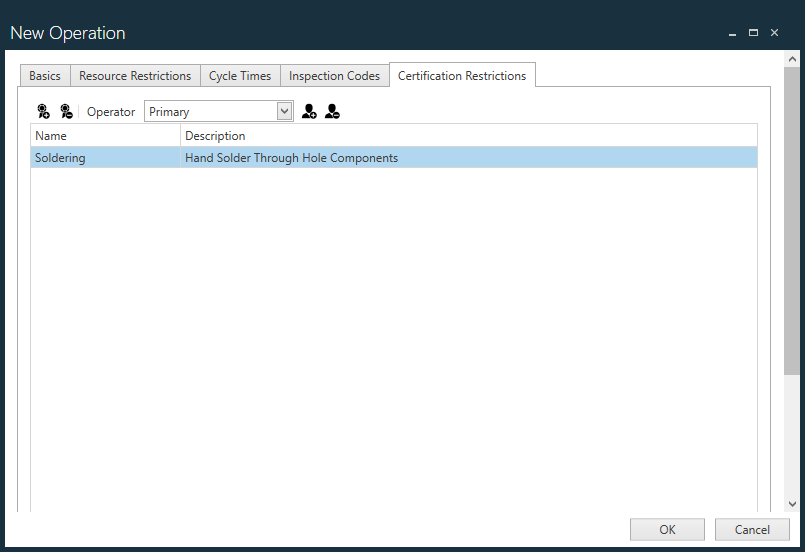
Certification Restrictions tab
The Certification Restrictions tab allows administrators to specify whether one or more additional operators are required to sign in when the operation is in process. Different certification restrictions can be specified for each operator. If you specify a certification restriction, only those operators with the specified certification may process assemblies at the selected operation.
In Production, the Primary operator opens an operation, but if additional operators are defined for that operation, the system prompts those operators to sign in. After all additional operator sign-ins are entered and accepted, the Primary operator (the operator currently logged into FactoryLogix) can then start working on units. Each additional operator is validated by correctly entering a FactoryLogix user name and password and they must have the required certifications and those certifications must be valid. All operators (primary or additional) must have all of the required certifications. For example, an operation requiring Certification A and Certification B means that the operator must have both certifications, not just either of the two.
Note
The rights to manage certification restrictions are controlled by the FactoryLogix administrator in the Users and Roles area of the NPI client application. See Select default user role permissions for more information.
Note
You can add certifications to individual user profiles in NPI > System Configuration > Users and Roles. See Create a user for more information.
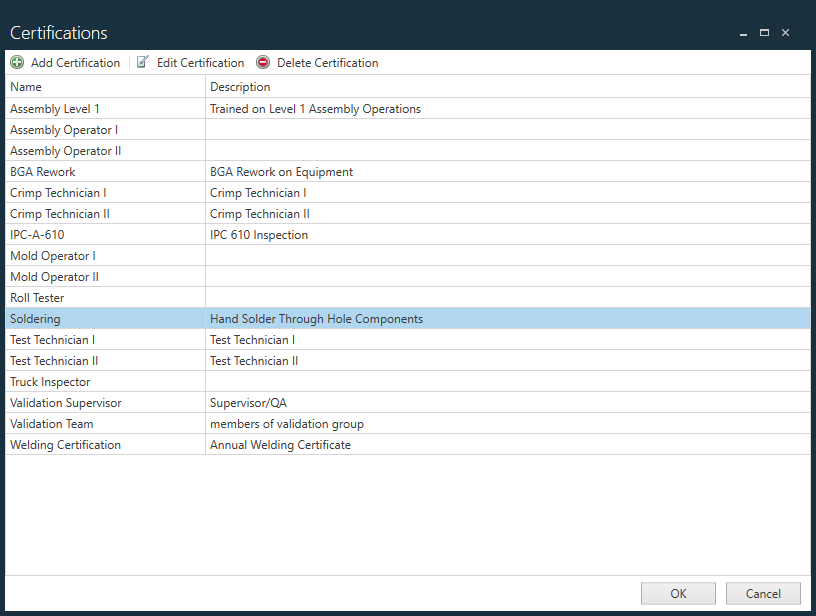
Select the Add Certification button.
In the Certifications dialog, select one or more certifications required for this operation, then select OK.
Tip
Use Ctrl+click or Shift+click to select multiple certifications for an operation.
The certification required for the Primary operator is displayed.
To add additional operators to this operation, select the Add Additional Operator button.
Each additional operator is added using sequential numbering (Additional Operator 1, Additional Operator 2, and so on).
To remove an additional operator, select the operator name from the Operator drop-down (Additional Operator 3, for example), then select the RemoveAdditional Operator button.
Note
You cannot remove the Primary operator.
To add one or more certifications for an additional operator, select the operator name from the Operator drop-down, select the Add Certification button, select the desired certifications for this operation, then select OK.
Add, delete, and edit certifications
While working on the Certification Restrictions tab, you can also manage certifications globally.
Important!
You must have administrator rights to add, delete, or edit certifications. (If you don't have the appropriate rights, you won't see the Certifications tab.)
Any certifications you add, delete, or edit in the Certifications dialog will be reflected in the NPI > System Configuration > Users and Roles area where certifications are assigned to individual users/operators by the FactoryLogix administrator. For example, if you delete a certification, it will be removed from all users it is currently assigned to.
From the New Operation dialog, select the Add Certificationbutton.
In the Certifications dialog, select the Add Certification button to define a new certification.
Enter a Name and Description for the new certification, select Save, then select OK.
To delete a selected certification, select the Delete Certification button, then select Yes when prompted to delete the certification.
To edit a selected certification, select the Edit Certificationbutton.
Make the necessary changes to the Name and/or Description of the certification, select Save, then select OK.
Note
See the Additional Operator Automatic Logout Time option in the FactoryLogix global options topic (Production Portal) for information about setting the logout time for operators.
 > Define Processes, then create a new assembly or assembly revision.
 indicates that the process is checked out for editing.
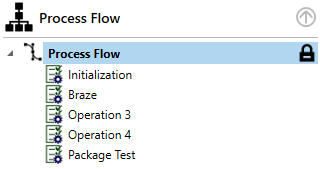
 > Operation.
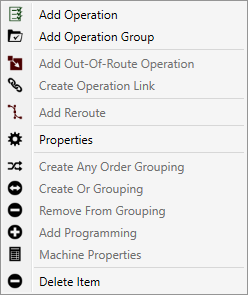


 button to remove a restricted resource from the list.
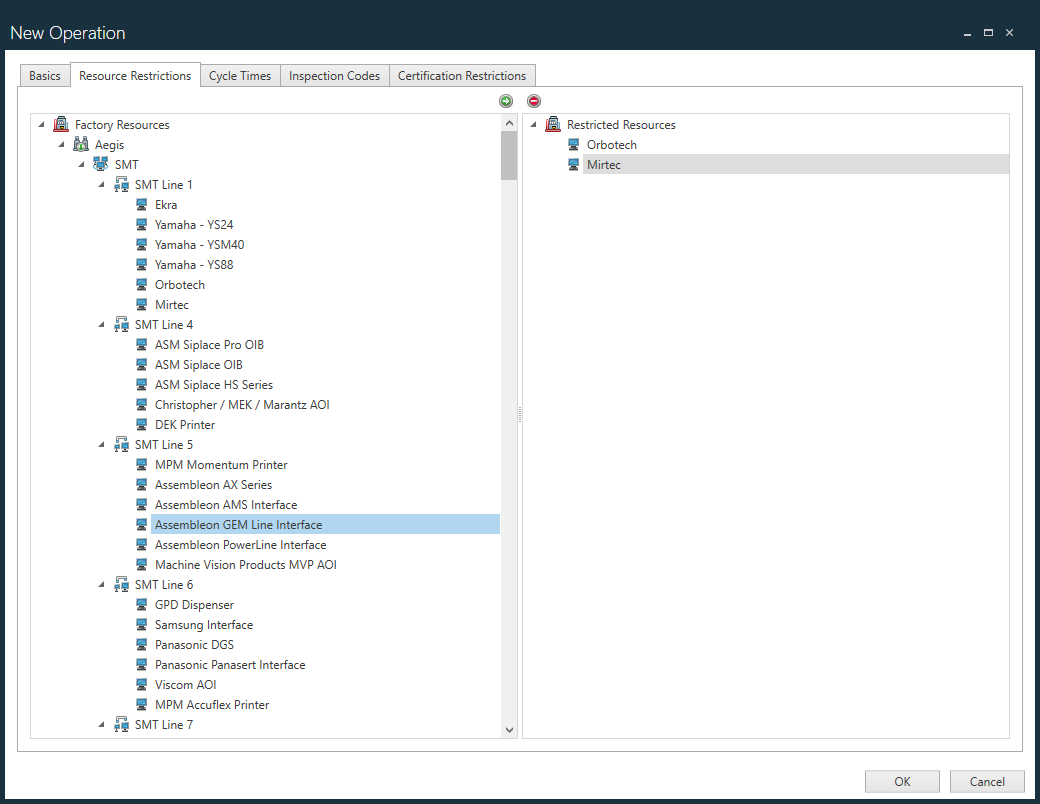
 icon to select all available inspection codes.
 icon to deselect all selected inspection codes.
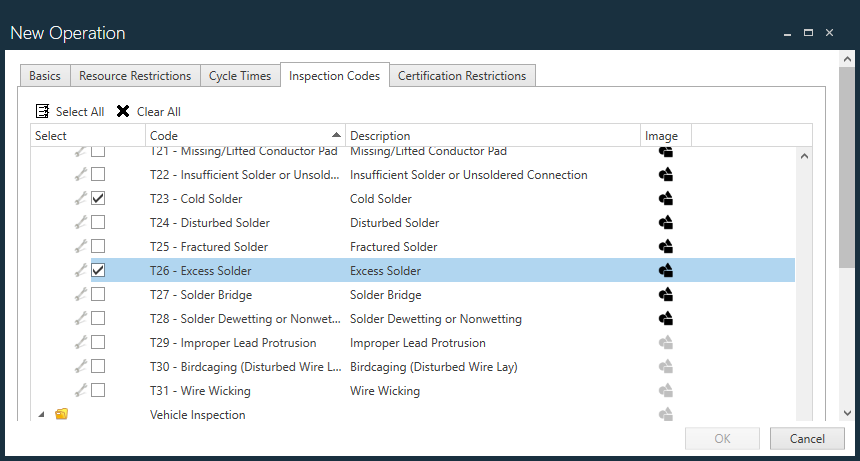

 button.
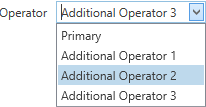
 button.
 button to define a new certification.
 button, then select Yes when prompted to delete the certification.
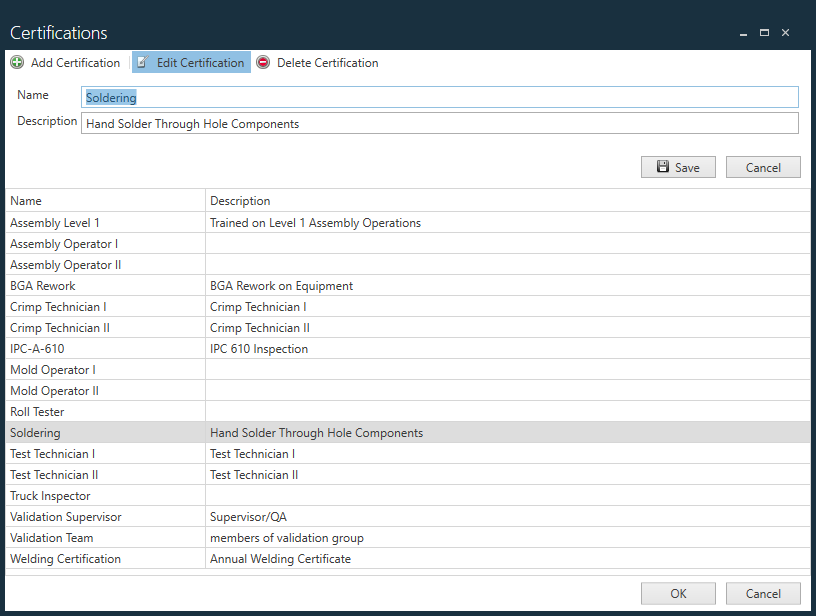
 button.