Create a color coded, guided inspection, or first article inspection step
Note
Wizard-driven steps/work instructions are only available for new operations that don't yet have any steps or activities. If an operation already has steps and/or activities, you can select a step type using the Add ![]() button under Step List in the NPI Process tree.
button under Step List in the NPI Process tree.
Log into the NPI client application.

On the right side of the window, select one of the following:
Create color coded work instruction(s)
This wizard helps you add a Color Coded step to a new operation. A Color Coded Step automates the color coding of parts to be placed or inspected and is typically used in PCB (electronics) manufacturing.Create guided inspection work instruction
This wizard helps you add a Color Coded step to a new operation and the activities necessary to guide the inspection process by assigning a single part number or reference designator per activity.Create first article inspection work instruction
The Create first article inspection work instruction option is the same as the Create guided inspection work instruction, but automatically sets the step frequency to once at the start of the batch to enable a First Article Inspection function on the shop floor.
The wizard displays and the Setup/Color Coding options are visible on the right side of the page.
Select an operator interface template from the User Interface drop-down. (See Operator Interface templates for more information.)
Under Color Coding Options, select the desired active work instruction template from the Template drop-down, then select the Next button. (See Create an Active Work Instruction template for more information.)
Under Color Coding, select the desired color palette for this step from the Color Palette drop-down to use for coloring parts.
Select the Edit Color Palettes
 button to open the color palette editor.
 Select a color palette from the Palette Chooser drop-down.
To add, edit, or delete a color in the selected palette, select a color, then use the Add Color
 , Edit Color
  , or Delete Color
  button to make the desired changes.
Tip
You can save custom color palettes for later use which can save you valuable time when creating future process definitions containing color coded steps.

Tip
Use the buttons above the Palette Chooser drop-down to add a new color palette, duplicate an existing color palette, or delete the currently selected palette.
To change the name of a color palette, select the Change Palette Name button to the right of the Palette Chooser drop-down, enter a new name for the palette, then select OK.
The Look Behind feature is typically used in manual assembly operations where an assembler is shown the parts placed by the previous operator so that their work can be verified prior to the performing their own tasks. Parts placed by the previous operator are color-coded/highlighted using a pre-selected Look Behind Color.Use the Look Behind drop-down to select the completed step or activity the operator should review before performing this step.
Use the Look Behind Color drop-down the specify the color to use for the Look Behind step or activity.
Use the Show Look Behind drop-down to select the activities that will display the selected Look Behind Color:
First Activity - The selected Look Behind Color displays only for the first activity.
Last Activity - The selected Look Behind Color displays only for the last activity.
All Activities - The selected Look Behind Color displays for all activities.
Select the Next button at the bottom of the page to move to the Activity Splitting page where you can auto-generate activities for this step and specify how the activities will be handled.
Activity splitting options for steps let you auto-generate activities and specify how parts are grouped when more than one item is assigned to a step or activity (items can be grouped by part number or by reference designator). Activity Splitting options also allow you to auto-generate activities based on either the whole board/panel or by dividing the board/panel into a customer-defined number of regions using a custom window size.
The Activity Splitting wizard page lets you define or limit the number of parts to be displayed on each page. The human eye can typically see approximately 10 different colors at any given time, so we recommend limiting the Max Number of Items per Activity to no more than 10.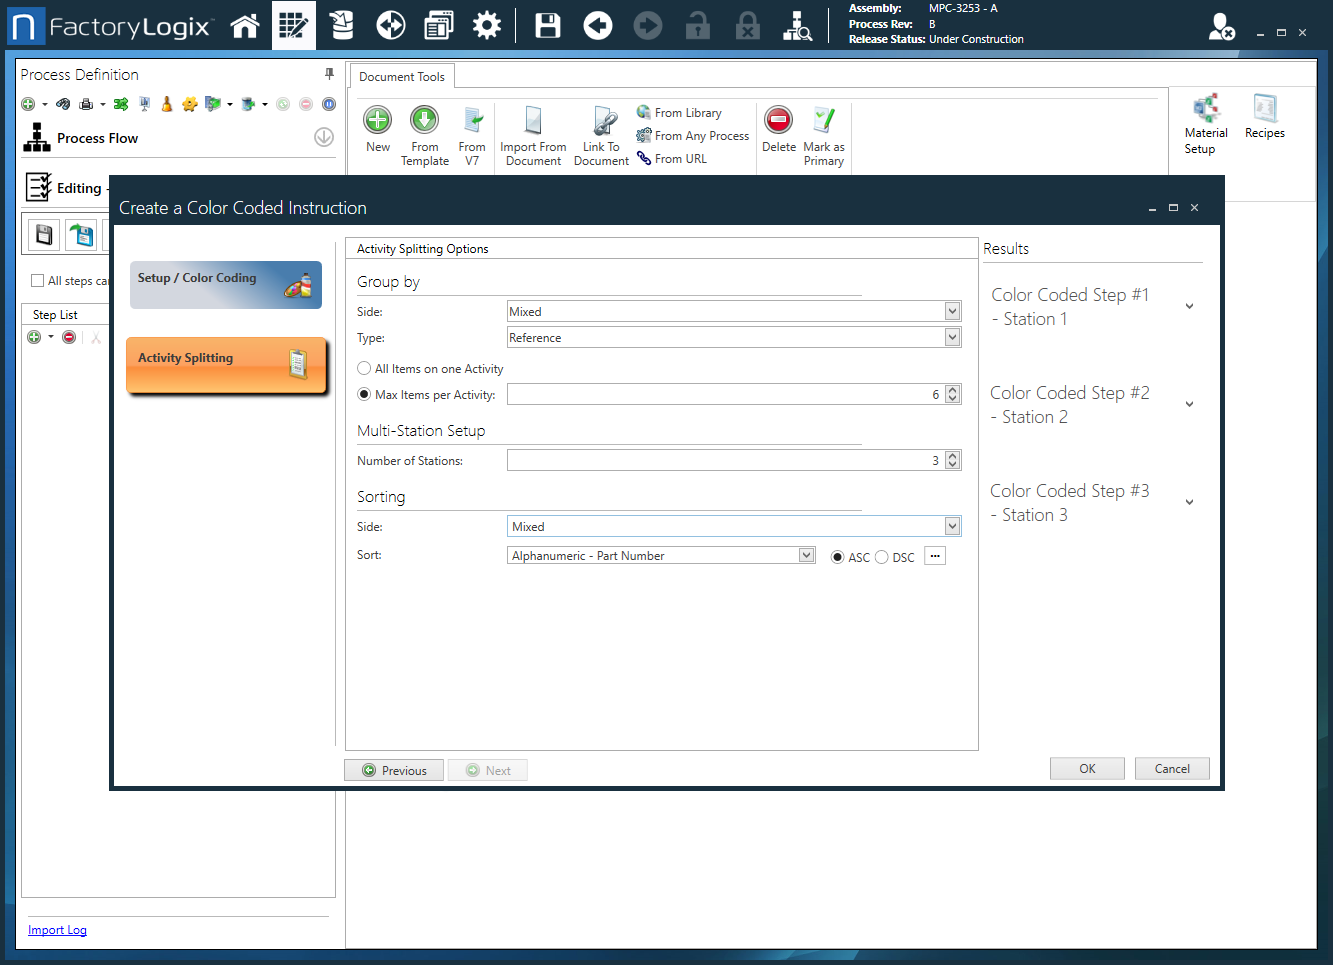
Next you'll specify how parts are grouped when more than one item is assigned to a step or activity. Items can be grouped by part number or by reference designator.Under Group by, select the Side of the part to group activities by: Mixed, Top Bottom, or Bottom Top.
Under Group by, select the Type of grouping: by Part Number or by Reference designator.
Select one of the following to define or limit the number of parts displayed on each page:
All Items on one Activity - Creates a single activity with all assigned parts listed.
Max Items per Activity - Facilitates large numbers of items (for example, groups of like part numbers or references based on the grouping method specified in Steps 14 and 15) by setting the maximum quantity of items per activity. The smaller the number, the more activities are created. As the number increases, activities are created automatically under the Results section, including a preview of how the activities will be dispersed.
Under Multi-Station Setup, select the Number of Stations where grouped parts will be split into multiple steps.
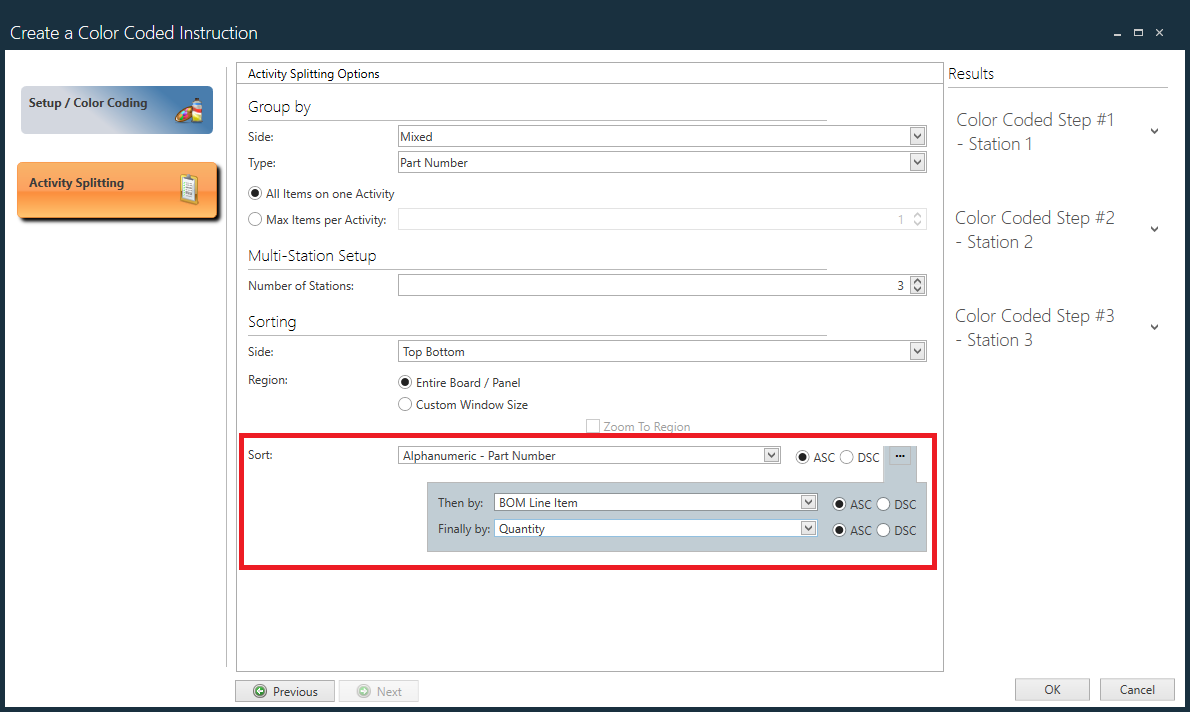
The Sorting options allow you to auto-generate the activities based on either the whole board/panel or by dividing the whole board/panel into a customer-defined number of regions using a custom window size.Under Sorting, select the Side of the assigned parts with regard to board side and the pattern in which the parts are divided in multi-station configurations: Mixed, Top Bottom, or Bottom Top.
Next to the Region option, select one of the following:
Entire Board/Panel - Activities are auto-generated based on the whole board/panel. In Production, the ECAD viewer zoom is calculated to optimize the display of all the footprints associated with the activity.
Custom Window Size - Activities are auto-generated by dividing the whole board/panel into a customer-defined number of regions using a custom window size you define. In Production, the ECAD viewer will zoom to show the region of the board using the regions you specify.
Select the ellipses (...), then use the controls to define a custom window size (X Axis and Y Axis), and Start Corner and Direction for activities.
Select the Adjust Independently check box to adjust each axis independently. (When the check box is unselected, changing one axis automatically changes the other axis to the same value.)

Select Zoom To Region to determine how any ECAD viewer associated with the work instruction will behave and determine the board view presented to the operator in Production.
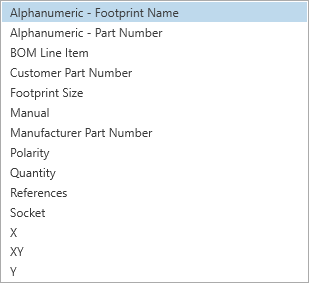
Use the Sort drop-down to select how you want to sort the parts listed for each activity (primary sorting).
Note the results on the right side of the page under Results showing the number of activities that will be created to accommodate the settings you selected for activity splitting.Use the ASC (Ascending) and DSC (Descending) buttons to select the sort order for the parts listed for each activity.
Select More Sort Options (...) to the right of the Sort drop-down to display two additional sorting options. (These options also have ASC and DSC sort order options.)
When you're finished making selections for activity splitting, select OK.
FactoryLogix generates the appropriate step with one or more basic instruction activities based on the settings you specified. The active work instruction template you specified is associated with each activity.