Create a project
Project administrators are typically responsible for creating projects.
Log into the NPI client application.
Select Process Engineering
 > Schedule Projects to display the Projects window.
To the right of Active Projects, select the Add Project
 button.
Enter a Project Name.
If applicable, select the customer this project will be created for from the Customer drop-down.
Enter a Description of the project you are requesting.
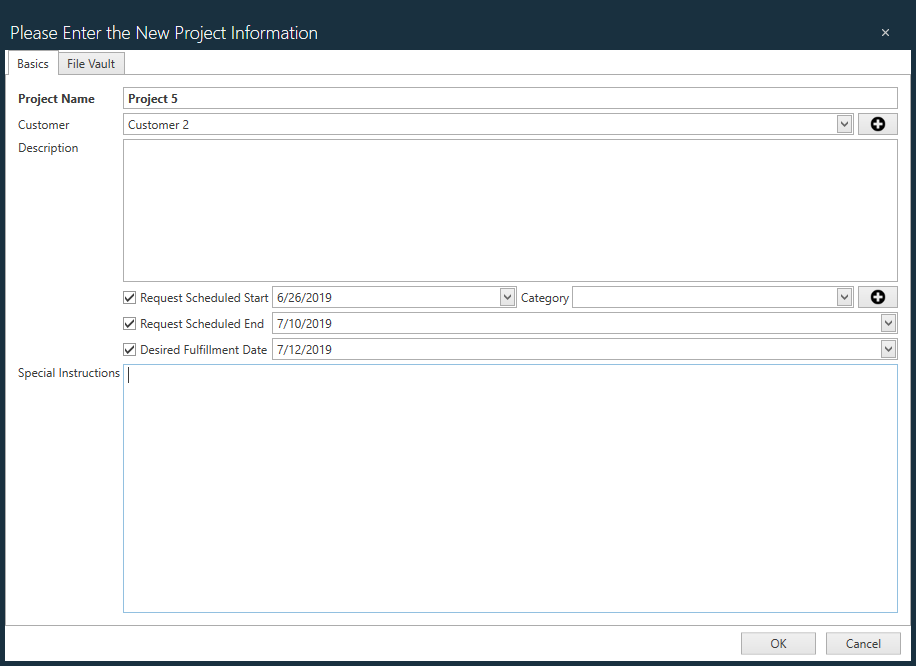
To enter a start date for the project, turn on the Request Scheduled Start check box, then use the drop-down to select a project start date from the calendar.
To enter an end date for the project, turn on the Request Scheduled End check box, then use the drop-down to select a project end date from the calendar.
To specify a fulfillment (ship) date, turn on the Desired Fulfillment Date check box, then use the drop-down to select a fulfillment date from the calendar.
If this project requires any special instructions, enter the details in the Special Instructions field.
To import files or folders containing project-related information to the project request, select the File Vault tab.
Select the Add Files
button, locate and select the file or folder you want to import into the project request, then select OK.
The file or folder you selected is imported into the project.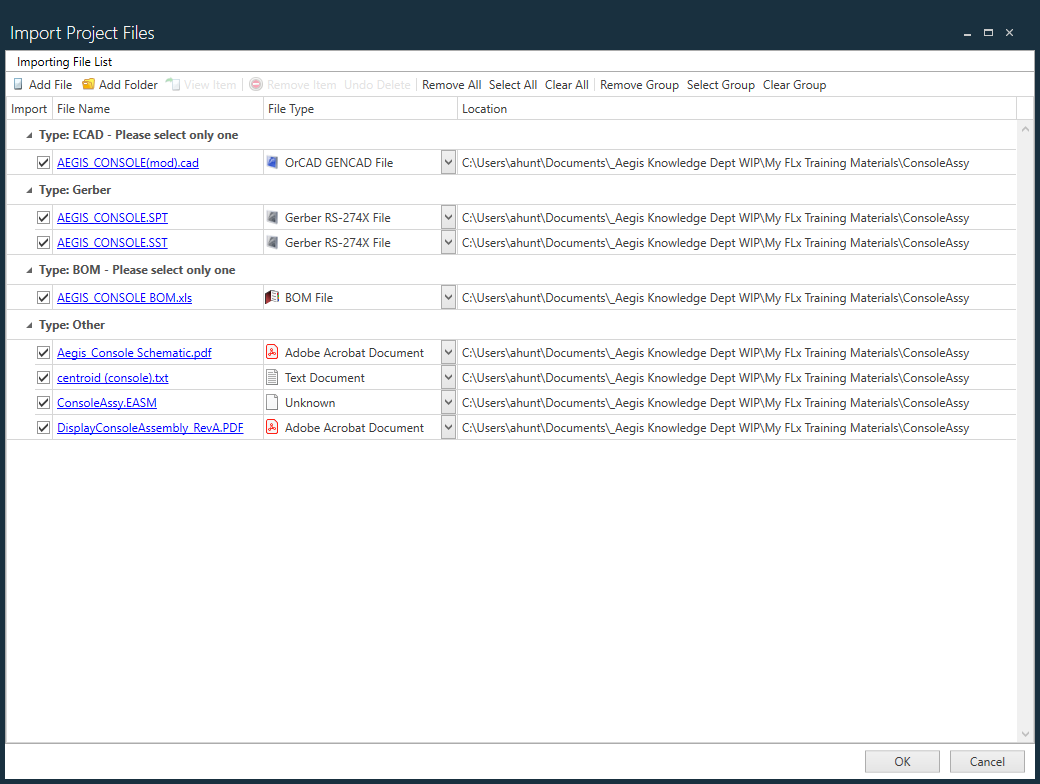
Select OK to finish the import.
The new project displays in the Active Projects list in the window.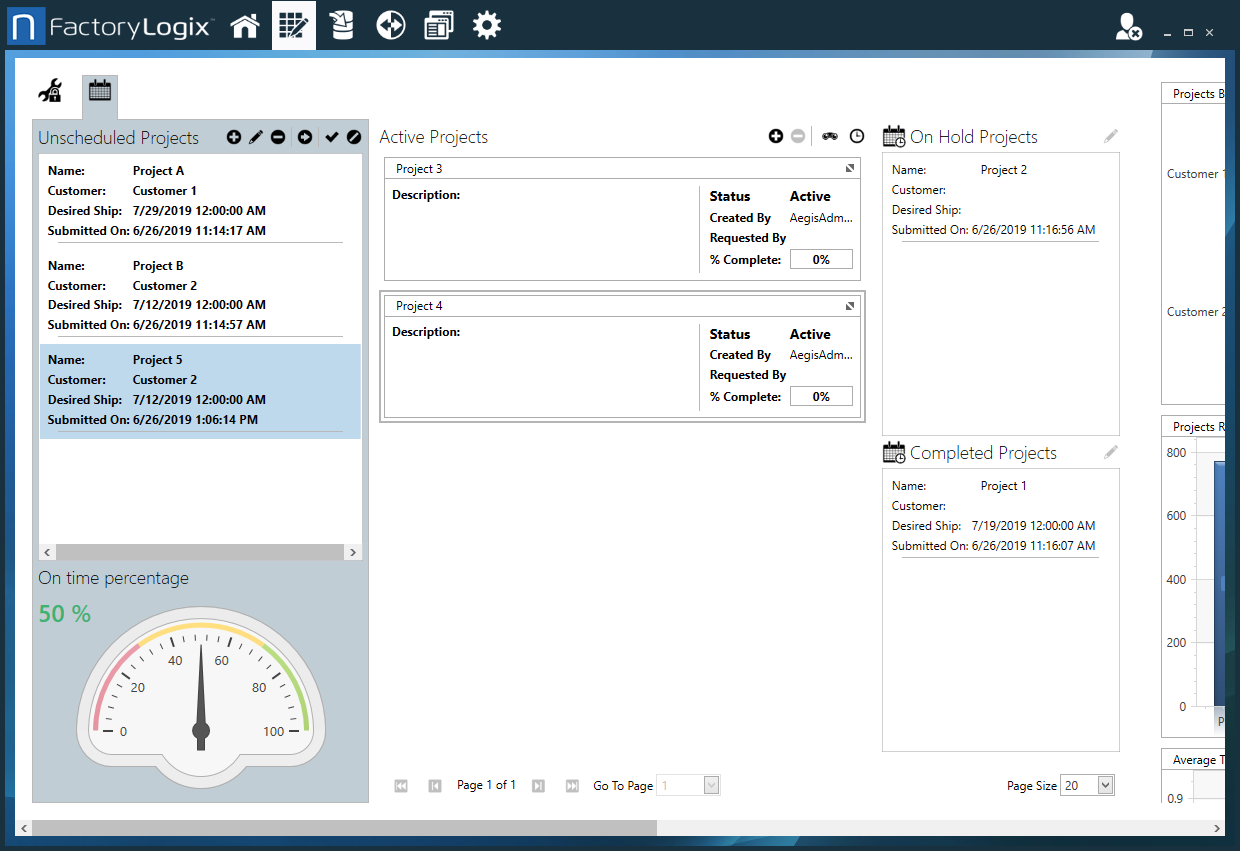
Select the icon in the upper-right corner of the new project to expand the project and view project details.
