Create a receiving process
Receiving processes in FactoryLogix are similar to production process flows; engineers define the flow of materials as they are received into the factory.
Receiving processes may be simple, such as validating quantities and assigning Unique Identifiers (UIDs), or complex, with sampled inspection and incoming materials testing. In addition, you can configure receiving processes to label first (similar to a serialized batch), or label last (similar to a non-serialized batch). The difference is whether you want to apply UID labels to each material instance at the beginning or end of the receiving process.
Tip
When you use a label first process, users apply labels to incoming materials that might fail inspection and need to be sent back to the vendor. A label last strategy ensures that manpower isn't spent labeling materials unnecessarily.
Create a new receiving process
Log into the NPI client application.
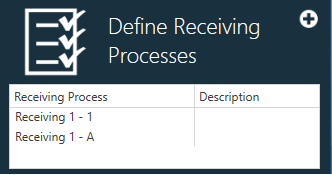
Select Logistics
 > Define Receiving Processes.
Select the New Process
 button in the Please select a Receiving Process window, then enter a Process Name and Process Revision for the new receiving process.
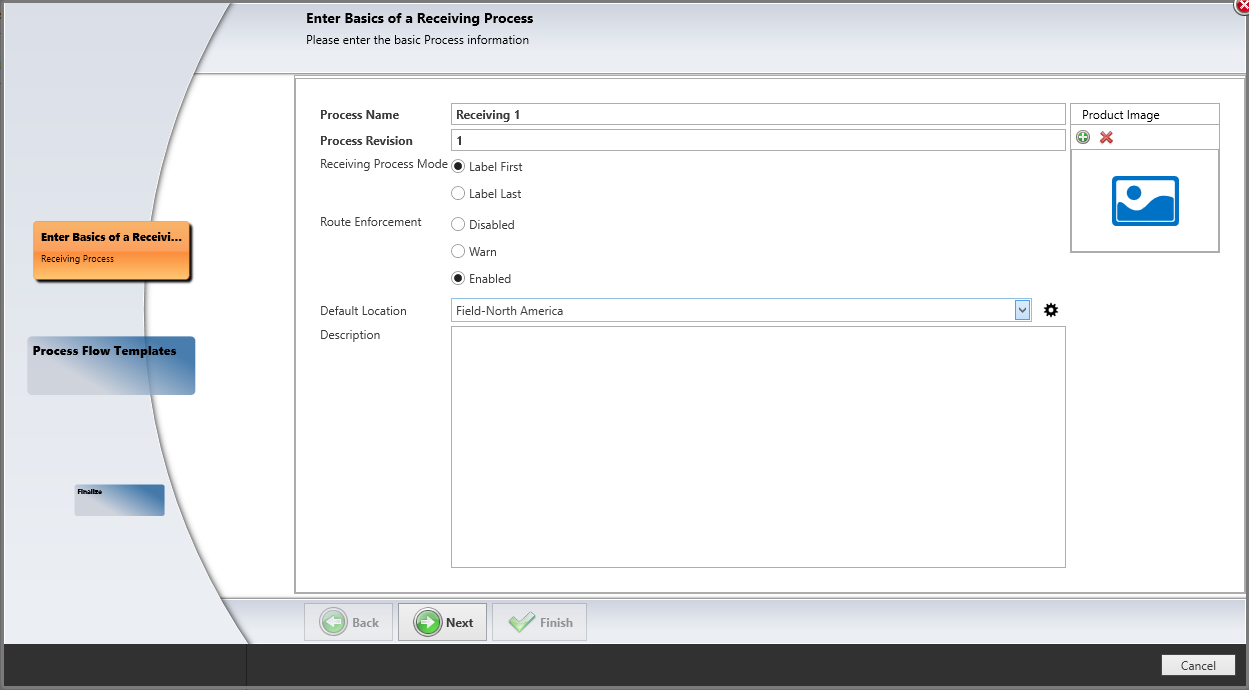
Select a Mode for this Receiving Process: Label First or Label Last.
Leave Route Enforcement set to the default value of Enabled.
Use the Location drop-down to select a location for the receiving process, then select Next.
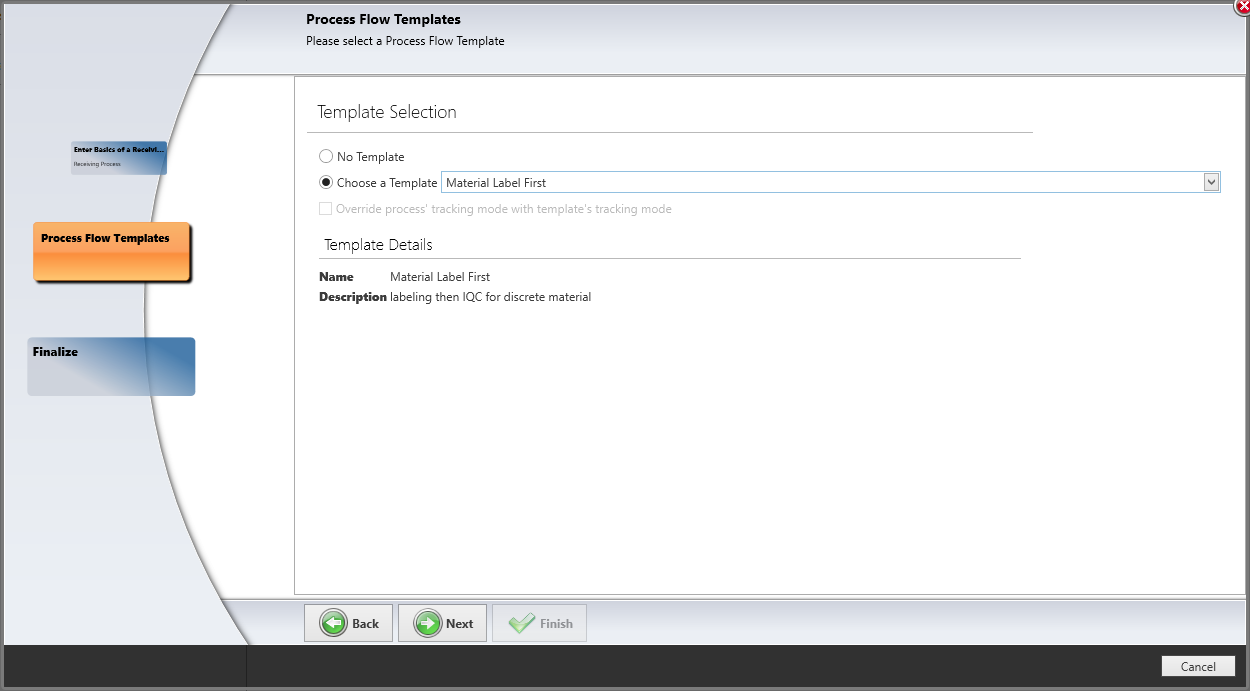
On the Process Flow Templates page, you can create the new receiving process from an existing template (if one exists) or select No Template, then select Next.
On the Finalize page, you can change options for the receiving process if desired, then select Finish.
Now you're ready to add operations, steps, and activities to the receiving process.
Add operations, steps, and activities to a receiving process
Similar to creating a manufacturing process flow, you can add operations, steps, and activities to a receiving process. In this topic, you'll add an Incoming Quality Control (IQC) operation, then define the steps and activities that specify the actual tasks factory operators need to perform to receive materials into stock.
Note
In a Label First receiving process, the first operation should be Receiving and Labeling. Much like the Initialization operation in a manufacturing process, this is a special type of operation to introduce new items into the FactoryLogix database. The operation tracking mode isn't very important for a labeling operation.
In a Label Last receiving process, the Labeling operation would be the last operation in the process flow, often preceded by an Inspection operation (Sampled Inspection, for example) using a sampling plan.
Log into the NPI client application.
Select Logistics
 > Define Receiving Processes, then double-click an existing receiving process to open it in the Receiving Process window.
Select the Add
 button, then select Operation.
For this example, a Label Last process is created, so the first Operation will be IQC (Incoming Quality Control).On the Basics tab, enter the name IQC for the first operation.
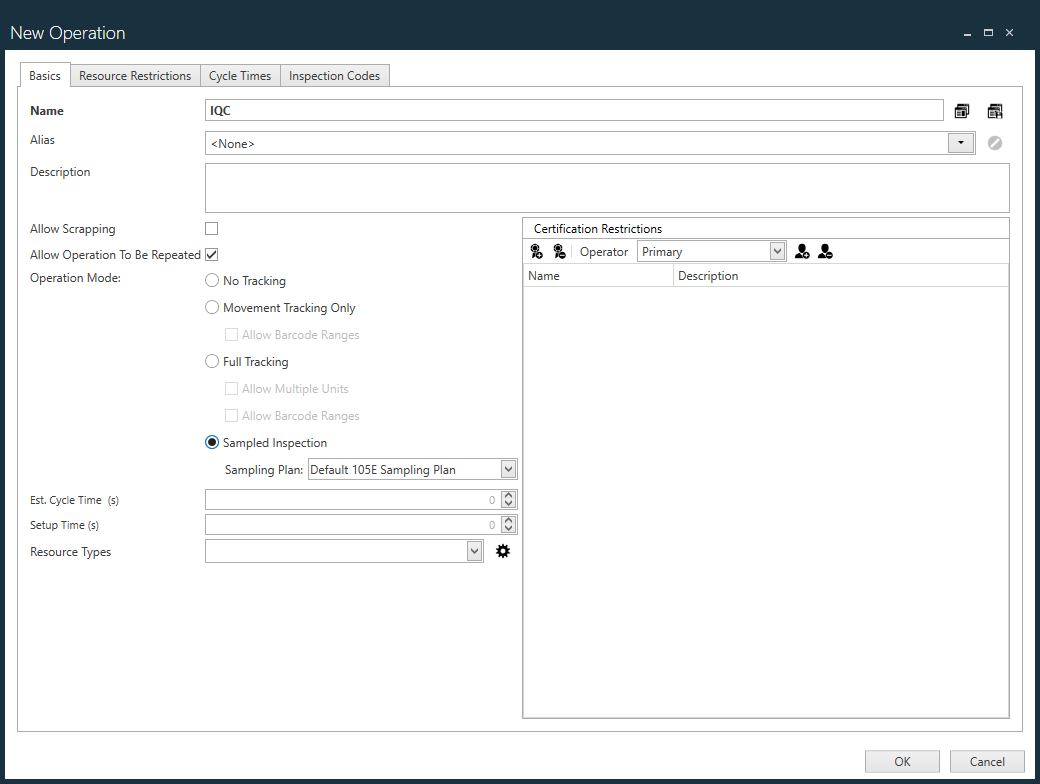
Select Sampled Inspection for the Operation Mode.
Select Default 105E Sampling Plan from the Sampling Plan drop-down, then select OK.
This sampling plan will appear in the drop-down only if you created it previously in the Sampling Plans window (NPI Templates and Standards area). See Add a new quality sampling plan for more information.
The operation tracking mode is not important for labeling. In a label last scenario, the labeling operation is the final operation in the overall flow, often preceded by some form of inspection operation such as a sampled inspection using a sampling plan.
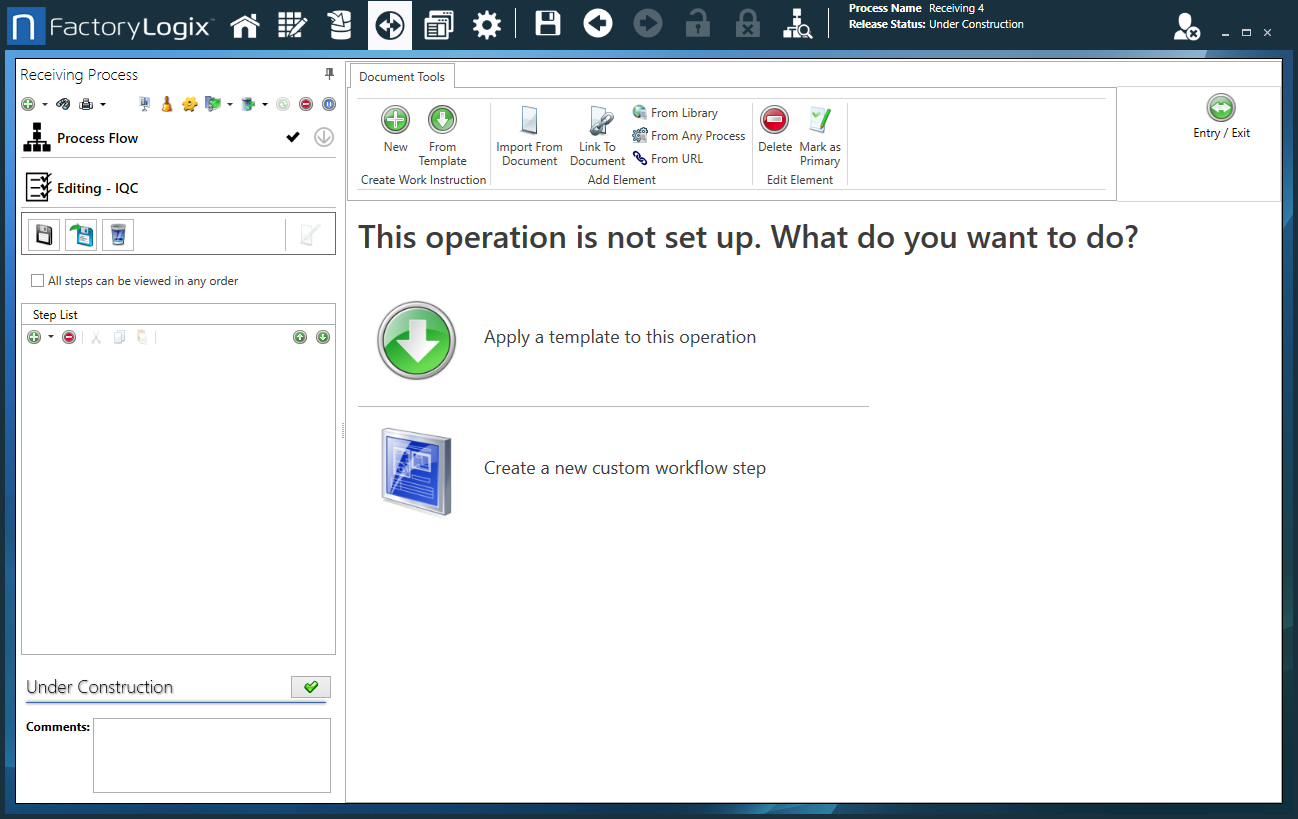
Define steps and activities to guide your receiving process just as you would for a production process flow. (See Process flows for details about how to add steps and activities.)
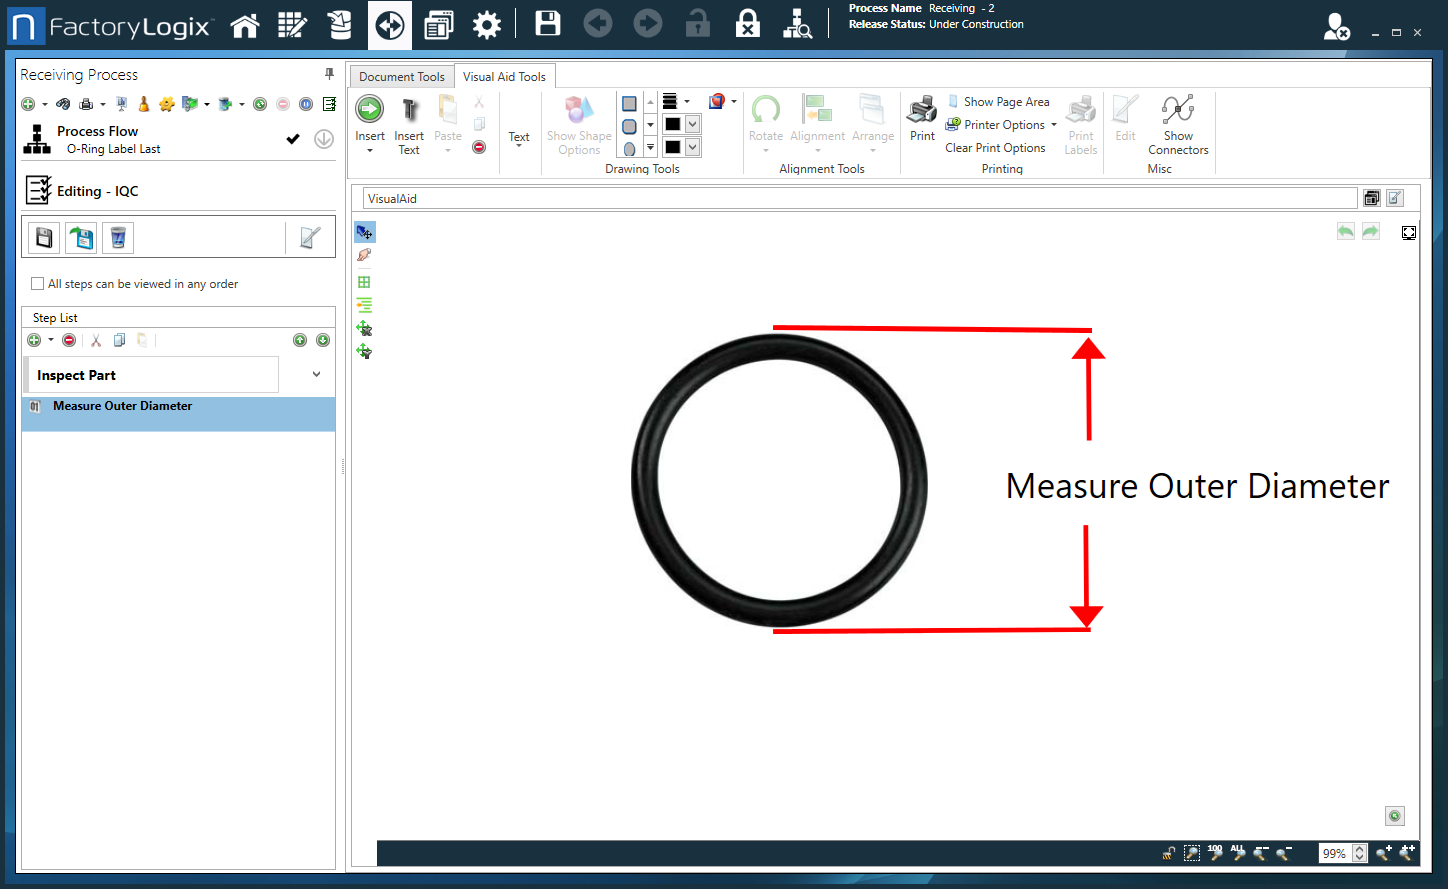
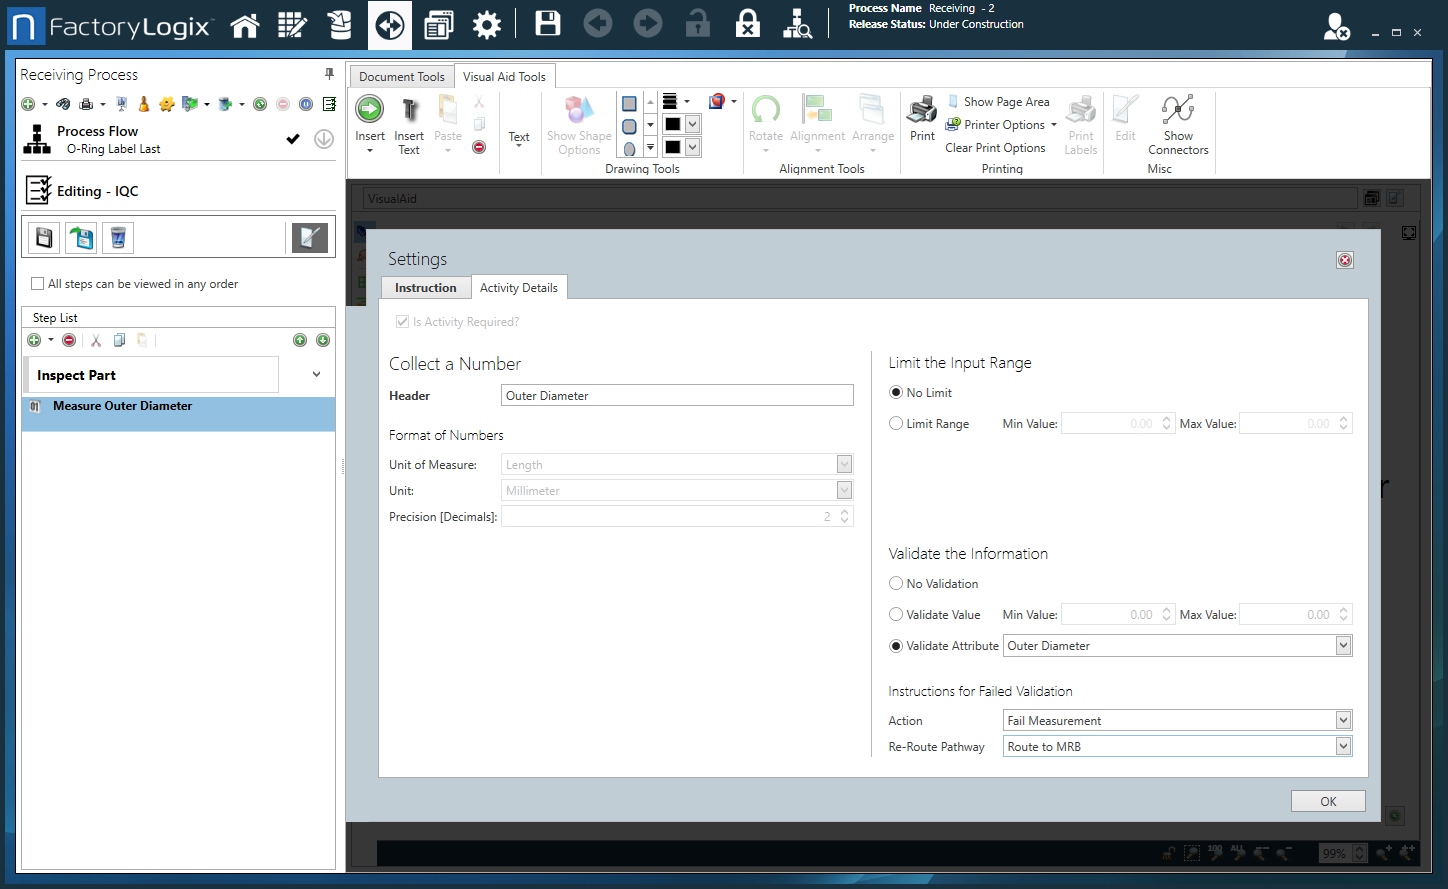
There may also be electrical or dimensional measurements that must be taken before accepting new materials into stock—you can add these as numeric data collection activities within the IQC operation. Part attributes and units of measure can be especially helpful. If you add a Standard step, then a simple numeric data collection activity to the receiving process, users can choose to perform validation on part attributes that were set up in the Part Library. FactoryLogix will automatically rename the instruction and the data collection header to an appropriate name that matches the part attribute being validated.
When you are finished defining the steps and activities for the receiving process, select the Save and Close Operation
 button under the receiving process name on the left side of the window.
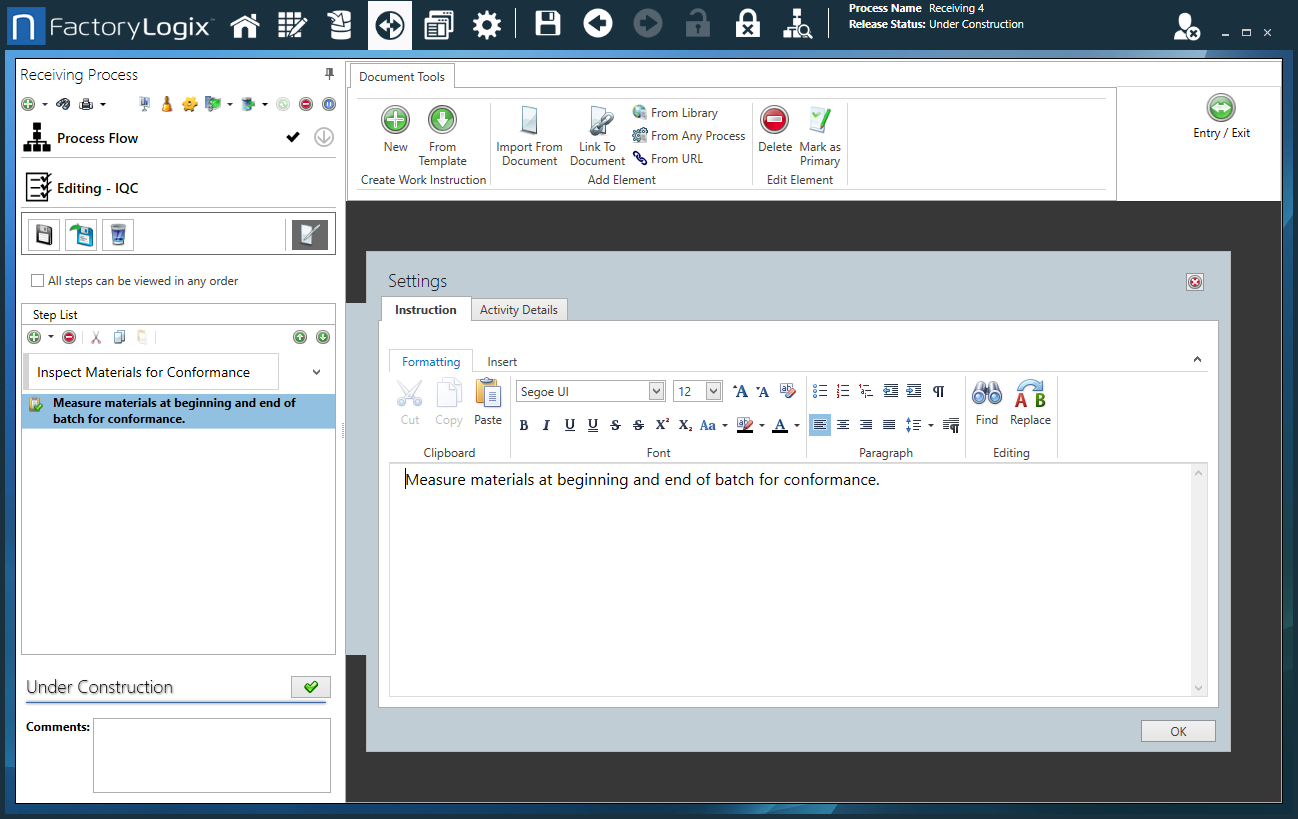
Tip
You can use the same receiving process for a variety of different part types. Similar to configurable assemblies, FactoryLogix automatically filters out data collection activities where the Validate Attribute field is set to an attribute that the part being received doesn't contain. For example, if the receiving process has two data collection activities (one to measure Capacitance and one to measure Resistance), and a resistor is being received/measured, FactoryLogix will omit the Capacitance data collection activity since it is irrelevant for a resistor.
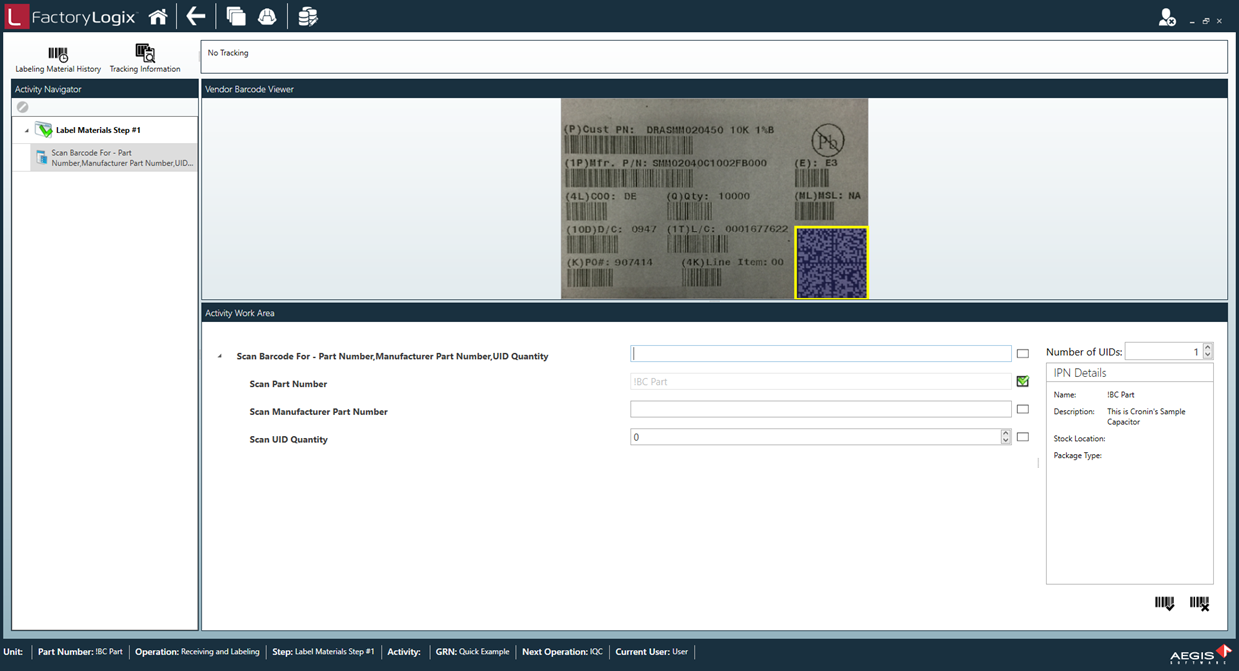
Material receiving and labeling
The Material Receiving and Labeling process is driven by Vendor Label templates. You use the Vendor Label Viewer gadget for this function (included in the default Operator Interface template named Standard FactoryLogix Material Labeling). You can apply this function to any Material Labeling step in your receiving process. The fields factory operators are prompted to scan or enter during the receiving process are defined in a Vendor Label template.
In this example, a sample image of the vendor label is displayed in the Vendor Barcode Viewer area with the appropriate barcode highlighted so that operators know what to scan. The fields required by this receiving process are shown in the Activity Work area below the Vendor Barcode Viewer.
Vendor Label templates drive the Material Labeling area. Once the required information is scanned or entered from the vendor label, FactoryLogix can generate and assign a UID and print a UID label using Bartender or NiceLabel. In the case of electronic parts where many individual parts may be packaged in a reel or tube, the Number of UIDs field determines how many UID labels will be generated as part of this process. Now that the new UIDs are in inventory, they need to be moved to a stock location before they can be used in production.