Add a packout operation to a process
After you create one or more box types, you can add a packout operation to a process.
Log into the NPI client application.
Select Process Engineering
 , then select an assembly.
In the Process Definition window, double-click the Process Flow in the tree to open it for editing.
Select Add
 > Operation.
In the New Operation dialog, enter Packout for the operation Name.
Select the Full Tracking button under Operation Mode, then select OK.
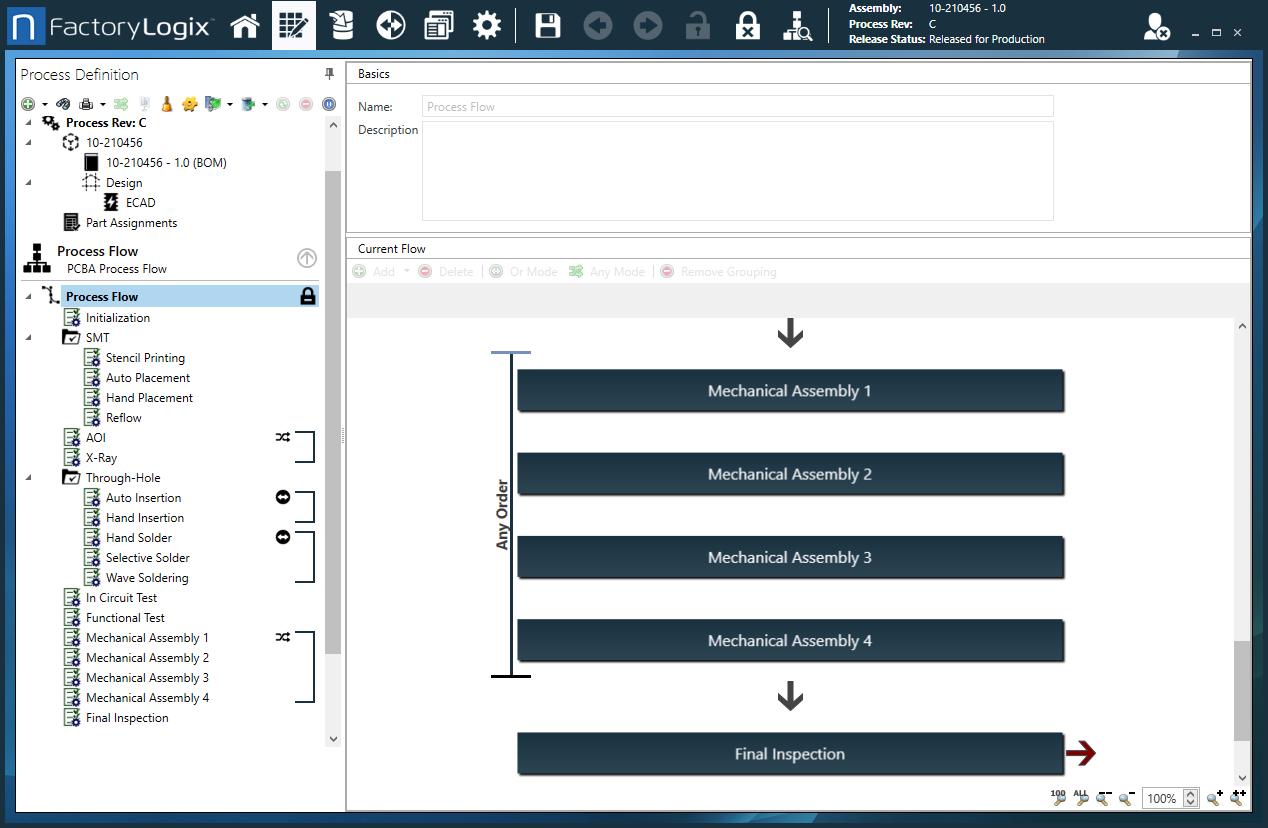
The Packout operation should be the last item in the process flow.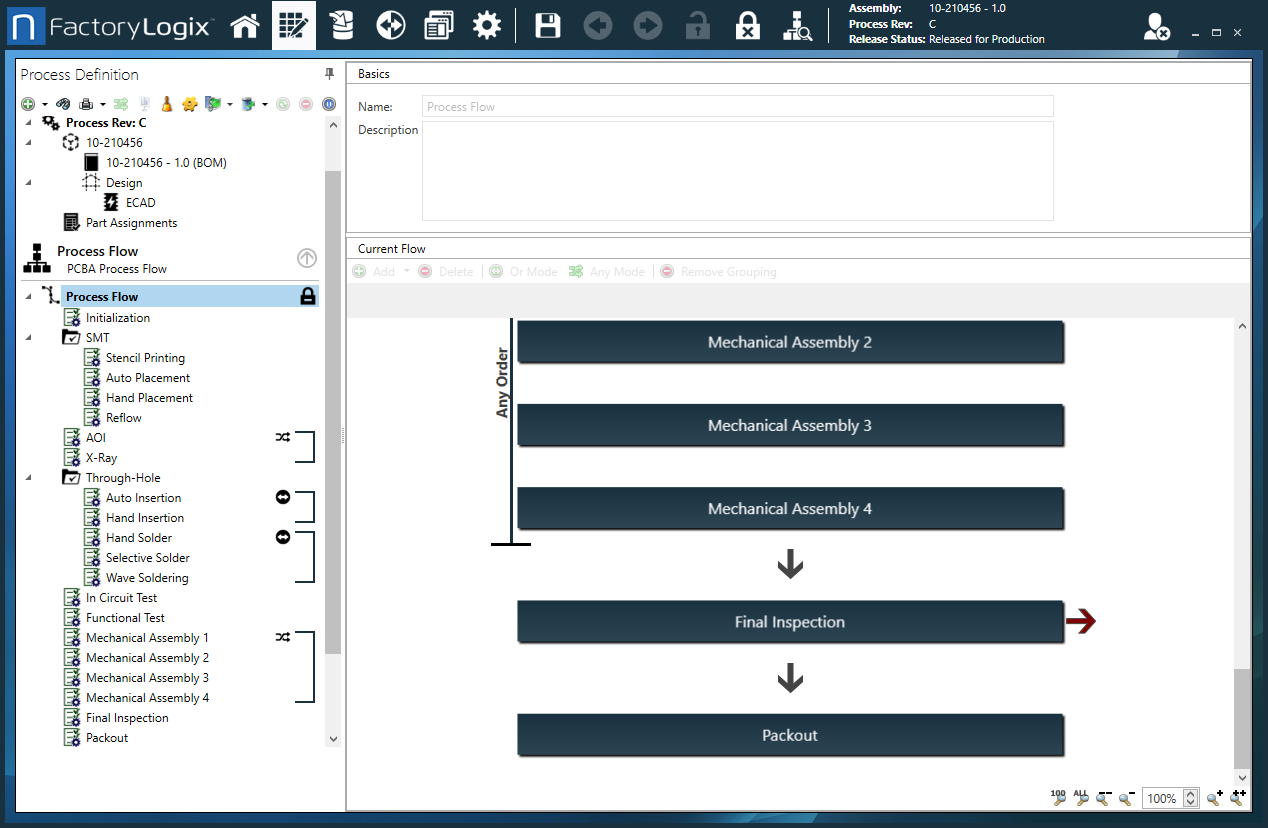
Double-click the Packout operation to open it for editing.
Add and configure steps and activities for a packout operation
After you create a packout operation, you need to configure a packout step. When you add a packout step to the operation, it "builds itself" as you define the box to use and the inventory items to be packed in the box.
In the Process Definition window, double-click the Packout operation you created previously.
Select Add
> Packout Step.Double-click the Packout step to open it for editing.
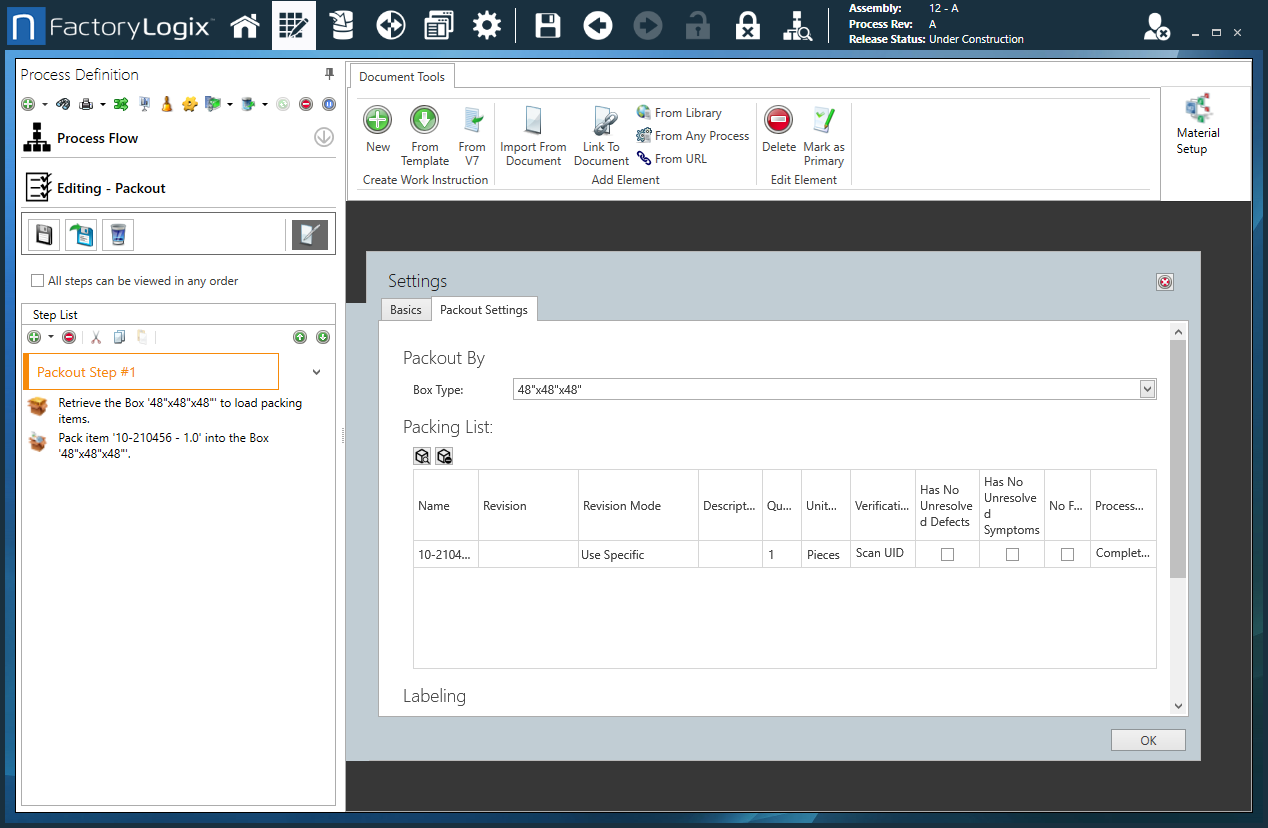
Select the Packout Settings tab.
Select a previously-created box from the Box Type drop-down. (See Create a box and add it to inventory for details.)
Select the Add Packing Items
 button to search for inventory items to be packed.
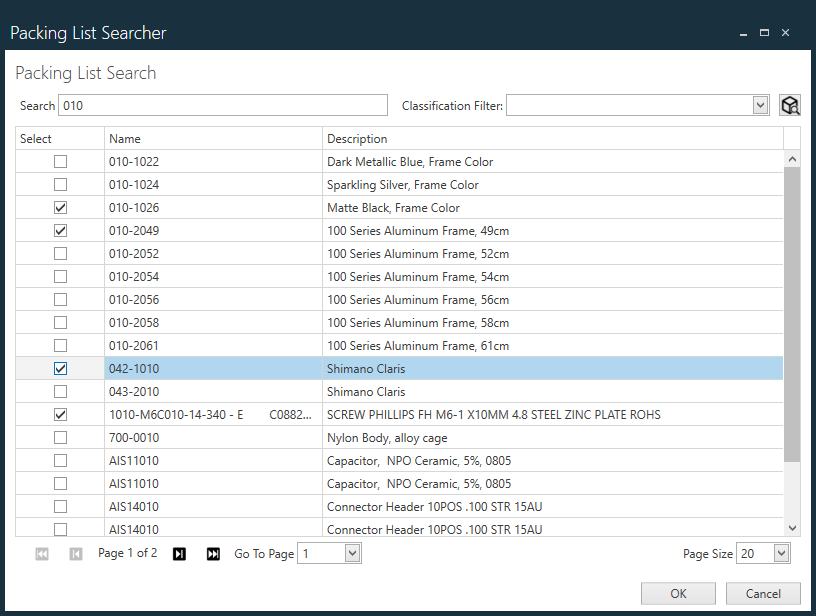
Search for one or more appropriate assemblies to be packed.
Tip
To add parts list items to a packing list dynamically based on the batch-level pick list items imported via an xTend FLX-XTD-JOB-01.xml file, see Add parts list items to a packing list.
Use the Classification Filter drop-down on the right side of the dialog to assist your search by selecting a filter. You can search by (Select All), Assembly, Part, and/or Box.

Select each item for your packing list using the check boxes in the Select column.
Select the check box next to the desired items, then select OK.
Notice that two new activities in the Step List on the left side of the Process Definition window are created automatically: one to instruct the operator to retrieve the appropriate Box type from inventory, the other detailing the assembly to be packed in the box. As additional inventory items are added to the packing list, new activities are generated automatically.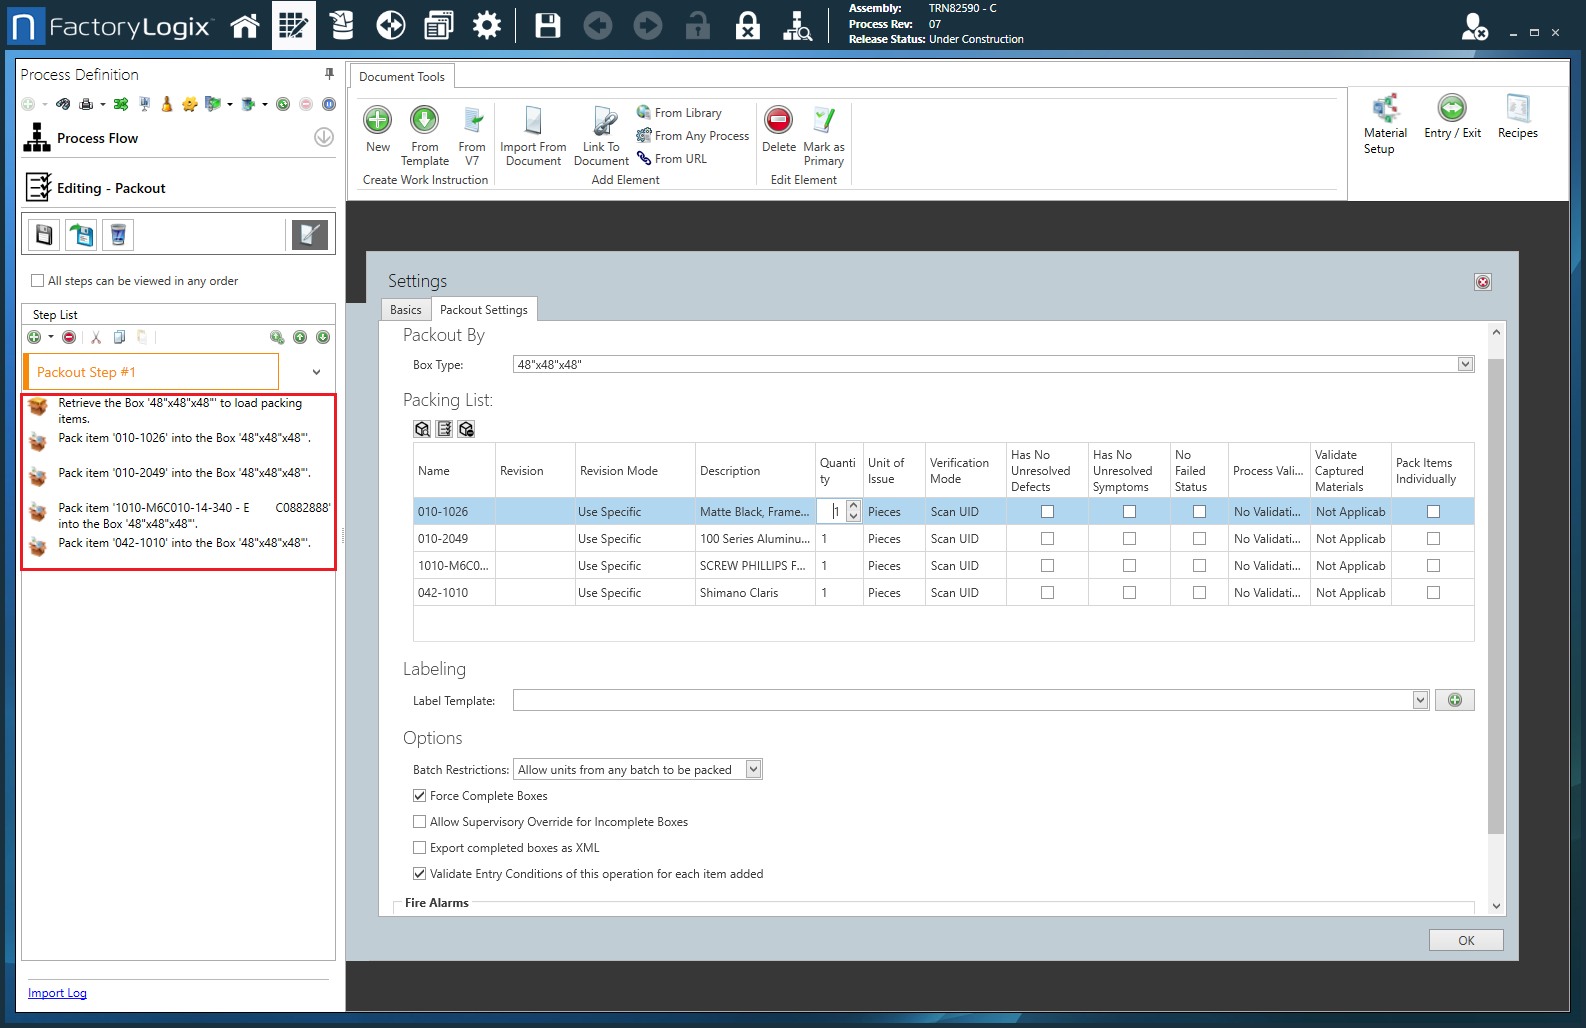
Note
Use the Remove Packing Items ![]() button to remove a selected item from the Packing List.
button to remove a selected item from the Packing List.
On the Packout Settings tab under Packing List, there are some columns of data that you can adjust as needed for your packing list. (Some columns such as Name, Description, and Unit of Issue are informational only and cannot be changed.)
If several revisions of the selected assembly exist, use the Revision drop-down to select the valid revisions.
Use the Revision Mode drop-down to specify the revision mode of the selected items to use: Use Latest, Use Any, Use Specific, Use Specific or Newer, Use Specific or Older.
Enter a Quantity to be packed in this box in the next field.
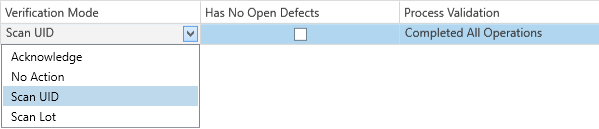
Use the Verification Mode drop-down to specify what the factory floor operator must enter or scan in order to specify the item being packed. There are four possible modes:
Acknowledge presents the operator with a check box to acknowledge that he or she followed the instruction and packed the appropriate item in the box. This is most useful for less-critical items like a quick-start guide or warranty sheet.
No Action presents the instruction to the operator with no need to acknowledge.
Scan UID turns on all validation options in the remaining columns of the dialog: that the assembly selected and scanned contains no open defects and has completed all of the prescribed assembly operations as defined in the Process Flow. This option requires that the assembly was built entirely in FactoryLogix.
Scan Lot allows the operator to scan or enter any alphanumeric data as the lot ID for the assembly or item being packed with no validation. The data entered will be presented in the overall comprehensive traceability information.
Select the Has No Unresolved Symptoms check box to check for the presence of any unresolved (open) symptoms associated with the item being packed.
Note
In Production, when packout is being performed and the Has No Unresolved Symptoms validation check fails, the operator will see an error message.
Select the Has No Unresolved Defects check box to check for the presence of any unresolved (open) defects associated with the item being packed.
Note
In Production, when packout is being performed and the Has No Unresolved Defects validation check fails, the operator will see an error message.
Select the Pack Items Individually check box for each item you want to be packed individually/separately.
Select Label Template, then select a shipping label (this requires that the desired label template is already defined in the Labels area of NPI).
Select Force Complete Boxes to require that the box quantity be filled before an operator can finish the box in Production.
Select Allow Supervisory Override for Incomplete Boxes to indicate that supervisor approval is required for any incomplete boxes.
Use the Batch Restrictions drop-down if you want to restrict packout items to:
Any batch
Only units from this process revision
Only units from the same production batch
Only units from the same order
Use the Select Group drop-down, select one or more groups who will approve the packout (Inspectors and Supervisors, for example), then select OK.
Select Export Completed Boxes as XML if you want to export an XML file of the contents of the completed boxes. (You can configure the location of the file in Settings.)
Select Validate Entry Conditions of this operation for each item added to validate that all entry conditions for the Packout operation have been met for each item in the packing list.
If you use the Analytics client application and want to configure alarms and generate reports for packout. See Use alarms for packout operations for more information.
Select OK, then select the Save and Close Operation
 button on the left side of the window to save your changes and return to the Process Definition window.
Double-click the process in the Process tree on the left side of the window, then select the Release to Production
 button (the Green check mark) in the upper-right corner of the window to observe the results.
Log into the Production client application.
Create a new batch with this process and initialize a barcode into the batch.
WIP the barcode through each WIP point until the Packout operation is reached.
At the Packout operation, the Activity Work Area gadget displays the appropriate instructions to the operator. The first step is to retrieve the appropriate box and scan its UID (or generate a UID using the Generate button).
The Production environment will automatically advance through the packing list items, prompting the operator to scan, enter, or acknowledge they have done as instructed. Any validation errors will prevent the unit from being packed.When all packing list items are satisfied, select the Complete button to complete the box.