Import From Flx
When you import a FactoryLogix *.flxp file, you have the option to create a new assembly, a new assembly revision, a new process revision, or import the *.flxp file into an existing process revision. These options make it fast and easy to create similar assemblies and processes quickly.
Log into the NPI client application.
Select Process Engineering.
Select the Import From FLX button under Define Processes.
Note
You can also select the Add New Process ![]() button to the right of Define Processes, then select Import From FLX from the drop-down to create a new assembly.
button to the right of Define Processes, then select Import From FLX from the drop-down to create a new assembly.
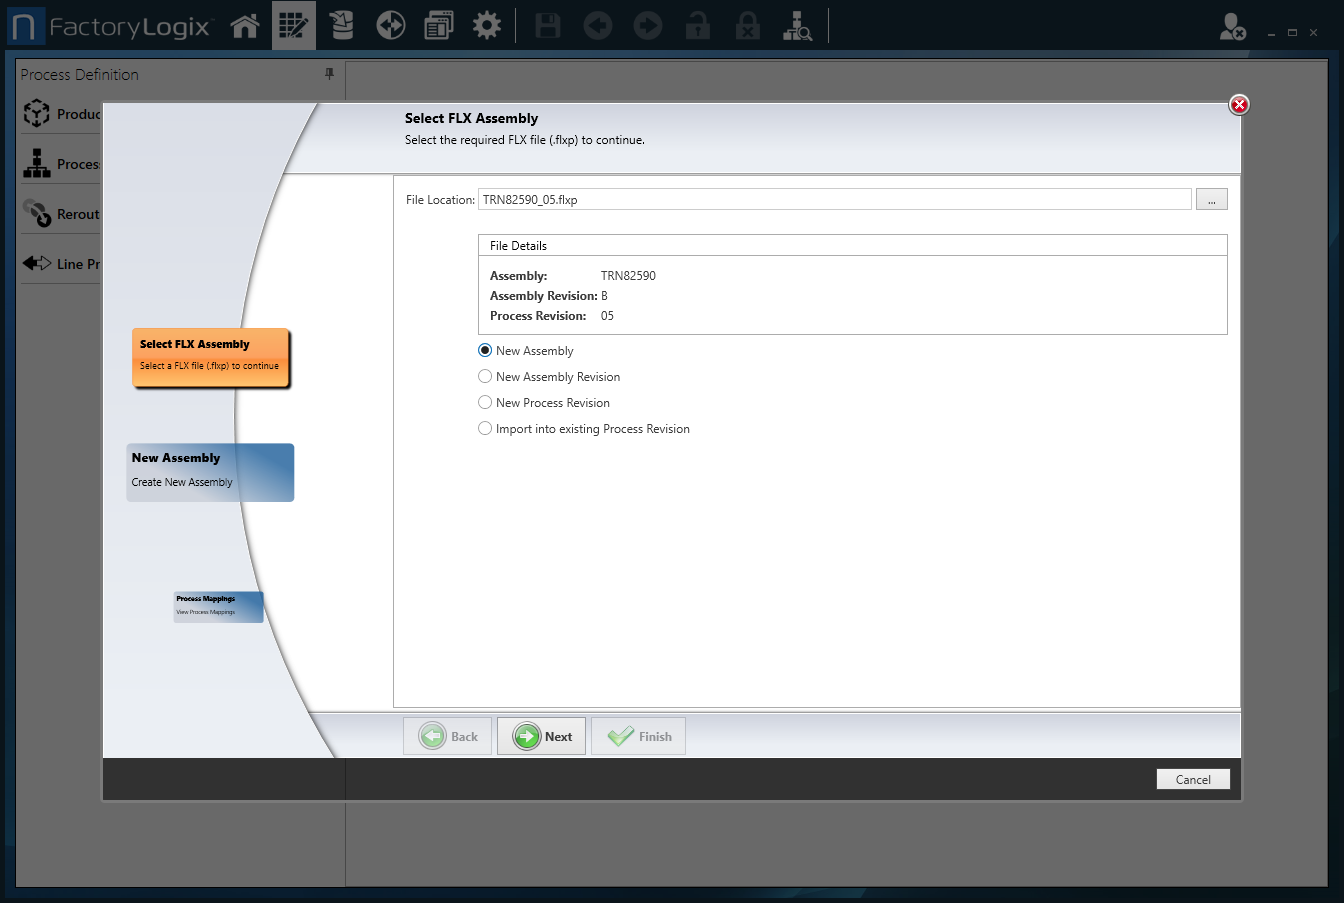
Select the ellipsis (...) to the right of File Location, locate the *.flxp file you want to open, then select Open.
Note
FactoryLogix assembly and process names and revision levels must be unique and no two may be alike. If there is a Red "X" next to an assembly revision or process revision or the revision level (![]() , for example), you must change the name and/or revision level in order to proceed through the import wizard.
, for example), you must change the name and/or revision level in order to proceed through the import wizard.
Select one of the following:
New Assembly - Create a new assembly from the selected *.flxp file. You are prompted to select assembly and process information.
New Assembly Revision - Create a new assembly revision from the selected *.flxp file. You are prompted to select an assembly revision as the basis for the new assembly revision.
New Process Revision - Create a new process revision from the selected *.flxp file. You are prompted to select an existing process revision as the basis for the new process revision.
Import Into Existing Process Revision - Import the selected *.flxp file into an existing process revision. You are prompted to select an existing assembly revision or process revision to apply to the existing process revision. (You also have the option to select the Import CAD and BOM From File check box to import the CAD and BOM into the existing process revision.)
Depending on your selection in Step 5, go through the remaining wizard pages and select the desired options.
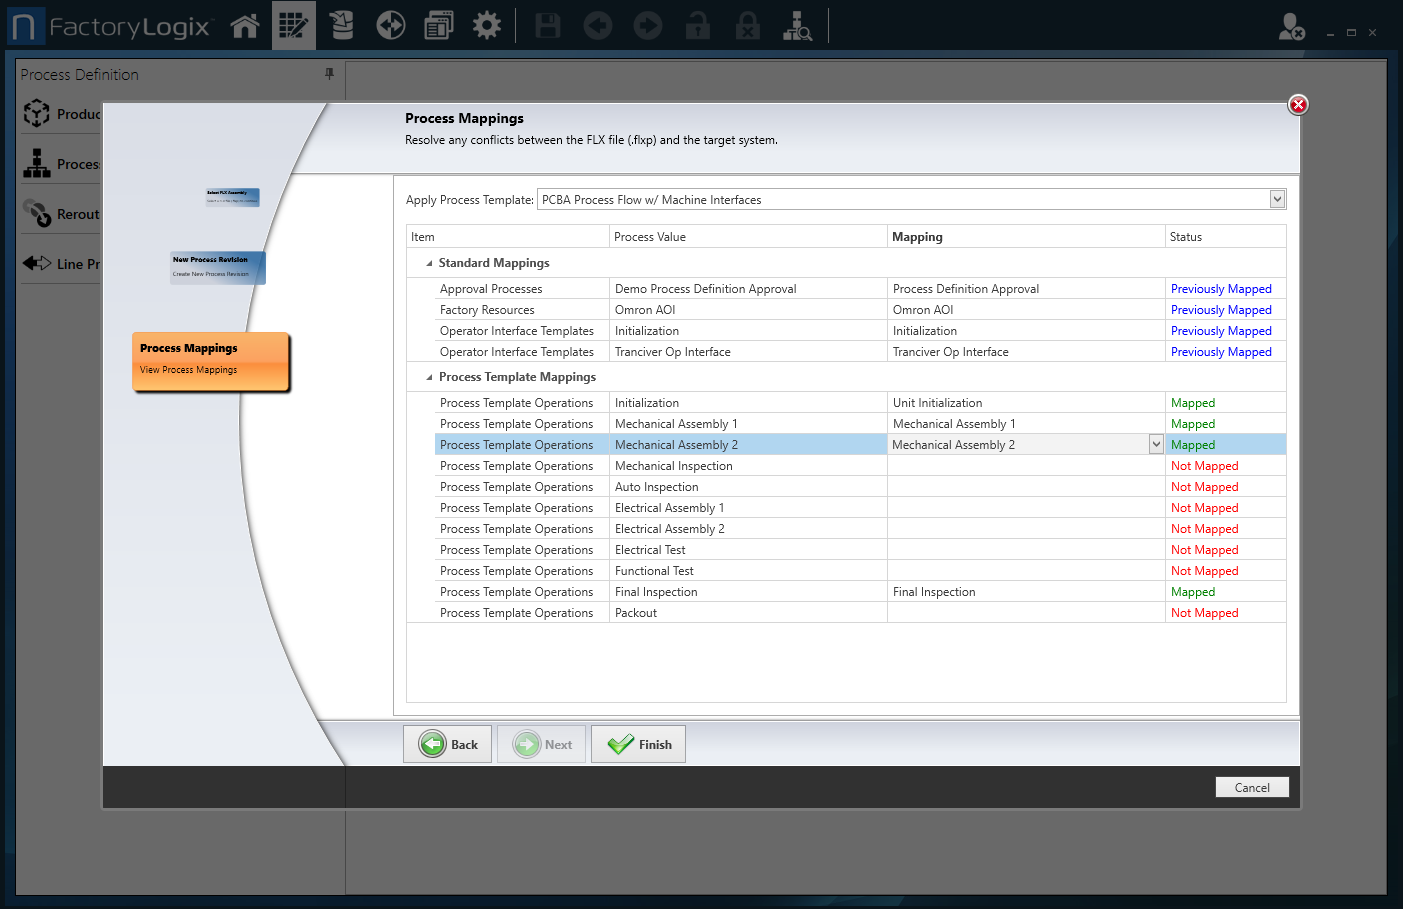
On the Process Mappings page, select a process template from the Apply Process Template drop-down, then use the drop-downs in the table to map each imported operation to an operation in the selected process template. (Operation names are replaced with the names from the template.)
Note
The Allow Operation Mapping global option must be set to True before you can map operations. When set to True, Allow Operation Mapping allows you to select a process template and map imported operations to operations in the selected process template (operation names are replaced with the names from the template). See Process Import for more information about global options for importing files into FactoryLogix.
Important
You will be unable to select Finish and complete the wizard until all imported operations are mapped to operations in the selected template on the Process Mappings page.
When you finish selecting process mappings, select the Finish button to complete the wizard.
Your new assembly, assembly revision, or process revision is displayed in the Process Definition window.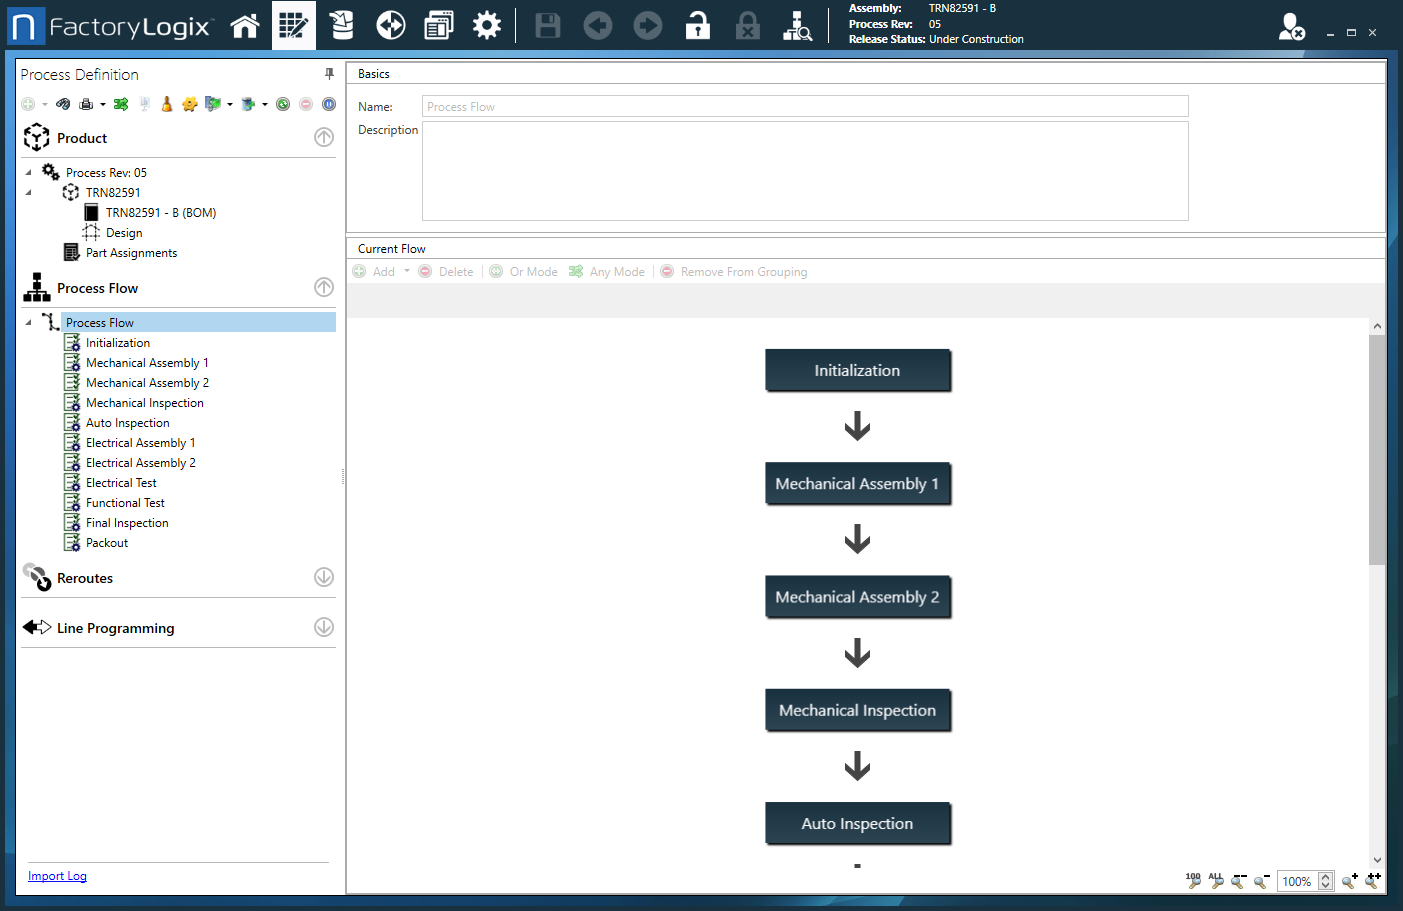
Note
For information about importing data from V7, see Migrating Data from V7 to FactoryLogix.